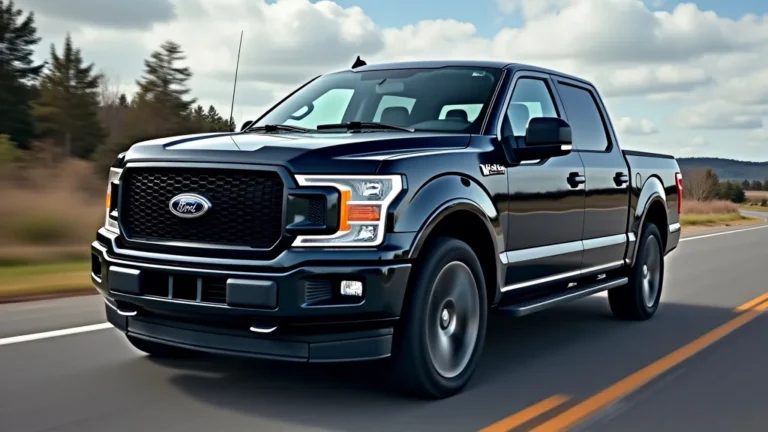
Why F150 Headlights Dim at Idle and How to Fix It
If you’re wondering why F150 headlights dim at idle, you’re not alone. It’s a common issue that can be puzzling, especially if you’re new to car maintenance. This can be frustrating when you just want your lights to work properly. Don’t worry, this post will break down the problem simply. We’ll go step-by-step to help you find the source and get your lights shining brightly again. Let’s start by exploring why this happens and what to do about it.
Key Takeaways
- Low voltage from the alternator often causes headlight dimming at idle.
- A weak battery can struggle to provide enough power during idle.
- Corrosion in electrical connections can create resistance and dim the lights.
- Upgrading the ground wires can improve electrical flow and light output.
- Checking and possibly replacing the alternator is a key troubleshooting step.
- Regular battery testing helps prevent headlight dimming issues.
Common Causes of Dimming Headlights
When you notice your F150 headlights dimming, especially when the engine is idling, it’s usually due to a drop in voltage. The electrical system of your truck relies on consistent voltage to power all components. At idle, the engine runs at slower speeds, affecting how the alternator generates electricity. This drop is the most frequent reason headlights appear dim at idle. Several components and factors combine to create this effect. These can range from the age and condition of your battery to how well the electrical connections are working. By exploring these components, you will gain a clear picture of the possible causes.
The Alternator’s Role and Its Impact
The alternator is the heart of your truck’s electrical system. It’s responsible for charging the battery and providing power to the various electrical components while the engine is running. When your F150 is idling, the engine’s RPMs are low. This causes the alternator to spin slower, producing less electricity. If the alternator isn’t working properly or is getting old, it might not generate enough power at idle to keep the headlights shining brightly. This insufficient output leads to the headlights dimming. Sometimes, the alternator can work fine at higher RPMs but struggle at idle.
- The alternator converts mechanical energy into electrical energy to power the truck.
- A failing alternator doesn’t provide enough current at idle to meet demand.
- Check the alternator’s output with a multimeter to ensure it is within specifications.
- An older alternator might be less efficient and require replacement.
- Loose or corroded connections at the alternator can further reduce its effectiveness.
Battery Health and Its Influence
Your battery stores electricity and provides power when the engine is starting and when the alternator’s output is low, such as at idle. A weak or old battery might not be able to provide enough power to maintain a bright light. If the battery is struggling, the headlights will take the hit. Even with a working alternator, a tired battery can cause dimming because it can’t supply the extra power needed. Cold weather can also make the situation worse, as batteries perform less efficiently in colder temperatures. Regularly testing your battery’s health is essential for preventing headlight dimming and other electrical problems.
- A healthy battery provides a reserve of power to supplement the alternator.
- A degraded battery can struggle to keep up with electrical demands at idle.
- Battery testing can reveal if it’s holding a charge and is in good shape.
- Age, usage, and temperature affect battery performance over time.
- A weak battery can cause your headlights to dim as the voltage drops.
Electrical Connections and Corrosion
Corrosion and poor connections within the electrical system can significantly affect your headlights’ brightness. As electrical current travels through wires, connections, and grounds, any resistance can lead to a voltage drop, especially at the headlights. Corrosion on battery terminals, ground wires, or in headlight connectors creates extra resistance. This increased resistance reduces the current flow to the headlights, leading to dimming. Inspecting and cleaning all electrical connections, including ground wires, is vital. Addressing these issues can solve many headlight dimming problems.
- Corrosion increases resistance, reducing the flow of electricity.
- Loose connections also introduce resistance and cause voltage drops.
- Inspect battery terminals, ground wires, and headlight connectors.
- Clean corrosion with a wire brush and apply dielectric grease.
- Ensuring clean connections will help restore the brightness of your headlights.
Troubleshooting Steps for Dimming Headlights
Addressing dimming headlights requires a systematic approach. First, you’ll need to examine the key components. Then, you can test these components. With the right tools and steps, you can pinpoint the source of the problem. Simple steps like cleaning connections can sometimes resolve the issue. If the problem persists, more advanced checks may be needed. The process can often be handled at home. This systematic approach can help restore your headlights’ full brightness and improve your driving safety.
Checking the Battery and Alternator
The battery and alternator are the two main players in your truck’s electrical system. Before you begin, gather a multimeter. Start by checking the battery voltage with the engine off. A fully charged battery should read around 12.6 volts. Next, start the engine and check the voltage again. The voltage should be around 13.5 to 14.5 volts. This indicates the alternator is charging the battery. If the voltage is low at idle, it could suggest a failing alternator. If the battery voltage drops significantly when the headlights are on at idle, this also indicates a problem.
- Test the battery voltage with the engine off to check its state of charge.
- Start the engine and measure the voltage at the battery terminals again.
- If the voltage rises to 13.5-14.5V, the alternator is likely charging.
- Turn on the headlights and recheck the voltage at idle.
- A significant voltage drop could point to a faulty alternator.
Inspecting and Cleaning Electrical Connections
Corrosion can easily create significant resistance, which leads to dimming headlights. This is especially true at the battery terminals, ground connections, and headlight connectors. Start by disconnecting the battery’s negative terminal for safety. Then, inspect the battery terminals for corrosion. Use a wire brush to clean them until they are shiny and free of residue. Next, check the ground wires connected to the engine block and chassis. Make sure they are secure and corrosion-free. Finally, examine the headlight connectors. If any corrosion is found, use electrical contact cleaner to remove it. Reconnect everything, and test the headlights to see if the dimming issue is resolved.
- Disconnect the negative battery terminal to prevent shorts.
- Clean the battery terminals using a wire brush and battery cleaner.
- Check and clean all ground connections, including engine and chassis.
- Inspect headlight connectors for corrosion or loose connections.
- Use electrical contact cleaner to remove any corrosion from connections.
Upgrading Ground Wires
One effective solution to voltage drop issues is upgrading the ground wires. Ground wires carry the electrical current back to the battery, completing the circuit. By upgrading to thicker, lower-resistance ground wires, you can improve electrical flow and reduce voltage drops. Start by finding the main ground wires connected to the engine and chassis. Purchase a set of high-quality, larger-gauge ground wires. Replace the existing wires one at a time. This ensures you maintain the correct connections. Securely fasten the new ground wires. This helps ensure better electrical conductivity. Testing your headlights after this upgrade can show a noticeable difference.
- Ground wires are crucial for completing the electrical circuits in your vehicle.
- Upgrading to thicker wires improves conductivity.
- Locate the main ground wires on the engine and chassis.
- Securely connect the new wires to improve electrical flow and reduce voltage drops.
Deeper Diagnostics and Potential Repairs
If simple troubleshooting doesn’t resolve the dimming headlight issue, further diagnostics are needed. This might involve more detailed electrical tests or replacing specific components. One such tool is a load test. This involves putting a load on the battery to see how it performs under stress. If the battery fails the load test, it will need to be replaced. At the same time, the alternator output test is also important. This confirms whether the alternator is generating enough power. In some cases, replacing the alternator may be necessary. Seeking professional help from a qualified mechanic can also be a good idea.
Advanced Electrical Testing
Advanced tests can help pinpoint the exact cause of the headlight dimming. One is a voltage drop test. This test measures the voltage drop across the circuit. The test focuses on all connections, including wires and switches. This test can reveal points of high resistance that are causing the problem. Another useful test is a parasitic draw test. This can identify if there is excessive electrical drain while the vehicle is off. This can slowly drain the battery and worsen headlight performance. These more advanced tests often require specialized equipment. This makes a professional diagnostic service valuable.
- A voltage drop test identifies areas with high resistance in the circuit.
- The parasitic draw test checks for excessive battery drain while the vehicle is off.
- These tests require specific equipment and skills.
- A skilled technician can pinpoint the issue with precision.
- These can help to avoid unnecessary parts replacement.
Alternator Replacement Considerations
If testing reveals that the alternator is not producing enough voltage, replacing it becomes necessary. When choosing a new alternator, consider the options available. Choose one that meets or exceeds the specifications for your F150. You can pick either a new or a remanufactured alternator. A new alternator offers the guarantee of brand-new components. A remanufactured alternator, usually more affordable, has been rebuilt. Always match the amperage rating of the original alternator to ensure you get the right amount of power. Be sure to disconnect the battery. Replace the alternator carefully, following the manufacturer’s instructions. Verify all connections are tight. Check the new alternator’s output after installation. This is to ensure it is working correctly and the dimming issue is resolved.
- Choose an alternator that matches or exceeds your F150’s specifications.
- Decide between a new or remanufactured alternator based on your needs.
- Ensure the amperage rating of the replacement matches the original.
- Disconnect the battery before replacing the alternator for safety.
- Verify the output of the new alternator after installation.
Professional Help and Guidance
If you’re not comfortable with electrical work or the troubleshooting steps do not resolve the issue, seeking professional help is a wise decision. A qualified mechanic has the tools and experience to diagnose and fix electrical problems. They can quickly identify the source of the dimming headlights. They have access to advanced diagnostic equipment, such as a load tester. The mechanic can perform detailed tests. They can
- Professional mechanics possess the knowledge and tools for accurate diagnostics.
- They can conduct advanced tests.
- This makes a skilled diagnosis more efficient and reliable.
- A professional repair ensures that the problem is fixed.
- Choose a mechanic with experience to address the issue properly.
Frequently Asked Questions
Question: Why do my headlights dim only when I’m stopped at a light?
Answer: This usually points to a problem with the alternator struggling to supply enough power at idle. The engine’s RPMs drop, reducing the alternator’s output. Check your battery and alternator to find the root cause.
Question: Could my headlights dimming be a symptom of a larger electrical issue?
Answer: Yes, headlight dimming can indicate a bigger electrical problem. A failing alternator, a weak battery, or corroded connections can all affect overall electrical performance and other car systems.
Question: Can I fix the headlight dimming myself, or do I need a mechanic?
Answer: You might be able to fix it yourself by cleaning connections, checking the battery, and upgrading ground wires. However, more complex issues often need a mechanic with the tools and expertise for more detailed diagnostics.
Question: What’s the best way to prevent this headlight dimming problem?
Answer: Regularly maintain your truck’s electrical system, including regular battery testing and cleaning terminals. You should also ensure the ground connections are secure and corrosion-free, and address issues early.
Question: How often should I test my battery to prevent dimming headlights?
Answer: Test your battery at least twice a year, or more often if you live in a climate with extreme temperatures. This helps catch potential issues before they cause problems, such as dimming headlights.
Final Thoughts
Fixing dimming headlights involves understanding the electrical system. You will need to inspect key components, and apply a systematic approach to identify the cause. Issues often arise from a weak battery, a struggling alternator, or corrosion within electrical connections. Testing and cleaning can sometimes fix the issue without professional help. Upgrading ground wires is also a good plan to improve electrical flow. However, if the problem persists or if you aren’t comfortable with electrical work, seeking professional help is best. By taking these steps and staying proactive, you can ensure your F150’s headlights remain bright and reliable. This can help you maintain safe driving conditions, so you’ll always have a clear view of the road ahead.