What Is an F150 Yaw Rate Sensor and Why Does It Matter?
If you’re wondering what is f150 yaw rate sensor, you’re not alone. It’s a common question for anyone working on Ford F150 trucks. This sensor plays a huge role in how your truck drives and stays stable. It can be a little tricky at first, but don’t worry! This post will break it down step by step, making it easy to see how this important component works. We’ll explore the sensor’s function, why it’s there, and how it impacts your driving. Get ready to explore the inner workings of your F150!
Key Takeaways
- The yaw rate sensor helps your truck stay stable, especially when turning or on slippery surfaces.
- It measures how quickly your truck is rotating around its vertical axis.
- A faulty sensor can cause issues with your truck’s stability control system.
- Locating the sensor varies by model, but it’s typically under the driver’s seat.
- Troubleshooting steps involve checking connections and possibly replacing the sensor.
- Knowing about the yaw rate sensor helps with safe driving and proper truck care.
Understanding the F150 Yaw Rate Sensor
The yaw rate sensor is a critical component in the Ford F150’s stability control system. Its main task is to measure the rate at which the truck is rotating around its vertical axis, commonly referred to as “yaw.” This measurement is essential for keeping the vehicle stable, especially when making turns, driving on uneven surfaces, or encountering slippery conditions like rain or snow. The sensor provides data that the truck’s computer uses to correct any unwanted vehicle movements, enhancing driving safety. It works behind the scenes, ensuring the driver maintains control.
What the Sensor Does
The primary function of the yaw rate sensor is to assess the rate of rotation, which gives the truck’s computer vital information. This helps the stability control system. When the truck starts to rotate unexpectedly, like during a skid, the sensor notices it immediately. Then, the system can apply the brakes individually to certain wheels. This corrects the vehicle’s direction and helps the driver regain control. It’s like having an invisible hand that subtly steers the truck back on course. Without it, your truck’s ability to handle challenging situations would be greatly reduced.
-
Detecting Rotation: The sensor measures the rate of the vehicle’s rotation, which is key for the stability control system.
This measurement allows the computer to tell how the truck is moving. It’s like a compass that tells the system which way the truck is pointing. This way, the system can compare what the driver wants (like turning the steering wheel) with what the truck is actually doing. If the truck starts to rotate too much, the system knows something is wrong.
-
Sending Information to the Computer: The sensor continuously sends data to the truck’s computer.
The computer uses this information to make decisions in real-time. It’s constantly getting updates on the truck’s movement. Then, the computer compares this data with the driver’s actions, such as steering and acceleration. If the computer sees that the truck is not behaving as it should, it activates the stability control system to help maintain control.
-
Helping with Stability: The data from the sensor helps the stability control system kick in.
The stability control system is designed to prevent skidding and loss of control. It works by selectively applying the brakes to individual wheels. For instance, if the truck is oversteering (the rear end is sliding out), the system can brake the outside front wheel to bring the truck back in line. If the truck is understeering (the front end is sliding), it can brake the inside rear wheel. The sensor helps make these split-second decisions.
-
Working with Other Sensors: The yaw rate sensor works with other sensors in the truck.
It doesn’t work alone. It teams up with other sensors, like wheel speed sensors and steering angle sensors. These sensors provide additional data. Together, they create a complete picture of the truck’s movement and position. This complete view allows the stability control system to work even better, helping in a wide range of driving situations.
Why It’s Important
The yaw rate sensor is important for many reasons. It has a significant impact on driving safety and the overall control of the vehicle. In challenging situations, the sensor actively reduces the risk of accidents. It works silently, but its presence is felt whenever the vehicle experiences a loss of control. The benefits extend beyond safety. It enhances the driving experience. A stable truck is easier to manage, making journeys smoother and more confident. Regular maintenance of this sensor is a simple step towards a safer and more enjoyable driving experience.
-
Enhancing Stability: The sensor keeps your truck on the road, even in difficult conditions.
This sensor is like an invisible helper that prevents the truck from spinning out of control. When the roads are slick, or you make a sudden turn, the sensor’s quick measurements allow the stability control to step in. This system can individually brake the wheels. These small actions help keep the truck moving in the right direction. This system is especially helpful on curves and in emergency situations, where it can make a big difference.
-
Preventing Skidding: The sensor helps to stop the truck from skidding.
Skidding can happen on wet or icy roads. Skidding also occurs if you turn too quickly. The yaw rate sensor detects when the truck starts to skid and triggers the stability control system. This system will then try to prevent a complete loss of control. By applying brakes to individual wheels, the system pulls the truck back into line. This action keeps you from sliding off the road or into another lane.
-
Improving Safety: A working sensor contributes to safer driving.
By preventing skidding and enhancing stability, the yaw rate sensor directly improves the safety of everyone in the truck and others on the road. The system reduces the risk of collisions. This gives drivers more time to react. The stability control system works constantly, but especially in emergencies, to keep the truck on its intended path. This offers peace of mind when driving on the highway and in urban traffic.
-
Offering Better Control: The sensor gives the driver better control.
When the stability control system kicks in, it assists the driver in maintaining direction. This means you can keep the truck going where you want it to go, even if conditions are challenging. It lets you handle curves with more confidence. It also helps in avoiding obstacles, providing a sense of security and control. The vehicle’s ability to react to driver input is enhanced.
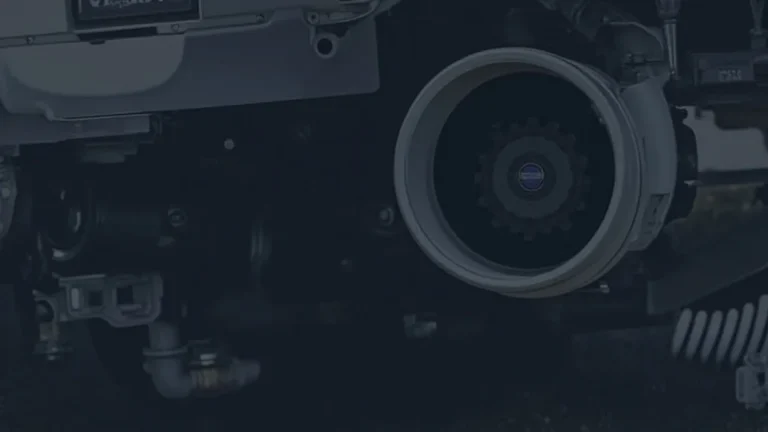
Locating the F150 Yaw Rate Sensor
Finding the yaw rate sensor in your F150 can vary slightly based on the year and the specific model. Typically, the sensor is installed in a spot where it can accurately measure the truck’s movement. It’s often found under the driver’s seat. It’s usually mounted in a central spot where it can best detect all the truck’s movements. This positioning ensures that the sensor gets clear and accurate readings. Familiarizing yourself with its location is the initial step for any maintenance.
Common Locations
The most common spot for the yaw rate sensor is under the driver’s seat. Accessing it may require removing the seat or a panel. This position gives the sensor a clear view of the truck’s movements. In some newer models, the sensor may be integrated with the anti-lock braking system (ABS) module or the stability control module, which can be located under the center console or within the engine bay. Always consult your truck’s manual. Doing so will provide the specific details for your vehicle.
-
Under the Driver’s Seat: This is the most common and typical location.
The sensor is placed in an area that is protected. It’s often secured with bolts or clips. Some models might need you to remove the seat. Other models may require removing a small panel. Once located, you can easily access the wiring connections. The central position enables accurate data gathering.
-
Integrated with ABS Module: Some models have the sensor built into the ABS module.
This module might be found in the engine bay or under the center console. The integration allows for a combined function. It also simplifies the system’s design. If the sensor is part of the ABS module, any faults may require the entire unit to be replaced or repaired. This is something to be aware of if troubleshooting is needed.
-
Under the Center Console: In some designs, the sensor is installed under the center console.
This location can be less exposed to the elements. This setup can be more protected. Accessing this location may require removing the center console components. It can sometimes be difficult to reach. It’s always best to have the correct tools.
-
Inside the Chassis: The yaw rate sensor can be attached to the truck’s chassis in some designs.
The chassis location offers protection from damage. This is a secure position. Inspection might require lifting the truck or using ramps. This position ensures accurate readings. It can also make it more complex to access.
Tools You Might Need
To locate and inspect your F150 yaw rate sensor, certain tools will be useful. A basic set of hand tools, like screwdrivers and sockets, is often enough to remove panels. You might need a multimeter to test electrical connections. A scan tool is essential for checking for any diagnostic trouble codes (DTCs). This tool will help you pinpoint potential problems. Always remember to disconnect the battery before working on any electrical components. Safety should always come first.
-
Screwdrivers: A set of screwdrivers is essential for removing panels and covers.
Make sure you have both flathead and Phillips head screwdrivers. You may also need Torx or other specialized screwdrivers. These tools are necessary for removing fasteners that secure interior components. They are also important for the initial steps of the disassembly.
-
Socket Set: A socket set is needed to remove bolts and nuts.
A variety of socket sizes is useful. It ensures you have the correct size for the fasteners you encounter. It is helpful to have both metric and standard sockets. The socket set is essential for taking out the seat or accessing any components under the seats.
-
Multimeter: A multimeter is vital for testing electrical connections.
The multimeter allows you to check for voltage, continuity, and resistance in the sensor’s wiring. This will help you locate any issues, such as short circuits. This device is important for verifying the electrical integrity of the sensor system. Use it before considering a sensor replacement.
-
Scan Tool: Use a scan tool to read and clear diagnostic trouble codes.
A scan tool is crucial for checking the sensor’s operation. It also allows you to see if the system is logging any problems. A scan tool can also tell you if the sensor is sending bad data. It can also help diagnose and solve any performance issues with the yaw rate sensor.
Diagnosing and Troubleshooting Yaw Rate Sensor Problems
When the yaw rate sensor isn’t working correctly, it can cause various issues. The most common sign is the illumination of the stability control warning light. You might also notice that the stability control system is not working as expected. This section will guide you through the initial steps for identifying potential problems. It will also cover the tests you can perform to troubleshoot your truck’s yaw rate sensor.
Common Symptoms
The symptoms of a malfunctioning yaw rate sensor can vary. One of the clearest indicators is the stability control warning light on your dashboard. You might also notice a difference in your truck’s handling, especially when cornering or on slippery roads. The truck may feel less stable than it should. Additionally, the anti-lock braking system might also have problems. It’s also wise to check for any diagnostic trouble codes using a scan tool. Paying close attention to these symptoms will help you diagnose the problem.
-
Stability Control Warning Light: The warning light on the dashboard illuminates.
This light typically looks like a car with squiggly lines around it. This is a direct signal that there’s a problem with the stability control system. When the sensor fails, it alerts the system. Then, the computer displays the warning light. It means the system may not be functioning correctly. Check it as soon as possible.
-
Handling Issues: You might notice that your truck doesn’t handle as well as it should.
You may feel the truck is less stable. You may also have problems when cornering. The stability control system uses the data from the yaw rate sensor to make adjustments. Without accurate readings, these adjustments are not made correctly. This can lead to a loss of control and handling issues. You may experience understeer or oversteer.
-
ABS Malfunctions: Problems with the yaw rate sensor can impact the anti-lock braking system.
The ABS and stability control often work together. The yaw rate sensor helps both systems. If the yaw rate sensor fails, the ABS might also have problems. The ABS might activate unexpectedly, or it might not work when you need it. You can check the ABS by applying the brakes firmly on a safe surface.
-
Diagnostic Trouble Codes (DTCs): Use a scan tool to check for diagnostic trouble codes.
These codes can help you pinpoint the cause. The codes will tell you what’s wrong. You can find these codes using an OBD-II scanner. The codes will point you to the malfunctioning sensor. Use a scan tool to see what codes are present. Then, use those codes to diagnose the problem.
Troubleshooting Steps
Troubleshooting the yaw rate sensor requires a systematic approach. Start by visually inspecting the sensor and its wiring for any damage. Then, use a multimeter to check the electrical connections. Next, use a scan tool to check for any error codes that indicate the issue. If you’re confident in your skills, you can test the sensor with a multimeter. Replacing the sensor is the final step.
-
Visual Inspection: Start with a visual inspection.
Examine the sensor and the surrounding area. Check for any obvious signs of damage, such as broken wires. Also, check for loose connections. You can see physical issues with your own eyes. Inspect the area around the sensor for any debris or moisture. Ensure the sensor is properly mounted. Take your time to be thorough.
-
Electrical Connection Check: Check the electrical connections.
Using a multimeter, test the wiring harness connected to the sensor. Make sure the wiring is not damaged. Verify there is a good connection between the sensor and the truck’s computer. Ensure there is continuity. A bad electrical connection is a common cause of sensor problems. You should carefully disconnect and reconnect the wiring harness.
-
Scan Tool Diagnostic: Use a scan tool to check for diagnostic codes.
A scan tool will provide information about the system’s operation. Scan for any trouble codes related to the sensor. Then, clear the codes and drive the truck. See if the codes return. This will help you know if the issue is still there. Review the code to focus your efforts. A scan tool is crucial for a complete diagnosis.
-
Sensor Testing with Multimeter: Testing with a multimeter helps see if the sensor is working.
You might need a wiring diagram for your truck’s year and model to perform this test. You can check for voltage and resistance. Then, compare your readings to the manufacturer’s specifications. A faulty sensor may show incorrect readings. If the readings are outside the specified range, the sensor may be defective.
-
Sensor Replacement: Replace the sensor if it is faulty.
If you confirm the sensor is faulty, replacing it is often the solution. Buy a replacement sensor that matches your truck’s specifications. Always disconnect the battery. Replace the old sensor. Reconnect the wiring harness. After replacing the sensor, clear any stored DTCs. Then test drive the truck to ensure the problem is resolved.
Replacing the Yaw Rate Sensor
Replacing the yaw rate sensor is usually something you can do at home with the right tools and a little mechanical ability. The process involves removing the old sensor, installing the new one, and then confirming that the system is functioning correctly. Before beginning, make sure you have the correct replacement sensor for your F150. Remember, taking your time will ensure that the replacement is done right. If you have any doubts, consulting a professional mechanic is always a good idea.
Getting Started
Before beginning, gather all the tools you’ll need. Make sure you have the replacement sensor. Disconnect the negative battery cable to prevent any electrical mishaps. Locate the sensor. Remember where it is located on your truck. Then, you can start removing the panels or components to access the sensor. Have a clean workspace and clear instructions. Safety should always come first.
-
Gather Your Tools: Get all of your tools together before you start.
You’ll need basic tools, like a screwdriver, socket set, and pliers. You might also need a multimeter and a scan tool. Having all the correct tools will save time and make the job easier. Check that everything is in working order. Make sure everything is easily accessible.
-
Get the Right Replacement Sensor: Make sure you have the correct replacement sensor.
Check the part number on the old sensor. Consult your truck’s manual. Compare it with the new sensor to confirm it is the correct match. A mismatch can lead to problems. If you’re unsure, ask a parts store representative for assistance. Getting the right part will save you from future issues.
-
Disconnect the Battery: Before working on the electrical components, disconnect the battery.
Disconnecting the negative terminal prevents electrical shorts. Doing so keeps you from getting shocked. This is a critical safety step. Use a wrench to loosen the terminal. Then, remove it from the battery post. Keep the cable away from the battery while you’re working.
-
Locate the Sensor: Locate the sensor.
Refer to the section on sensor location. Know where to find the sensor on your specific F150 model. The most common spot is under the driver’s seat. Sometimes, the sensor is in the center console or integrated into the ABS module. Having it in plain sight will help you work. You should have easy access to the sensor for removal.
Installation Process
Once you can access the sensor, the replacement process is straightforward. Unplug the electrical connector from the old sensor. Unscrew or unclip the old sensor. Install the new sensor. Attach it in the exact place as the old one. Reconnect the wiring harness. Then, reassemble any components you removed to access the sensor. Make sure everything is securely in place. Then, reconnect the battery cable.
-
Disconnect the Electrical Connector: Disconnect the electrical connector from the sensor.
Carefully unplug the wiring harness from the old sensor. You might need to press a release tab. Avoid pulling on the wires. Disconnecting this allows you to remove the old sensor. Be careful to not damage the connector or its wires. If the connector has a locking clip, release it first.
-
Remove the Old Sensor: Unscrew or unclip the old sensor.
Remove the fasteners holding the sensor in place. These might be bolts, screws, or clips. Keep the fasteners somewhere safe. You will need them to mount the new sensor. Then, carefully remove the old sensor. You may need to wiggle it to remove it from its position.
-
Install the New Sensor: Mount the new sensor in the exact location as the old one.
Align the new sensor with the mounting points. Secure it with the same fasteners. Make sure it is installed in the correct orientation. Double-check that the sensor is securely mounted. Proper installation is critical for the sensor’s function. Tighten the screws or clips appropriately. Don’t overtighten the fasteners.
-
Reconnect the Electrical Connector: Reconnect the electrical connector.
Plug the wiring harness back into the new sensor. Make sure it clicks securely into place. Make sure the connector is firmly seated to prevent any issues. Give it a gentle tug to be sure the connection is secure. If there’s a locking mechanism, make sure it is locked. A good connection is essential for the sensor to work properly.
-
Reassemble the Components: Reassemble any components.
Replace any panels or seats that you removed to access the sensor. Make sure everything is correctly installed. Ensure all screws, bolts, and clips are securely fastened. Take your time to make sure that the components are properly fitted. Make sure all the components are in the right place.
-
Reconnect the Battery Cable: Reconnect the battery cable.
Reconnect the negative battery cable. Tighten the nut securely. Be careful not to overtighten. Make sure the connection is firm and secure. Ensure the cable is properly connected. Now, the electrical system is active again.
Testing After Replacement
After installing the new yaw rate sensor, it is important to test to confirm that everything is working as it should. Use a scan tool to clear any trouble codes. Then, test-drive your truck to see if the stability control light goes off. This section details the steps to confirm that the new sensor is working. This is important to ensure your truck is safe to drive.
Using a Scan Tool
A scan tool is essential for checking the vehicle’s system. Use the scan tool to clear the error codes. Then, drive the truck and monitor the system data. This tool can also confirm that the system is operating correctly. A scan tool is also useful to determine if the sensor is now providing accurate data. It allows you to check whether the replacement was successful.
-
Clear Diagnostic Trouble Codes: Clear any diagnostic trouble codes.
Using the scan tool, go to the “clear codes” section. Follow the prompts on the scan tool to erase all the stored codes. This ensures the system resets to its original state. This step is necessary to see if the new sensor has resolved the issue. Be sure you know the reason for the codes before clearing them.
-
Start the Engine and Check the Dashboard: Start the engine.
After clearing the codes, start your truck’s engine and check the dashboard. The stability control warning light should not be lit. If it does not light up, it’s a good sign the sensor replacement worked. If the light comes back on, there might still be an issue that needs attention. Review the codes again.
-
Road Test the Truck: Take your truck for a road test.
Drive the truck on a variety of road surfaces and conditions. This will help you verify the stability control system is working. Go through various maneuvers, like turns and abrupt stops. Make sure your truck handles correctly. Pay attention to how the truck feels and responds to your steering inputs. Drive on different surfaces, such as wet roads.
-
Monitor System Data: Use the scan tool to monitor the system data.
Most scan tools can display live data from the sensor. Check the yaw rate sensor data. Make sure it provides sensible values as you drive. The tool should display the rate of rotation as the truck moves. It helps you see if the sensor is providing accurate readings. Check how the readings change as you turn the steering wheel.
Checking for Improvements
After installing the new sensor and testing, there are key signs to check for improvements. Look for the absence of the warning light on the dashboard. Then, verify that the truck’s handling feels normal. The truck’s stability control system should now engage as intended. If you experience these positive changes, the replacement was successful. It’s a sign that the truck’s safety is restored.
-
No Warning Light: Confirm the stability control warning light isn’t lit.
If the warning light does not illuminate during driving, it shows the system is no longer detecting a problem. This is one of the most visible indicators. Be sure to check the light during startup. Confirm that the light turns off quickly. Ensure that the light stays off. If the light remains on, the system might still have problems.
-
Better Handling: Driving should feel stable and in control.
You should feel a significant difference when driving. The truck should maintain its path, even on challenging roads. Your steering should feel responsive and precise. If you feel any unusual movement, or if the truck feels unstable, the sensor might still have problems. You should test handling on a variety of road surfaces.
-
Stability Control Engagement: The stability control system should function.
In cases of skidding, the stability control should work to correct the truck’s path. Perform some maneuvers. Make some turns. You may test the function of the stability control system. If the system engages correctly, it will show on the dashboard. Check for the stability control light.
-
Check for DTCs: Recheck for any DTCs.
Use the scan tool to recheck for any remaining diagnostic trouble codes. If you clear all the codes, there should be none. Check if any new codes have appeared. If you find any, you can identify and troubleshoot them. This will make sure that all the systems are working correctly.
Frequently Asked Questions
Question: What does a yaw rate sensor actually do?
Answer: A yaw rate sensor measures how quickly your truck is rotating around its vertical axis. This information is key for the stability control system to keep the truck stable, especially during turns or when road conditions are poor.
Question: Where is the yaw rate sensor located in an F150?
Answer: The location varies by model year, but it’s often under the driver’s seat. It can also be found in other locations like under the center console or integrated into the ABS module.
Question: What happens if the yaw rate sensor fails?
Answer: A failing yaw rate sensor can cause the stability control warning light to come on, make your truck feel less stable, and potentially impact the function of the anti-lock braking system (ABS).
Question: Can I replace the yaw rate sensor myself?
Answer: Yes, in many cases. If you have some mechanical experience and the right tools, you can replace it yourself. Remember to disconnect the battery and follow the steps carefully.
Question: How do I know if the new sensor is working after I replace it?
Answer: After
Final Thoughts
Exploring what is f150 yaw rate sensor and its role in your truck might seem complex at first, but with a good approach, it becomes manageable. We’ve explored the sensor’s function, how it aids in vehicle stability, where to find it, and the steps to diagnose and resolve any issues. From understanding its importance in preventing skidding to the basic steps needed for a