Why F150 Coolant Flows Back into Reservoir? Causes and Solutions
Figuring out why f150 coolant flows back into reservoir can be a bit tricky, especially if you’re new to car repairs. This problem often pops up for several reasons, and it might seem like a big deal, but don’t worry! We’re here to break it down in a way that’s easy to get. We’ll explore the common causes and guide you through simple steps to solve the issue. So, let’s get started and clear up any confusion.
Possible Issues with Cooling Systems
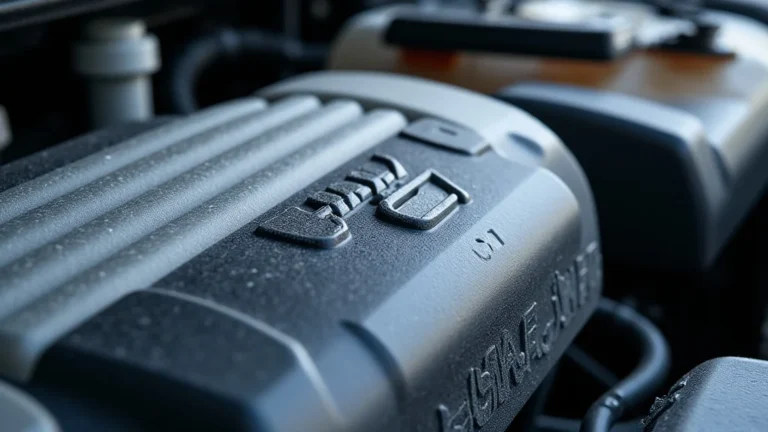
The cooling system in your F150 is important for keeping the engine from overheating. A healthy system circulates coolant to absorb heat. When something goes wrong, like coolant flowing back into the reservoir, it can lead to bigger problems if not addressed. There are a few key parts of the cooling system that you should get familiar with. We’ll go through the most frequent issues.
Faulty Radiator Cap
A radiator cap might seem simple, but it plays a crucial role. It keeps the pressure in your cooling system where it should be. The pressure helps the coolant flow well and prevents it from boiling. If the cap is old, damaged, or not sealing correctly, it can’t maintain the right pressure. This can cause coolant to flow back into the reservoir instead of staying in the engine. Also, the radiator cap has a pressure relief valve. If this fails, the system pressure can’t be released safely, potentially leading to coolant escaping.
- How It Works: The radiator cap seals the radiator and has two main functions. Firstly, it keeps the coolant under pressure, raising its boiling point. Secondly, it has a pressure relief valve.
- Check for Wear: Inspect the rubber seal on the cap. Cracks or damage mean it’s time for a replacement.
- Test the Pressure: Use a pressure tester to see if the cap is holding the correct pressure.
- Replace as Needed: Radiator caps are relatively inexpensive and easy to replace.
The pressure valve helps to vent excess pressure to prevent damage. This valve helps to protect the cooling system components. It releases pressure, and when the system cools down, it creates a vacuum to draw coolant back in from the reservoir.
Over time, the rubber seal in the cap can degrade. Inspecting the seal will help identify if the seal is worn or damaged.
A pressure tester helps determine if the cap can maintain the necessary pressure. This is important to ensure the proper function of the cooling system.
Replacing the cap is often a quick fix. You will need to check your owner’s manual for the correct replacement cap for your model.
Head Gasket Problems
The head gasket is located between the engine block and the cylinder head. It seals the cylinders, preventing combustion gases from leaking into the cooling system or coolant from entering the cylinders. A blown head gasket can create a pathway for combustion gases to enter the cooling system, increasing pressure and pushing coolant back into the reservoir. This is one of the more serious problems, as it requires extensive engine work. Other problems might include engine overheating or loss of power.
- Symptoms of Failure: Look for bubbles in the coolant reservoir, white smoke from the exhaust, and coolant loss.
- Pressure Test: A cylinder leak-down test or a pressure test can confirm if a head gasket is leaking.
- Check the Oil: A milky appearance in the oil (when you check the dipstick) is another indicator of a head gasket issue.
- Repair Difficulty: Fixing a head gasket is a difficult job, often requiring professional help.
These signs show signs of a blown head gasket, allowing the combustion gases to mix with the coolant. This is often accompanied by overheating and decreased engine performance.
These tests can help you pinpoint the leaks. They will also determine if there are any combustion gases in the cooling system.
Coolant leaking into the engine oil will create a milky consistency. This is the result of the coolant and oil mixing. It can also cause the engine to malfunction if not quickly repaired.
The repair typically involves removing the cylinder head. Then, the gasket must be replaced, and the cylinder head may need to be re-surfaced. Ensure the engine is clean and free of contamination after the repair.
Faulty Water Pump
The water pump is the heart of the cooling system. It pumps the coolant throughout the engine. If the water pump is failing, it may not circulate the coolant correctly, leading to overheating and possibly pushing coolant into the reservoir. The pump could be leaking, or the impeller could be damaged, reducing its pumping ability. A bad water pump can also cause a variety of other problems. These issues include the engine overheating, the coolant leaking, and even significant engine damage.
- Inspect for Leaks: Look for coolant leaks around the water pump. A leak around the weep hole indicates the seal has failed.
- Check the Impeller: Remove the water pump (after draining the coolant) to inspect the impeller blades.
- Listen for Noises: Unusual noises like grinding or squealing from the water pump area may indicate a failing pump.
- Replace the Pump: Water pumps are usually replaced as a unit. Follow the manufacturer’s directions for replacement.
If coolant leaks from the weep hole, it shows the water pump has problems. The water pump’s seal might have failed, needing replacement.
The impeller blades rotate inside the water pump to circulate the coolant. If they are damaged or worn, the water pump will not be able to do its job correctly.
The water pump makes different noises when it fails. These sounds will help you determine the source of the problem.
The water pump is a critical part of the cooling system. Therefore, it’s very important to keep it well maintained to prevent damage to the engine. When replacing, make sure you properly install and prime the water pump.
More Considerations about Your F150’s Cooling
Keeping your F150’s engine cool is vital for its longevity and performance. The cooling system is more than just a radiator and a reservoir. It’s a complex network that includes many parts working together. It’s also important to understand other components that impact the cooling function.
Thermostat Troubles
The thermostat acts like a gatekeeper. It controls the coolant flow based on the engine’s temperature. If the thermostat sticks closed, coolant can’t circulate properly, leading to overheating and potentially forcing coolant into the reservoir. If it stays open, the engine might not reach its operating temperature, which can impact fuel efficiency and performance. A thermostat issue will show up with changes in the engine’s temperature readings.
- Check Operation: You can test the thermostat by removing it and placing it in hot water to see if it opens.
- Replace if Stuck: A thermostat that is stuck closed must be replaced immediately.
- Overheating Issues: An overheating engine is usually caused by a bad thermostat.
- Easy Replacement: Thermostats are relatively inexpensive and easy to replace.
A simple check involves placing the thermostat in hot water to see if it functions as it should.
A closed thermostat can restrict coolant flow. This will quickly cause the engine to overheat.
Overheating often leads to serious engine damage if not addressed quickly.
Replacement usually involves removing a few bolts and swapping out the old thermostat for a new one.
Air Bubbles in the System
Air pockets in the cooling system can obstruct coolant flow. These bubbles can prevent coolant from reaching all parts of the engine, leading to localized overheating and pushing coolant into the reservoir. When you refill the coolant after any maintenance, air often gets trapped. Getting rid of these bubbles is an important part of a coolant system checkup. Also, if there are issues in the system, it will have to be bled to remove air pockets.
- How They Form: Air can enter the system during repairs or leaks.
- Bleeding the System: Properly bleed the system after any coolant work.
- Fill Slowly: Fill the coolant slowly to prevent air from entering.
- Run with Cap Off: Run the engine with the radiator cap off to help the air escape.
Air bubbles form when the system is opened during maintenance or if there is a leak.
Bleeding the system removes any trapped air. This prevents overheating and helps the cooling system to work as designed.
Slowly pouring the coolant will allow the air bubbles to escape more quickly.
Running with the radiator cap off allows the system to burp air out of the system more efficiently.
Coolant Leaks
Coolant leaks reduce the coolant in the system, making the engine overheat. Leaks can happen at various points. They can occur at hoses, the radiator, the water pump, or other fittings. A small leak might not be noticeable at first, but over time, it will cause the coolant level to drop. This loss of coolant will reduce the system’s efficiency. Finding and fixing these leaks is important to keep the engine’s temperature in check.
- Where to Look: Check all hoses, the radiator, the water pump, and the engine block.
- Pressure Test: A cooling system pressure test can help identify leaks.
- Fix the Leaks: Replace hoses and repair any leaks right away.
- Inspect Regularly: Keep a regular eye on the coolant level and check for any signs of leaks.
Visual inspections can help determine leaks. Look for telltale signs of coolant.
A pressure test uses a tool to pressurize the system. This shows where leaks may be occurring.
Repairing leaks will help prevent overheating and potential engine damage.
Check your vehicle to catch leaks early. This will also help you identify any problems that may be occurring.
Diagnostics and Preventative Steps
Finding out the root cause of why f150 coolant flows back into reservoir is key to stopping the problem. Diagnosing the issue involves a few steps. They range from basic checks to more specific tests. Knowing these steps can help you to understand what is going on with your truck’s cooling system. Prevention plays a crucial role in avoiding issues. It involves regular maintenance tasks that will protect your engine.
Initial Checks
Begin with simple visual inspections to identify potential problems. Look for obvious signs such as leaks, damaged hoses, or low coolant levels. Also, check the coolant reservoir. A sudden increase in coolant level or bubbling in the reservoir can signal problems like a head gasket leak. These initial steps often give you clues about where the problem lies. Also, you might want to start with the simple checks.
- Check Coolant Level: Regularly check the coolant level in the reservoir.
- Inspect Hoses and Connections: Look for any signs of leaks, cracks, or wear and tear.
- Examine the Radiator: Check for any leaks or damage to the radiator.
- Check the Oil: Examine the oil dipstick for a milky appearance. This could be from coolant mixing with the oil.
This will help you detect any coolant loss. Low levels can indicate a leak or other problem.
Hoses can fail over time. Make sure you regularly inspect them for potential issues.
Inspect the radiator for any obvious leaks or damage that can be causing coolant issues.
Checking the oil can show you if coolant is mixing. This is a sign of internal engine problems.
Advanced Testing Techniques
If initial checks don’t provide the answer, you’ll need advanced testing. A cooling system pressure test is a great tool for finding leaks. A cylinder leak-down test will help confirm if there’s a problem with the head gasket. These methods will often provide more accurate details about the issues. Additionally, an infrared thermometer can help to identify hot spots. These may indicate blockages or other issues within the cooling system.
- Cooling System Pressure Test: This test pressurizes the cooling system to find leaks.
- Cylinder Leak-Down Test: This test can check for head gasket problems by detecting leaks in the cylinders.
- Infrared Thermometer: Use an infrared thermometer to check for hot spots in the radiator or engine.
- Coolant Analysis: Coolant testing can reveal contamination or other issues.
A pressure test is a method for locating leaks. It identifies where coolant may be escaping.
A cylinder leak-down test determines head gasket leaks and other issues. It will help to locate leaks within the cylinders.
An infrared thermometer quickly reveals problems. The tool shows where the engine is running too hot.
This process will identify if the coolant is contaminated or if other problems exist within the cooling system.
Preventative Maintenance
Regular maintenance is a great way to prevent problems. This includes flushing the cooling system and changing the coolant at recommended intervals. Check hoses and belts regularly, and replace them if needed. This will extend the life of your F150’s cooling system. This will help you avoid the common issue of why f150 coolant flows back into reservoir, and ensure your engine runs smoothly.
- Regular Coolant Flush: Flush and replace the coolant every two to three years.
- Check Hoses and Belts: Inspect hoses and belts for cracking, wear, and leaks.
- Use the Correct Coolant: Always use the coolant that your F150 manufacturer recommends.
- Professional Inspections: Have your cooling system checked by a mechanic regularly.
This keeps the coolant from getting contaminated. This will help your engine run smoothly.
Check the hoses and belts often. This will help to catch the problems before they get bad.
The correct coolant will help your engine’s cooling system work correctly.
Regular inspections will catch potential issues early. This can save you from bigger problems down the road.
| Component | Common Issues | Symptoms |
|---|---|---|
| Radiator Cap | Pressure issues, sealing failure | Coolant overflow, system underperformance |
| Head Gasket | Leaks, combustion gas intrusion | Overheating, white exhaust smoke, coolant loss |
| Water Pump | Leaks, impeller damage | Overheating, coolant leaks, unusual noises |
| Thermostat | Stuck closed/open | Overheating/underheating, poor fuel economy |
Frequently Asked Questions
Question: What does it mean when the coolant reservoir overflows?
Answer: Coolant overflowing from the reservoir usually indicates that there’s too much pressure in the cooling system. This can be caused by a variety of issues, such as a faulty radiator cap, a head gasket leak, or a malfunctioning water pump, among other things.
Question: Is it safe to drive with coolant flowing back into the reservoir?
Answer: It’s generally not safe to keep driving when coolant flows back into the reservoir. This means the engine could overheat. Overheating can cause major damage, such as warping the cylinder head or damaging the engine block.
Question: How often should I check my F150’s coolant?
Answer: You should check your F150’s coolant level at least once a month, or more often if you drive in extreme conditions or do a lot of towing. Check it when the engine is cold to get an accurate reading.
Question: What type of coolant should I use in my F150?
Answer: Always use the coolant that your F150’s manufacturer recommends. This information can be found in your owner’s manual. Using the wrong type of coolant can cause corrosion and damage to your cooling system.
Question: Can I fix the problem of coolant flowing back into the reservoir myself?
Answer: Some causes, like a faulty radiator cap or a leaking hose, are easy to fix. However, problems like a blown head gasket usually need a mechanic. It’s best to assess the problem and seek professional help if you’re not comfortable with car repairs.
Final Thoughts
Understanding why f150 coolant flows back into reservoir is key to maintaining your truck’s engine health. The most common causes are often related to parts like the radiator cap, head gasket, or water pump. Addressing these issues early on will help avoid serious damage and save you money in the long run. By keeping up with routine checks, such as coolant levels and inspections for leaks, you’ll be able to quickly spot any potential problems. Knowing how the cooling system works and what to look for empowers you to take action and keep your F150 running smoothly. Remember, if you’re unsure about any repair, don’t hesitate to seek advice from a mechanic. With a little care and attention, you can keep your F150 cool and running right for years to come!