Why F150 High Fuel Trim at Idle? Causes and Solutions
Figuring out why F150 has high fuel trim at idle can be tricky for anyone just starting with car repair. It involves understanding how the engine’s computer, sensors, and fuel system all work together. Don’t worry, it’s not as hard as it seems! We’ll explore the common reasons and break down the steps to find and fix the problem. Get ready to learn about the most common culprits and solutions, making it simple to troubleshoot high fuel trim issues in your F150. Let’s get started!
What Causes High Fuel Trim in Your F150?
High fuel trim at idle means the engine control unit (ECU) is adding extra fuel. This is usually due to the engine trying to compensate for a lean condition, meaning there’s too much air compared to fuel. The ECU monitors the oxygen sensors and adjusts the fuel injectors to try and reach the correct air-fuel ratio. When this adjustment goes beyond the normal range, the fuel trim becomes high, and this often shows up prominently when the engine is idling. Several issues can trigger this problem. It’s like a detective story, and we’re trying to find out what went wrong in your F150’s engine.
Pinpointing the cause involves checking various systems and components. We will examine the air intake system, vacuum leaks, fuel injectors, and oxygen sensors. Each of these can contribute to a lean condition. Air leaks, for example, introduce extra air that the ECU doesn’t account for, leading it to add more fuel. Faulty injectors can also fail to deliver the right amount of fuel. The goal is to identify the root cause so you can address it and keep your F150 running smoothly.
Common Air Intake Problems
One of the most frequent culprits behind high fuel trim at idle is issues within the air intake system. This system is responsible for bringing air into the engine, and any leaks or restrictions can cause significant problems. Common troubles include a disconnected or cracked vacuum hose. Another example might involve air leaks around the intake manifold or even a faulty mass airflow (MAF) sensor. The MAF sensor measures the amount of air entering the engine, and if it’s sending incorrect data, the ECU will miscalculate the required fuel, resulting in high fuel trim.
- Vacuum Leaks: Vacuum leaks are like tiny holes that let in extra air. These leaks can occur in the hoses connecting to the intake manifold, the brake booster hose, or even the PCV valve system. Because the ECU doesn’t account for this extra air, it compensates by adding more fuel, thus raising fuel trim.
- MAF Sensor Issues: The MAF sensor plays a key role. If it is dirty, damaged, or simply failing, it will inaccurately measure the air entering the engine. When the MAF sends the wrong air volume information, the ECU incorrectly calculates the fuel needed, leading to fuel trim problems. Clean the sensor carefully with MAF cleaner, or replace it if necessary.
- Intake Manifold Leaks: The intake manifold provides a pathway for air to enter the engine cylinders. Over time, gaskets can degrade, causing leaks. These leaks introduce extra air after the MAF sensor, which the ECU doesn’t detect. You can check for leaks by spraying a flammable solution (like brake cleaner) around the manifold while the engine idles. A change in engine speed or idle quality can help locate the leak.
- Clogged Air Filter: A restricted air filter will limit the amount of air entering the engine. While a clogged filter usually results in a rich condition (too much fuel), it can sometimes cause the engine to run lean. This causes the ECU to add fuel to compensate, leading to high fuel trim. Replace your air filter regularly.
Vacuum Leak Detection Methods
Detecting vacuum leaks is a crucial step when figuring out why F150 has high fuel trim at idle. There are several methods you can use, from simple visual inspections to more advanced diagnostic techniques. Vacuum leaks are common, but they can be tricky to find. If you know how to identify these leaks, you can address them before they turn into major engine problems. A well-maintained engine runs better and lasts longer. Taking the time to locate and repair these leaks will help you get the best performance from your vehicle.
- Visual Inspection: Start by doing a close examination of all vacuum hoses and fittings. Look for cracks, splits, disconnections, or dry rot. Pay special attention to areas near the intake manifold, throttle body, and any vacuum-operated components. Remember to check all the fittings, as they are a common source of leaks.
- Spray Testing: With the engine running at idle, spray a flammable solution, like brake cleaner or carb cleaner, around the suspected leak areas. If the engine speed changes when you spray a certain area, it suggests a leak. The engine will “suck in” the flammable spray, momentarily altering the air-fuel mixture and affecting idle.
- Smoke Test: A smoke test involves pumping smoke into the intake system to show leaks. Smoke will escape from any cracks, disconnections, or leaks in the system. Smoke testing can find small leaks that other methods might miss, such as a vacuum leak in the fuel tank, or a small crack in a vacuum hose.
- Using a Vacuum Gauge: A vacuum gauge can indicate whether there’s a vacuum leak. Connect the gauge to a vacuum hose and watch the reading. A low or unstable vacuum reading can indicate a vacuum leak. This can help you focus your search on a specific area, such as the intake manifold.
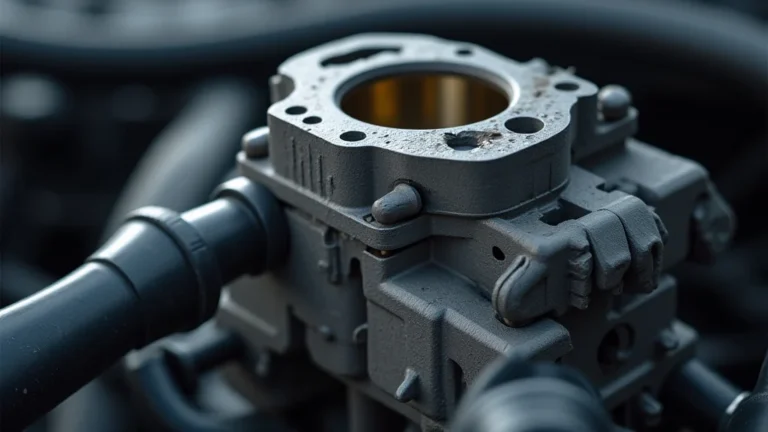
Diagnosing Problems with the Mass Airflow Sensor (MAF)
The MAF sensor is a vital component of the engine’s air intake system. It measures the amount of air entering the engine, and the ECU uses this information to calculate the correct amount of fuel needed. When the MAF sensor malfunctions, it can throw off the air-fuel mixture, resulting in high fuel trim at idle. To correctly diagnose MAF problems, you will need to understand how it functions and how to test it. Diagnosing MAF sensor issues helps you maintain your engine’s efficiency and prevent damage. This is a common issue, and with some basic techniques, you can confirm whether the MAF sensor is part of the problem.
- Visual Inspection and Cleaning: First, inspect the MAF sensor for any obvious damage, such as a broken wire or physical damage. Then, use MAF sensor cleaner to carefully clean the sensor wires. Sometimes, this simple step can resolve the issue, as dirt or debris on the wires can cause inaccurate readings. Be careful not to damage the delicate wires inside the sensor.
- Using a Scan Tool: A scan tool can display the data from the MAF sensor in real time. One key data point is the mass airflow rate (grams per second, or g/s). At idle, the expected airflow rate is typically between 2 to 5 g/s, depending on the engine size. Compare the sensor reading with the expected values.
- Checking the MAF Sensor’s Voltage: With the ignition on, but the engine off, check the voltage readings from the MAF sensor. This will help confirm that the sensor is receiving power. With a digital multimeter (DMM), test the power and ground connections to ensure the sensor is getting the required voltage. Consult your vehicle’s service manual to determine the correct voltage levels.
- Disconnecting the MAF Sensor: Temporarily disconnecting the MAF sensor can help to see if it is causing high fuel trim. If the fuel trim returns to normal (or improves) after disconnecting the MAF, it suggests the sensor is faulty. However, it’s essential to drive the vehicle only for testing purposes, and not for an extended period, as the engine will revert to a default operating mode.
Fuel System Issues and High Fuel Trim
Issues within the fuel system can significantly impact fuel trim. These problems are directly related to the delivery of fuel to the engine. Any restriction, leak, or malfunction in the fuel system can alter the air-fuel ratio, causing high fuel trim at idle. Examples include fuel injector problems, fuel pump issues, or a clogged fuel filter. Addressing these problems requires careful diagnosis and repair to ensure your engine receives the correct amount of fuel, keeping it running smoothly and efficiently. Ensuring the fuel system works efficiently is a critical part of vehicle maintenance.
Fuel system problems are often difficult to detect without the correct tools and knowledge. Understanding these problems will help you address the issues more efficiently. Fuel system problems can cause poor engine performance, reduced fuel economy, and potential engine damage if left unresolved. By addressing the fuel system, you can reduce repair costs, improve gas mileage, and extend the lifespan of your vehicle. The fuel system works in close coordination with other engine systems, such as the air intake and the ECU. A problem in one system can easily affect another.
Fuel Injector Malfunctions
Fuel injectors are the devices that spray fuel into the engine cylinders. They are key to ensuring the correct air-fuel mixture, and if they malfunction, it can lead to various problems, including high fuel trim at idle. Fuel injector malfunctions can happen in various ways. They can get clogged, leak, or fail to deliver the correct amount of fuel. Inspecting and testing the fuel injectors will help you determine whether they are causing your high fuel trim problem. If you identify and resolve these issues, your engine will run efficiently.
- Clogged Injectors: Over time, fuel injectors can become clogged with debris or deposits. A clogged injector can restrict the flow of fuel, causing the engine to run lean. To diagnose clogged injectors, a fuel injector cleaning can resolve this issue. If that doesn’t work, consider replacing the faulty injectors.
- Leaking Injectors: Leaking injectors drip fuel even when they’re supposed to be closed. This can cause the engine to run rich, which may also affect fuel trim. A leaking injector will cause problems, such as rough idling. You can use a fuel injector tester to determine if an injector is leaking.
- Injector Electrical Issues: Injectors use electricity to open and close. Electrical problems, like a faulty injector wiring or connector, can prevent an injector from working correctly. Use a multimeter to check for voltage and ground at the injector connector. Inspect the wiring for damage.
- Fuel Injector Testing: A fuel injector test will help you identify the injectors’ flow rates. This test measures the amount of fuel delivered by each injector to determine whether they are working. With a fuel injector tester, you can test the fuel injectors on your F150.
Fuel Pump Issues
The fuel pump is responsible for delivering fuel from the tank to the fuel injectors. Any issues with the fuel pump can affect the fuel supply and cause high fuel trim at idle. Problems with the fuel pump are common and can include a failing pump, a clogged fuel filter, or electrical issues. When the fuel pump is not working right, it can lead to problems like a lack of power, or poor engine performance. Diagnosing fuel pump problems requires certain tests. By doing so, you can address the fuel delivery problems of your F150 and keep it running in top condition.
- Fuel Pump Failure: A failing fuel pump may not deliver enough fuel to the engine, resulting in a lean condition. Symptoms can include rough idling, hesitation, or a lack of power, particularly under acceleration. To verify the fuel pump, use a fuel pressure gauge to measure the fuel pressure.
- Clogged Fuel Filter: A restricted fuel filter reduces fuel flow to the pump, which can cause the engine to run lean. Check the fuel filter by using a fuel pressure gauge to test fuel pressure before and after the filter. If the pressure drops significantly after the filter, the filter could be blocked.
- Electrical Problems: Issues like a faulty fuel pump relay, a broken wire, or a bad fuel pump fuse can prevent the pump from running. Test the fuel pump relay with a multimeter. Ensure that the fuse is not blown. Check the wiring and connectors for corrosion or damage.
- Fuel Pressure Testing: To diagnose fuel pump problems, you can test the fuel pressure. Attach a fuel pressure gauge to the fuel rail. Compare the measured pressure to the manufacturer’s recommended specifications. If the fuel pressure is low, the fuel pump may be failing.
Fuel Pressure Regulator Problems
The fuel pressure regulator (FPR) is designed to maintain the fuel pressure in the fuel rail. If the FPR malfunctions, it can cause high fuel trim. A bad FPR can result in too much or too little fuel reaching the engine. The fuel pressure regulator’s main job is to ensure that the fuel is delivered at the proper pressure. To test the FPR, you can use a fuel pressure gauge to measure fuel pressure. The results will let you know whether the FPR is maintaining the correct fuel pressure. Diagnosing the FPR helps improve the engine’s performance, fuel economy, and overall longevity.
- Faulty Fuel Pressure Regulator: A faulty fuel pressure regulator is designed to maintain the correct fuel pressure. If the FPR fails, it can cause the fuel pressure to be too low. You can check the FPR by using a fuel pressure gauge.
- Testing the Fuel Pressure Regulator: To test the fuel pressure regulator, you can use a fuel pressure gauge and a vacuum hose. Disconnect the vacuum hose from the FPR with the engine idling. If the fuel pressure increases when the vacuum hose is disconnected, it indicates the FPR is working.
- Internal Fuel Leak: An internal leak in the FPR causes the fuel pressure to drop, which can cause the engine to run lean. To confirm an internal fuel leak, you can check for fuel in the vacuum line. If there is fuel, the FPR is leaking internally.
Oxygen Sensor Function and Fuel Trim
Oxygen (O2) sensors play a key role in the fuel trim process. They are designed to monitor the oxygen level in the exhaust gases. The ECU uses the readings from these sensors to adjust the fuel injectors and maintain the ideal air-fuel ratio. When the O2 sensors provide incorrect data, it can cause the ECU to miscalculate the required fuel, resulting in high fuel trim at idle. Learning about O2 sensors is an important part of understanding how your car’s engine works. Understanding how they work, how to test them, and what can go wrong, will give you an edge in car maintenance.
The condition of your O2 sensors directly impacts your vehicle’s performance. You can use these insights to test, diagnose, and maintain your oxygen sensors. Replacing faulty sensors will often resolve fuel trim issues and improve overall engine performance. The use of oxygen sensors ensures that your F150 runs efficiently and meets emission standards. The O2 sensor plays a vital role in engine performance. By testing the sensors, you can maintain optimal performance from your vehicle.
Oxygen Sensor Failure
When the oxygen sensors fail, they can no longer accurately monitor the oxygen levels in the exhaust gases. This results in the ECU receiving false information, causing it to miscalculate the amount of fuel needed. Sensor failure can happen in multiple ways, including contamination, damage, or wear and tear. Failed sensors can cause problems such as rough idling, poor fuel economy, and failed emissions tests. Finding a malfunctioning O2 sensor is a common cause of high fuel trim at idle.
- Contamination: Oxygen sensors can be contaminated by various substances, such as oil, silicone, or coolant. Contamination can render the sensor useless, as the sensor’s reading is compromised, giving an inaccurate reading. Contamination can throw off the readings. This can cause high fuel trim issues.
- Damage: Physical damage, like a broken wire or a cracked sensor element, can disrupt the sensor’s function. In this case, the damaged sensor will not be able to send any useful information to the ECU. Damage can also disrupt the signal from the sensor.
- Aging and Wear: Over time, oxygen sensors degrade due to high temperatures and exposure to exhaust gases. As the sensor ages, it becomes slow to respond to changes in oxygen levels, leading to inaccurate readings. Replacement might be needed when the oxygen sensors age or wear.
- Testing Oxygen Sensors: Oxygen sensors are tested with a scan tool to monitor the sensor’s voltage output. The scan tool displays the sensor’s data, and it is compared to the expected readings. If the scan tool readings are not in the specified range, the sensor may need to be replaced.
Diagnosing O2 Sensor Problems
Diagnosing O2 sensor problems involves a methodical approach to verify the performance of the sensors. This can be accomplished with a scan tool to examine the sensor’s data. You’ll need to understand what the normal voltage range is. You can also perform physical inspections of the sensor and its wiring. Diagnosing O2 sensor problems often helps resolve fuel trim issues. Understanding how to diagnose O2 sensor problems is a key skill for any car enthusiast. You can save time and money by recognizing the problems associated with an O2 sensor.
- Using a Scan Tool: A scan tool can display the voltage output of the O2 sensors in real time. The voltage should fluctuate between around 0.1 and 0.9 volts. If the voltage is steady, or if the sensor is not fluctuating, the sensor may be faulty. Use a scan tool to monitor and check oxygen sensor data.
- Checking the Sensor’s Heating Element: Many O2 sensors have a heating element to warm up the sensor quickly. You can check the heating element’s functionality with a multimeter. Check the resistance of the heating element. You can determine if the sensor’s heating element is working by checking the heating element’s voltage and resistance.
- Visual Inspection of the Sensor: Inspect the sensor itself for damage or contamination. Look for a buildup of deposits on the sensor tip. Also, examine the wiring and connectors for any signs of damage or corrosion. Visual inspection will help diagnose O2 sensor problems.
- Monitoring Sensor Response Time: The O2 sensors should respond quickly to changes in exhaust oxygen levels. Use a scan tool to watch the sensor’s response time. If the response time is slow, the sensor may be failing. Check the sensor’s response time. This helps to determine whether or not the O2 sensor is operating normally.
Catalytic Converter Issues
The catalytic converter is designed to convert harmful exhaust gases into less harmful emissions. A problem with the catalytic converter, while not directly causing high fuel trim, can still impact the engine’s performance. Problems with the catalytic converter will often trigger other issues that affect fuel trim. If the catalytic converter is blocked, it can cause backpressure in the exhaust system. This can lead to decreased engine performance and can indirectly cause high fuel trim. If you have any catalytic converter problems, then the engine will begin to run inefficiently. A properly functioning catalytic converter will greatly improve your vehicle’s emissions.
- Blocked Catalytic Converter: A clogged catalytic converter restricts the flow of exhaust gases. This results in the exhaust pressure increasing, which can negatively affect the engine’s performance. A clogged catalytic converter may cause the engine to run lean. Check for signs of restricted exhaust flow and use diagnostic methods to verify if the catalytic converter is blocked.
- Inefficient Catalytic Converter: When the catalytic converter fails to properly convert the exhaust gases, the oxygen sensors may register unusual readings. This can mislead the ECU. This will likely affect fuel trim. A malfunctioning catalytic converter can cause emissions-related issues, such as failing emissions tests.
- Testing the Catalytic Converter: There are different ways to test a catalytic converter. A pressure test can be used to assess exhaust flow. Testing includes checking the temperature of the converter before and after. These diagnostic methods will help determine the catalytic converter’s efficiency.
Why F150 High Fuel Trim at Idle: Step-by-Step Solutions
Identifying and fixing high fuel trim at idle requires a systematic approach, using a set of well-defined steps. These steps involve checking different components and systems, such as the air intake, fuel system, and oxygen sensors. You’ll use tools to inspect the components and gather data, with the ultimate goal of finding the root cause of the problem. Follow these steps to find and address the issue with your F150. These step-by-step procedures can help make your vehicle run more efficiently. Getting it right will bring you increased performance, and ensure your F150 runs like it’s supposed to. Use these steps to guide you to solving high fuel trim at idle.
- Gather Information and Tools: Before you start, gather your tools. You’ll need a scan tool, a multimeter, and possibly a smoke machine, depending on the diagnostic approach. Review the vehicle’s service manual or gather any related vehicle service information. Also, have a good understanding of the engine’s systems.
- Scan for Diagnostic Trouble Codes (DTCs): Start by connecting a scan tool to the vehicle’s diagnostic port (OBD-II). Scan for any DTCs (Diagnostic Trouble Codes) that may have been stored. This step can provide helpful clues about the issues and point you in the right direction.
- Check Fuel Trims at Idle: Use the scan tool to monitor fuel trim values while the engine is idling. Pay attention to both short-term fuel trim (STFT) and long-term fuel trim (LTFT). High fuel trim values indicate a problem with the air-fuel mixture. Keep an eye on both STFT and LTFT values.
- Inspect the Air Intake System: Thoroughly check the air intake system. Check all vacuum hoses, and look for any cracks, disconnections, or leaks. Inspect the MAF sensor for any contamination or damage. Use a scan tool to monitor the MAF sensor data.
- Check for Vacuum Leaks: Vacuum leaks are a common cause of high fuel trim. Use a smoke machine to find vacuum leaks. You can also spray a flammable solution to find leaks. Fix all vacuum leaks as the next step.
- Test the Fuel System: Test the fuel pump and fuel injectors. Use a fuel pressure gauge to measure the fuel pressure and check whether the pressure meets the manufacturer’s specifications. If you discover a problem, such as clogged injectors or a faulty fuel pump, replace them as needed.
- Inspect the Oxygen Sensors: Use the scan tool to check the oxygen sensors. Monitor the sensor voltage and response time to verify that the sensors are working properly. If the sensors aren’t functioning correctly, they will need to be replaced.
- Check for Exhaust Restrictions: Make sure the exhaust system isn’t blocked. A blocked catalytic converter can cause issues. Measure the exhaust backpressure, and verify the converter is working as it should. Replace the converter if it is failing.
- Perform a Reset and Retest: After any repairs, reset the engine control unit (ECU). Then, drive the vehicle. Scan the system again to verify that the fuel trim values have returned to normal. If the issue has been fixed, the fuel trim readings should be within the normal range.
Frequently Asked Questions
Question: What does fuel trim mean?
Answer: Fuel trim refers to the adjustments the engine’s computer makes to the amount of fuel delivered to the engine, based on the readings from the oxygen sensors and other sensors. It helps keep the air-fuel ratio at the ideal level.
Question: What’s the normal fuel trim range?
Answer: Ideally, fuel trim should be close to zero. Minor adjustments are normal. If the fuel trim is consistently above +10% or below -10%, it indicates a problem that needs attention.
Question: Can a bad oxygen sensor cause high fuel trim at idle?
Answer: Yes, faulty oxygen sensors are a common cause. They send incorrect information to the ECU, which then tries to correct the air-fuel mixture, leading to high or low fuel trim.
Question: How can I check for vacuum leaks?
Answer: You can visually inspect vacuum hoses, use a smoke test to identify leaks, or spray a flammable liquid (like brake cleaner) around suspected areas to see if the engine’s idle changes.
Question: What is a mass airflow (MAF) sensor and why is it important?
Answer: The MAF sensor measures the amount of air entering the engine. The ECU uses this information to determine the correct amount of fuel needed. A faulty MAF can lead to incorrect air-fuel ratios, affecting fuel trim and engine performance.
Final Thoughts
You now know the most common reasons why F150 has high fuel trim at idle. We’ve explored the air intake system, vacuum leaks, fuel injectors, oxygen sensors, and more. Remember that the issue is usually related to a lean condition. Extra air entering the engine, or not enough fuel being delivered. Identifying and addressing these issues will help resolve the problem. The process can often involve checking for vacuum leaks, testing the MAF sensor, and examining the fuel system. It can also include testing the O2 sensors. When the engine’s ECU tries to compensate for these problems, that’s when you see high fuel trim at idle.
Solving this problem can improve your engine’s performance. You can do this by using the systematic approach. Gather the right tools, and then perform step-by-step diagnostics. If you aren’t sure, consider seeking professional advice from a qualified mechanic. Now, you have the knowledge to troubleshoot the high fuel trim issue in your F150. By following these steps and addressing the possible causes, you can get your F150 running smoothly. Now you can confidently tackle this common issue!