Why F150 Roof Leaks around Third Brake Light Explained
If you’re wondering why f150 roof leaks around third brake light, you’re not alone. It’s a common problem that can be frustrating, especially if you’re new to car repair. But don’t worry! This can seem like a big issue, but it’s usually easy to fix. We’ll explore the causes and offer a straightforward, step-by-step solution to keep your truck dry. Let’s get started, and you’ll soon know how to solve this common headache!
The Common Culprit Behind Roof Leaks in F150s
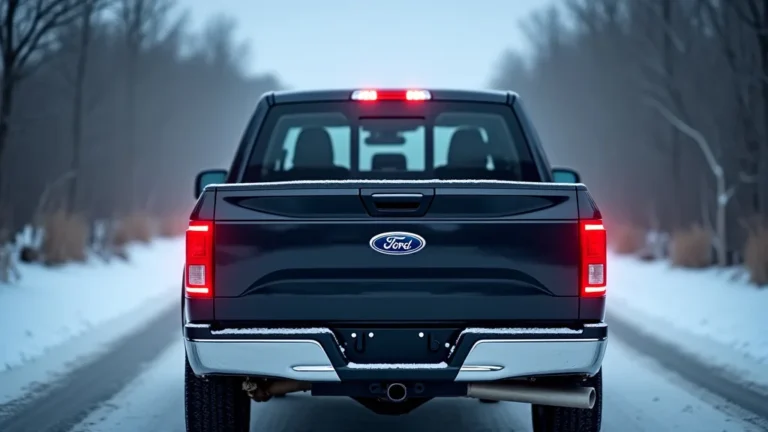
One of the most frequent reasons for water entering an F150’s cabin involves the third brake light. This light, positioned at the top center of the rear window, is a frequent trouble spot. Over time, the sealant or gasket surrounding the light can break down, crack, or become brittle. This breakdown creates an opening, allowing water to seep in during rain or when washing your truck. This can cause leaks that damage your truck’s interior. Other problems are cracks in the cab and the gasket material wearing out due to sunlight or car washes. Solving this problem requires careful inspection and straightforward repair techniques.
Examining the Brake Light Seal
The seal around the third brake light is usually made of rubber or a similar material. This material deteriorates as it ages. The sun’s UV rays and constant temperature fluctuations accelerate this process, causing the seal to dry out, shrink, and crack. When the seal is no longer effective, water can easily get through. This is the main reason why f150 roof leaks around third brake light occur. Thoroughly check the area around the brake light for any signs of damage or wear. Inspect the seal itself, looking for cracks, splits, or any spots where the material has become detached from the truck’s body.
- Visual Inspection: Start by simply looking at the brake light. See if the lens is cracked. Look for any gaps between the light and the truck’s cab.
- Feel the Seal: Gently press on the seal. It should feel soft and pliable, not hard or brittle.
- Check for Water Stains: Look inside the cab. Check the headliner around the light for water stains. These stains show where water has been getting in.
- Use Water: You can use a hose to spray water around the light. Watch inside the truck for leaks.
Once you locate signs of water intrusion or damage, your focus should be on
The Removal and Replacement of the Brake Light
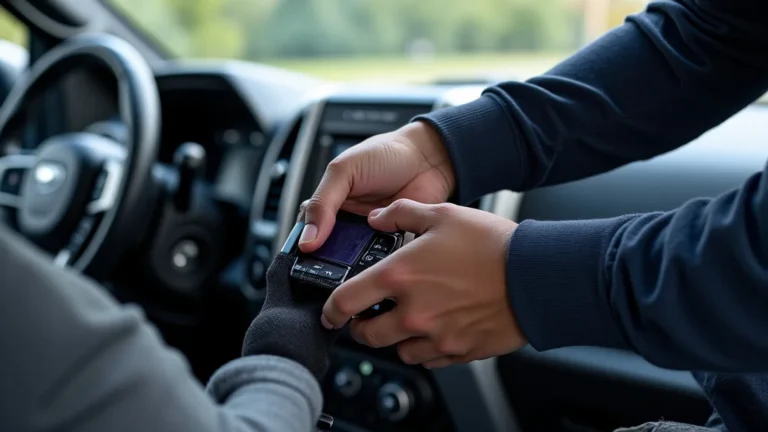
To fix the leak, you’ll need to remove the third brake light. This can look challenging, but it is not difficult. The light assembly is usually fastened with screws or clips. You may need to use a screwdriver or a trim removal tool. Carefully remove the light from the truck. This task involves removing the old sealant and cleaning the area. Once clean, install a new seal or apply fresh sealant. Reinstalling the light can be done with the same screws or clips. Make sure the light is secure and properly sealed to prevent future leaks.
- Gather Tools: You will need a screwdriver or a trim removal tool. You will also need a new seal or sealant.
- Detach the Light: Locate and remove the screws or clips holding the light in place.
- Disconnect Wiring: Carefully disconnect the electrical wiring from the light.
- Clean the Surface: Clean the area around the light to remove old sealant and debris.
- Apply New Sealant: Apply the new seal or sealant around the light.
- Reinstall the Light: Carefully put the light back in place. Fasten it securely.
Proper installation of the new seal or sealant is key to success. Ensure a tight seal to keep water out of your truck. Double-check your work after the sealant dries. If you do this job correctly, you will have a leak-free truck. Repairing the brake light can save you from costly interior damage.
More Causes of Water Leaks in Your F150
While the third brake light is a frequent problem, other locations on an F150 can also cause leaks. These areas include the cab seams, the windshield, and the sunroof (if your truck has one). Each of these potential points requires a unique approach to inspection and repair. It is important to look at all possible causes when trying to pinpoint the source of a leak. A complete inspection helps prevent any future issues. Early detection of leaks will protect your vehicle’s value.
Issues with Cab Seams
Cab seams are where the different parts of the truck’s cab are joined together. These seams are sealed at the factory to keep water out. Over time, the sealant on these seams can dry out. This makes them prone to cracking and leaking. Environmental factors such as extreme temperatures and vibration can worsen this process. Inspecting the cab seams usually involves checking the areas around the roof, the windshield frame, and the back wall of the cab. Any sign of cracking or separation in the sealant requires repair. This generally involves cleaning the area. It involves applying new sealant to reseal the seams. Using a high-quality sealant will prevent future leaks.
- Locate the Seams: Look for the seams where the cab panels are joined.
- Examine the Sealant: Check the sealant for cracks or gaps.
- Clean the Seams: Clean the seams with a degreaser.
- Apply Sealant: Apply a new sealant. Use a sealant that is designed for automotive use.
- Allow Drying: Give the sealant time to fully dry and cure.
Fixing cab seam leaks can involve removing old sealant, cleaning the surface, and applying new sealant. This prevents water from getting into the truck’s interior. Regular inspections of these areas can prevent bigger issues. Early detection helps you avoid problems like rust and mold growth.
Windshield Leaks as Potential Problem Areas
The windshield is another area that can cause leaks. The windshield is sealed to the truck’s frame with a special adhesive. If this seal is damaged, water can get in. Windshield leaks are often caused by the age of the adhesive. This can happen if the windshield is cracked or damaged. Water can penetrate the windshield’s seal. This may result in water dripping into the truck. You might also notice moisture inside the car. A complete inspection is important. The seal around the windshield requires a close look for any signs of damage. Any cracks or gaps require immediate attention. These can lead to leaks. Professional replacement of the windshield and the seal is a frequent solution to guarantee water resistance.
- Visual Inspection: Check for cracks or chips in the windshield.
- Inspect the Seal: Look for gaps or damage around the edge of the windshield.
- Water Test: Use a hose to spray water around the windshield. Observe for any leaks inside the truck.
- Professional Repair: If leaks are discovered, have the windshield inspected by a professional.
- Proper Sealing: Ensure the windshield is properly sealed. This will prevent water from getting in.
Fixing a windshield leak frequently involves removing and replacing the windshield. This includes applying a new adhesive seal. It is a repair best handled by professionals. This assures the repair is done right. The professional approach prevents future leaks and helps keep the truck’s interior dry.
What You Need to Fix a Leak in Your F150
Fixing leaks in your F150 involves having the right supplies and tools. Having everything you need before you start makes the process easier. The list of tools and supplies will vary based on where the leak is located. However, there are some essential items needed for the brake light or any other areas. This preparation helps make the repair procedure go smoothly. Careful selection of materials helps to ensure a long-lasting and effective repair. It will prevent recurring problems down the road. Keep these items handy so you can easily tackle the job yourself. This will let you keep your truck in good shape.
Essential Tools for Repair
The tools needed will depend on the source of the leak and the type of repair. However, a basic toolkit for leak repair should include some important items. A selection of screwdrivers, a trim removal tool, and a utility knife are necessary for removing panels and components. A scraper will remove old sealant. A brush helps you to clean the surfaces. Measuring tools and a flashlight make it easier to see and measure. These tools will let you deal with most common leak issues. Having the right tools on hand will help make repairs go faster. They will help you do a more complete job. Having the proper tools in your kit prepares you for any leak you may discover.
- Screwdrivers: You will need a variety of screwdrivers.
- Trim Removal Tool: This tool helps you remove panels and trim without damage.
- Utility Knife: This is used for cutting old sealant or trimming new material.
- Scraper: Use a scraper to remove old sealant or adhesive.
- Flashlight: A flashlight is essential for looking into dark areas.
These tools are the beginning of a good toolkit for dealing with leaks. Adding to it as you deal with other problems is a good idea. Using the right tools makes the repair job simpler. It also prevents damage to the truck and helps the repairs last longer.
Necessary Materials
Apart from the tools, the right materials are needed to effectively seal or replace seals. Sealant is important for cab seams and around the brake light. It’s important to select a sealant that is appropriate for automotive use. A new seal or gasket is often required for the third brake light. You can find these at auto parts stores. Cleaners and degreasers are needed to remove old sealant and prepare the surface. The materials you choose play a part in the success of the repair. Using good quality products ensures that the repairs will last for the long term. This provides maximum protection against water and other weather conditions. Choosing the right materials protects your truck from future issues.
- Sealant: Choose a high-quality, automotive-grade sealant.
- New Seals: Purchase replacement seals or gaskets for the third brake light.
- Degreaser: Use a degreaser to clean surfaces.
- Cleaning Supplies: Have some cloths or towels on hand to remove dirt and debris.
- Gloves: Protect your hands with gloves.
Having the correct materials makes any repair easier. Getting the right supplies and tools can lead to a successful outcome. Having the right tools and supplies means you can fix the problem and avoid future damage. Preparing ahead of time increases the chances of completing a leak repair effectively. A good repair will keep your vehicle water-free for years to come.
Troubleshooting Common F150 Roof Leak Issues
Finding the source of a leak can be difficult. The water can enter in one spot and travel to another. Carefully inspecting your truck is important. Knowing common problems and solutions can help you find and fix the leak. Common strategies include using a water test, inspecting the third brake light, checking cab seams, and looking around the windshield. Finding the exact problem is the first step toward finding a lasting fix. Proper troubleshooting is essential for ensuring your truck is watertight. Taking your time, and using a systematic method, will assist you in discovering the source of the issue. You can then ensure it’s repaired.
The Water Test: Your First Step
A water test is an essential method for finding the location of leaks. It involves using water from a hose to spray different areas. This allows you to check for water entry points. This approach will let you see the precise location of the leak. Spray water on the roof, around the windshield, and around the third brake light. Pay special attention to the areas where water appears to be accumulating inside the truck. A helper inside the truck can be useful. The helper can watch for water entry. This collaborative approach will help you pinpoint the source of the leak faster. This approach may also make it easier to fix any issues. The goal of the water test is to identify where the water is coming in.
- Preparation: Park your truck on a level surface.
- Water Source: Use a garden hose. Set the water to a medium pressure.
- Target Areas: Spray water slowly over areas.
- Inside Observation: Have someone inside the truck to watch for leaks.
- Repeat and Observe: Repeat the test, focusing on different areas.
The water test is simple, but it is a very effective way to find leaks. It can help you find leaks even if the source is not immediately visible. This helps you to pinpoint the area to fix. It also makes sure you do not waste time and money on unnecessary repairs. The water test helps you find the actual source of the problem.
Checking the Headliner and Interior
The headliner and other interior components can show signs of water leaks. These include stains, mold, and mildew. Regularly checking the headliner, the carpets, and other interior trim pieces is a good idea. Water damage, like staining and discoloration, can pinpoint areas of leakage. Mold and mildew are common issues with leaks. These can develop in hidden areas. This is why a complete inspection is important. The headliner around the third brake light is often the first place you will see signs of water entry. The headliner may have water stains. This can help you identify a leak. Taking the time to examine these areas can prevent damage to the interior of your truck. It can also prevent possible health risks associated with mold growth.
- Visual Inspection: Examine the headliner for water stains.
- Feel: Touch the headliner. See if it feels damp or wet.
- Smell Test: A musty smell may indicate mold or mildew.
- Check Carpets: Inspect carpets for moisture or stains.
- Remove and Inspect: Remove trim panels if needed.
Inspecting your truck’s headliner and interior can help you locate where the water is entering the truck. Early detection of water problems prevents damage to the interior and health problems from mold growth. A thorough inspection can help you find and resolve leaks quickly. Repairing the leaks can help keep your truck in good condition. It also improves your driving experience.
Real-Life Scenarios and Solutions
Sometimes, seeing how others fixed a problem can give you ideas for your own repairs. It is helpful to examine various instances. These show the real-world application of leak repairs. These real-life case studies explain common issues, the methods used to solve them, and the results achieved. These scenarios offer useful advice on handling problems such as roof leaks in your F150. These examples can help anyone understand what to expect. They also provide practical methods for identifying and resolving problems with roof leaks.
Case Study 1: The Third Brake Light Revelation
A truck owner noticed water stains on the headliner. The stains were near the third brake light. The owner performed a water test. The test showed water entering around the brake light housing. The owner removed the brake light. They noticed the original seal was cracked and brittle. They cleaned the area, removed the old seal, and installed a new one. They used sealant to ensure a tight, waterproof seal. After reinstalling the light, they performed another water test. This proved the repair stopped the leak. The owner’s success demonstrates the importance of a properly sealed third brake light. Their results indicate that proper sealing is critical for keeping water out.
Case Study 2: Cab Seam Surprise
Another owner noticed water on the floor of the truck after heavy rain. They looked around, and determined the leak was near the roof’s cab seams. After close inspection, they discovered cracks in the factory sealant. They cleaned the seams and applied fresh, automotive-grade sealant. They did this according to the manufacturer’s directions. This repair successfully stopped the leak. The cab remained dry, and the owner was happy with the repair. The experience confirms that checking cab seams for any damage is an important part of leak detection. This proactive approach prevents water damage.
- Problem: Water on the floor after rain.
- Diagnosis: Cab seam leaks.
- Solution: Cleaning and re-sealing the cab seams.
- Result: Leak stopped.
Frequently Asked Questions
Question: How often should I check for leaks?
Answer: It’s good practice to inspect your F150 for leaks at least twice a year, especially before the rainy season.
Question: Can I fix the third brake light leak myself?
Answer: Yes, in most cases, you can. It typically requires removing the light, replacing the seal, and applying sealant.
Question: What type of sealant should I use?
Answer: Use a high-quality, automotive-grade sealant designed for exterior use.
Question: What are the signs of a windshield leak?
Answer: Water stains on the interior, moisture inside the car, or water dripping from the roof are all signs of a possible windshield leak.
Question: Can a clogged sunroof drain cause a roof leak?
Answer: Yes, a clogged sunroof drain can cause water to back up and leak into the cab.
Final Thoughts
Dealing with why f150 roof leaks around third brake light doesn’t have to be a major problem. It usually comes down to wear and tear on the brake light’s seal. It’s a common issue that often results in water damage. By carefully checking the seal, cleaning the area, and applying fresh sealant or replacing the seal, you can usually stop the leak. Other areas that are the root of the problem are often damaged cab seams, or even issues with the windshield. Doing a water test and checking your truck’s interior are great ways to find the source. This is important to determine the exact spot where the water is getting in. Armed with the right tools and materials, you can solve this problem and keep your F150 dry. Don’t put it off. Fixing the problem early stops further damage. Inspecting your truck regularly helps you keep it in great shape. You can avoid bigger problems down the road.