How To Fix F150 4×4 Not Engaging: A Simple Guide
Having your Ford F150’s four-wheel-drive system not work can be frustrating. Many truck owners face this, especially those new to off-roading or vehicle maintenance. Figuring out how to fix f150 4×4 not engaging can feel challenging. However, it’s often simpler than you think. This guide will walk you through the most common issues and provide clear, step-by-step solutions to get your 4×4 back in action. Let’s get started!
Common Causes Of F150 4×4 Problems
When your F150’s 4×4 doesn’t engage, it’s often due to a few primary culprits. These range from electrical issues, like a faulty switch or wiring problems, to mechanical issues within the transfer case or front axle. Understanding these common problems is the first step toward a fix. You might be dealing with a blown fuse, a malfunctioning actuator, or even a problem with the vacuum lines that control the system. Pinpointing the exact cause can save time and money. We’ll explore these causes further, providing details and troubleshooting steps. That way, you’ll know how to get your truck’s 4×4 working properly.
Electrical System Issues
The electrical system is the control center for your F150’s 4×4. The system has switches, relays, and actuators. All need to work together for the four-wheel-drive to engage properly. A simple problem, like a blown fuse, can prevent the entire system from functioning. More complex issues, like a damaged wire or a bad switch, will also affect things. Checking the electrical components is often the first step in diagnosing a 4×4 problem.
- Fuses: Fuses protect the electrical circuits from overloads. A blown fuse will cut power to the 4×4 system. Find the fuse box, consult your owner’s manual for the correct fuse number, and check the fuse.
- Relays: Relays act as electronic switches, controlling the flow of power to different parts of the 4×4 system. A faulty relay might not send power to the necessary components. You can test a relay using a multimeter or by swapping it with a known good relay.
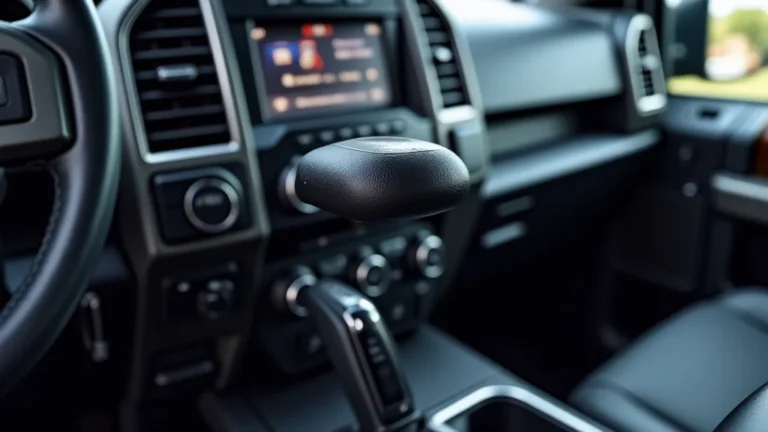
- 4×4 Switch: The 4×4 switch in your cabin is the command center. If it’s faulty, it won’t signal the system to engage 4×4. Test the switch with a multimeter to ensure it’s functioning correctly. Sometimes, dirt or debris can cause a switch to malfunction; cleaning the switch may solve the problem.
- Wiring and Connectors: Inspect all the wiring and connectors associated with the 4×4 system. Look for any damaged wires, loose connections, or corrosion. These issues can disrupt the electrical signals needed for the 4×4 to work. Use electrical contact cleaner to clean any corroded connectors.
It’s important to remember that electrical troubleshooting can sometimes be tricky. Always disconnect the negative battery cable before working on electrical components to prevent shorts. If you’re not comfortable with electrical work, consider seeking help from a professional mechanic.
Mechanical Components And Their Issues
Beyond the electrical system, mechanical parts play a huge role in the operation of your F150’s 4×4. The transfer case, front axle, and related components must all function correctly. Problems with these parts often manifest as grinding noises, failure to engage, or unusual behavior when the 4×4 is engaged. Knowing what to look for can help you diagnose mechanical problems.
- Transfer Case: The transfer case splits the engine’s power between the front and rear axles. A common problem is a worn-out or damaged transfer case chain or gears. Low fluid levels or contaminated fluid can also cause problems. Regular fluid changes are vital for extending the transfer case’s life.
- Front Axle Actuator: The front axle actuator engages and disengages the front axle. This helps transfer power to the front wheels. A faulty actuator can prevent the 4×4 from engaging. You might hear a clicking or buzzing sound from the actuator when it’s malfunctioning.
- Vacuum Lines: Some F150 models use a vacuum system to engage the 4×4. Leaks in the vacuum lines can prevent the system from working. Check the lines for cracks, disconnections, or leaks. A simple visual inspection may reveal the issue.
- Shift Motor: The shift motor on the transfer case is responsible for shifting between 2WD, 4H, and 4L. If the shift motor fails, your 4×4 will not engage. You might hear the motor attempting to shift, but the gears do not move.
Addressing mechanical problems often involves more hands-on work. You may need to replace components like the transfer case, axle actuator, or vacuum lines. Regular maintenance, such as changing fluids and checking for leaks, can help to prevent these mechanical issues.
Troubleshooting Steps For A Non-Engaging 4×4
When the 4×4 fails to engage, systematic troubleshooting is essential. Start with the simplest checks and then move toward more complex ones. Using a methodical approach will help you isolate the problem. This saves time and minimizes the chance of unnecessary repairs. A step-by-step approach guides you through common issues. It ensures you don’t miss anything crucial.
Preliminary Checks
Start with some quick and easy checks before you get into anything complicated. These initial steps can often pinpoint the problem. They may save you a lot of time and effort.
- Check the 4×4 Switch: Make sure the switch is in the desired position (4H or 4L). Then, try cycling through the different settings to see if anything changes. Sometimes, a simple reset can fix the issue.
- Inspect the Fuses: Locate the fuse box and consult your owner’s manual to find the fuse for the 4×4 system. Pull the fuse and check if it’s blown.
- Check the Fluid Levels: Make sure the transfer case and front axle have adequate fluid levels. Low fluid can cause problems with the 4×4 engaging. Check for any leaks and top off the fluid if necessary.
- Look For Warning Lights: Pay attention to any warning lights on your dashboard, like the “Check Engine” light or a 4×4-specific light. These lights often signal issues that need immediate attention.
These preliminary checks are quick and easy to perform. They can often provide a quick fix. If the problem persists, move on to more detailed troubleshooting.
Advanced Diagnostic Techniques
When preliminary checks don’t work, more advanced techniques are needed. These may include using diagnostic tools, inspecting components, and testing electrical circuits. These steps will help you dig deeper into the problem. You might need to use specialized tools to diagnose the issue correctly.
- Use a Scan Tool: Connect an OBD-II scanner to your truck’s diagnostic port. Look for any trouble codes related to the 4×4 system. These codes can provide valuable clues about the problem.
- Test the Actuator: If you suspect a faulty actuator, test it by applying power directly to the motor. You should hear it engage. If not, the actuator might need replacement.
- Check the Transfer Case: If you suspect an issue with the transfer case, check for leaks and listen for any unusual noises. You may need to remove the transfer case to inspect the internal components.
- Inspect Vacuum Lines: If your truck uses a vacuum system, inspect all vacuum lines for leaks or damage. Use a vacuum gauge to check for proper vacuum levels.
These advanced techniques require some level of technical skill. It is best to consult a professional mechanic if you are not comfortable with these procedures.
Detailed Steps On How To Fix F150 4×4 Not Engaging
Let’s explore detailed steps on how to fix f150 4×4 not engaging. We’ll go step by step, from the simplest fixes to more complex repairs. This ensures you can address the issue thoroughly.
Step-By-Step Guide To Electrical Repairs
Many 4×4 problems stem from electrical issues. Following these steps can help diagnose and fix problems with electrical components.
- Check Fuses and Relays: Begin by inspecting the fuse box for any blown fuses.
- Test the 4×4 Switch: Use a multimeter to test the 4×4 switch. Set the multimeter to test for continuity. Touch the probes to the switch terminals and move the switch through its settings. The multimeter should indicate continuity in the correct positions.
- Inspect Wiring and Connectors: Carefully examine all wiring and connectors associated with the 4×4 system. Look for damaged wires, loose connections, or corrosion. Clean any corroded connectors with electrical contact cleaner and ensure secure connections.
- Test the Actuator: Disconnect the electrical connector from the actuator. Connect a 12-volt power source directly to the actuator terminals. If the actuator engages, the wiring or switch is the problem. If it doesn’t, the actuator may need to be replaced.
Electrical issues can be tricky. It’s often best to consult a professional mechanic if you’re not comfortable working with electrical components.
Mechanical Component Repairs
If electrical fixes don’t work, mechanical repairs may be needed. Here’s a guide to addressing common mechanical issues that prevent 4×4 engagement.
- Inspect the Transfer Case: Check the transfer case for leaks and ensure the fluid level is correct. If the fluid is low or contaminated, change the fluid and look for any unusual metal shavings. These can indicate internal wear.
- Test the Front Axle Actuator: Check the front axle actuator by applying power to it directly. If the actuator doesn’t engage, it may need to be replaced.
- Check Vacuum Lines: For models that use a vacuum system, inspect all vacuum lines for leaks, cracks, or disconnections. Use a vacuum gauge to ensure proper vacuum levels. Replace any damaged lines.
- Shift Motor Inspection: If your truck uses a shift motor on the transfer case, check its functionality. Listen for the motor attempting to shift. But the gears aren’t engaging. The motor may be faulty and need replacement.
Mechanical repairs often require more specialized tools and knowledge. If you’re not comfortable with mechanical work, seek help from a qualified mechanic. This will help you get your F150 back in shape.
Real-Life Scenarios And Solutions
Sometimes, seeing how others have solved similar problems can be very useful. Here are a few real-life examples and scenarios showing you how to fix f150 4×4 not engaging. These illustrate common issues and their solutions.
- Scenario 1: Fuse Issue. A driver reported their 4×4 stopped working after going through a deep puddle. After inspecting the fuses, they found a blown fuse. Replacing the fuse fixed the problem.
- Scenario 2: Actuator Failure. One F150 owner noticed the 4×4 would not engage, and they heard clicking noises coming from the front axle. They replaced the front axle actuator, which solved the issue.
- Scenario 3: Vacuum Leak. A driver’s 4×4 would intermittently engage. They found a cracked vacuum hose that was causing the problem. Replacing the hose restored full 4×4 function.
These scenarios highlight the importance of methodical troubleshooting. They show how you can often fix your F150’s 4×4 problems with a bit of patience and some basic tools.
Preventive Maintenance For The 4×4 System
Preventive maintenance can go a long way in ensuring your F150’s 4×4 system remains reliable. Regular care helps to spot and address potential problems early on. This will prevent major repairs down the road.
- Regular Fluid Changes: Change the transfer case fluid and front axle fluid at the intervals recommended in your owner’s manual. This keeps your components lubricated and reduces wear.
- Check for Leaks: Regularly inspect the transfer case, front axle, and vacuum lines for any leaks. Addressing leaks immediately prevents further damage.
- Engage 4×4 Regularly: Engage your 4×4 system periodically, even if you don’t need it. This keeps the components lubricated and prevents them from seizing.
- Inspect Electrical Connections: Check all electrical connectors and wiring for corrosion or damage. Cleaning or replacing these connections ensures proper function.
Implementing a regular maintenance schedule will maximize the lifespan of your 4×4 system. It will also help ensure that your truck performs reliably in all driving conditions.
Frequently Asked Questions
Question: What’s the first thing I should check if my 4×4 isn’t working?
Answer: Always start with the basics: check the fuse for the 4×4 system. Consult your owner’s manual for its location. A blown fuse is a common and easy fix.
Question: How often should I change the fluid in my transfer case?
Answer: Check your owner’s manual for the recommended interval. The typical range is between 30,000 to 60,000 miles. Regular fluid changes are crucial for the transfer case’s health.
Question: What does the front axle actuator do?
Answer: The front axle actuator engages and disengages the front axle. This allows the transfer of power to the front wheels when you engage the 4×4 system.
Question: What are the signs of a failing transfer case?
Answer: Look for grinding noises when engaging the 4×4, difficulty shifting, or fluid leaks around the transfer case. Metal shavings in the fluid also indicate a problem.
Question: Can I drive my F150 on the road with the 4×4 engaged?
Answer: Driving on paved roads with the 4×4 engaged can cause damage to your drivetrain. Only engage 4×4 when driving on loose surfaces like dirt, snow, or gravel.
Final Thoughts
Troubleshooting how to fix f150 4×4 not engaging can be manageable with the right approach. Starting with simple checks, like fuses and switches, is usually enough. Progressing to more detailed inspections of electrical and mechanical components can help to pinpoint the root cause of the problem. Remember, systematic troubleshooting and the right tools can often lead to a quick fix. Addressing mechanical failures, like transfer case issues or actuator problems, requires more in-depth work but is still within reach for many DIY mechanics. By following the steps in this guide, you should be well on your way to getting your F150’s 4×4 system back to its best. Don’t be afraid to take things one step at a time, and consider seeking help from a professional when needed. With a little effort, you can ensure your truck is ready for any challenge.