Quick DIY F150 Bed Extender Installation Made Simple
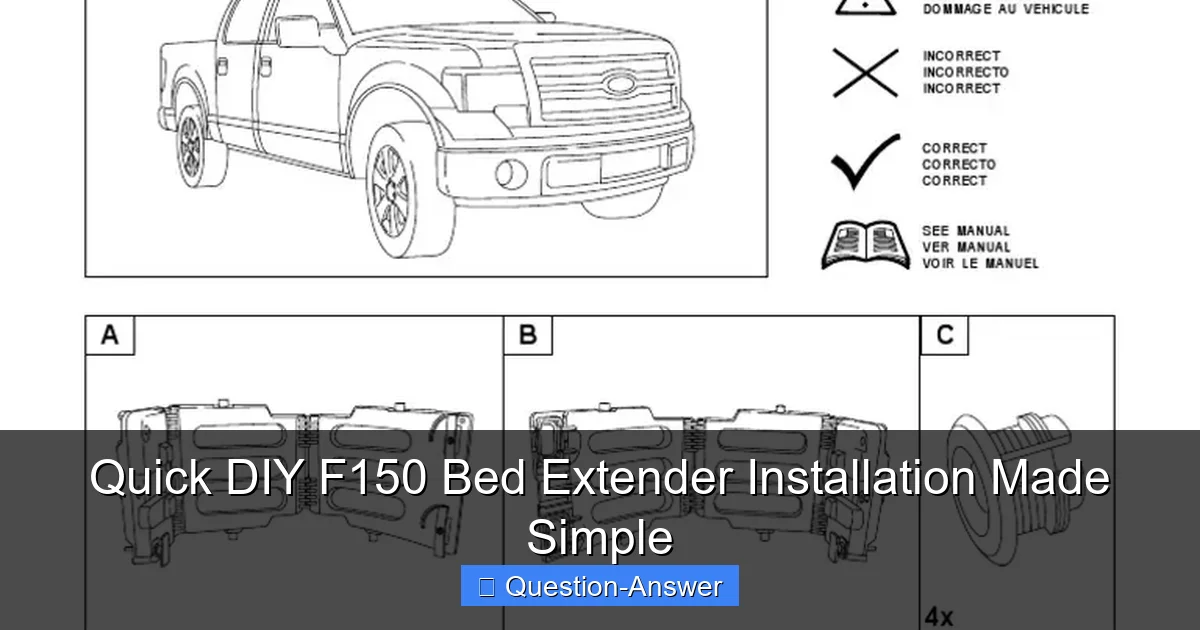
Featured image for f150 bed extender installation
Image source: imgv2-2-f.scribdassets.com
Transform your F150’s cargo capabilities with a surprisingly simple and quick DIY bed extender installation. This essential upgrade can be completed with minimal tools, offering a significant boost in usable bed length for larger hauls. Get ready to easily secure longer items and maximize your truck’s versatility in no time.
Quick DIY F150 Bed Extender Installation Made Simple
Ever find yourself needing just a *little* more bed space in your F150 for that lumber, those kayaks, or even just extra camping gear? It’s a common scenario, and frankly, a bit frustrating when you’re trying to make everything fit. That’s where an F150 bed extender comes in super handy, turning your truck into an even more versatile workhorse. Good news! Installing one yourself is absolutely within reach, even if you’re not a seasoned mechanic. I remember the first time I tackled an F150 bed extender installation, a little nervous but totally ready for a new project, and it turned out to be one of the easiest upgrades I’ve done.
It really is a straightforward job that you can easily do in your driveway with a few basic tools. No need to pay a shop when you can proudly say you did it yourself! This guide will walk you through everything you need to know to make your F150 bed extender installation a smooth and successful experience.
So, how do you tackle an F150 bed extender installation and get it right the first time?
Getting your F150 bed extender installation just right is all about a bit of preparation and following a few key steps. Trust me, it’s not rocket science, and you’ll be super proud once it’s done.
First off, before you even think about grabbing a drill, always read the instructions that come with your specific bed extender. While the general process is similar, there might be unique details for your model. Gather your tools: typically, you’ll need a drill, drill bits (usually 1/4″ and 3/8″), a tape measure, a marker or pencil, a socket wrench set, and maybe a utility knife. Having a friend to help hold things steady is a huge bonus!
Here’s the step-by-step lowdown:
- Unpack and Check: Lay out all your parts. Make sure everything is there and nothing looks damaged. This is your first quality check.
- Position the Brackets: This is arguably the most crucial step for your F150 bed extender installation. You’ll need to mark where the mounting brackets will go on your truck’s tailgate. Most kits provide templates or specific measurements. Don’t rush this part! Measure twice, even three times. I usually use painter’s tape to mark the spots first, so I can adjust before making any permanent marks.
- Pilot Holes First: Once your marks are perfect, grab a small pilot drill bit (like 1/4 inch) and drill a small pilot hole. This helps prevent your main drill bit from “walking” or going off-center. My buddy once skipped this and his hole ended up crooked – a bit frustrating to fix!
- Drill Main Holes: Now, switch to the larger drill bit (often 3/8 inch or whatever your instructions specify). Drill the main holes for the mounting bolts. Be careful not to press too hard, and make sure you’re drilling straight. Crucially, check underneath the bed for any wires or lines before you drill! This is a common oversight that can lead to big headaches.
- Mount the Brackets: Attach the mounting brackets to the drilled holes using the provided hardware. Often, these are bolts that go through the bed and are secured with nuts on the underside. Hand-tighten everything at first.
- Assemble the Extender: While the brackets are cooling, assemble the bed extender itself according to the instructions. This usually involves bolting a few sections together. Again, don’t over-tighten until it’s all together.
- Attach to Brackets & Test: Now, carefully lift the assembled bed extender and attach it to the mounted brackets. This is where that extra set of hands comes in handy! Once it’s attached, fully tighten all the bolts, making sure everything is secure but not so tight you strip the threads.
- Final Checks: Test the extender’s movement. It should pivot smoothly in and out of the bed. Make sure it latches securely when flipped into position. If it feels stiff or binds, loosen bolts slightly, adjust, and re-tighten. I always give the bolts a quick check after a week or two of use, just to be safe.
That’s it! Your F150 bed extender installation is complete. You’ve added fantastic utility to your truck, and you did it all yourself. This whole process usually takes me about an hour or two, depending on how much I chat with the dog. It’s an incredibly rewarding DIY project that really pays off every time you haul something long.
Now, with your new bed extender, those longer loads that used to be a hassle become a breeze. Whether it’s lumber for a home project or those weekend adventure toys, you’ve just made your F150 even more capable. Enjoy the extra space and the satisfaction of a job well done!