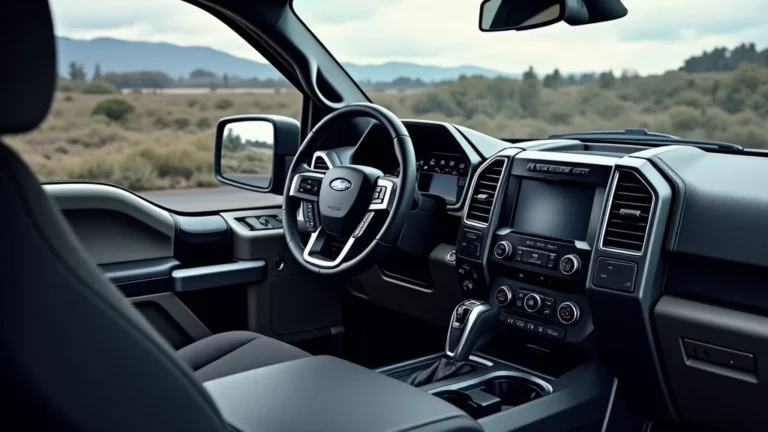
F150 Headlight Electrical Issues Explained for Owners
If you’re an F150 owner experiencing problems with your headlights, you’re not alone. Many folks run into f150 headlight electrical issues. These problems can seem tricky, especially if you’re new to car repairs. But don’t worry! This guide will break down these issues step by step. We’ll explore the common causes and how you can diagnose and fix them. Get ready to learn about simple solutions you can try at home. Let’s get started and solve those headlight woes!
Key Takeaways
- Learn the common reasons behind F150 headlight problems.
- Discover how to test your headlights and find the source of the issue.
- Explore easy troubleshooting tips for common electrical issues.
- Understand the importance of fuses, relays, and ground connections.
- Find out how to safely replace bulbs and other headlight components.
- Gain confidence in tackling basic headlight repairs on your F150.
Common Causes of F150 Headlight Problems
F150 headlight electrical issues can stem from various sources. These often begin with a faulty light bulb but can extend to wiring or other components. This section aims to provide a basic overview of what goes wrong with these headlight systems. From simple bulb failures to more complicated electrical circuit malfunctions, understanding the common causes is the first step in addressing your F150’s headlight troubles. Let’s explore the typical problems that plague these systems. This knowledge enables better diagnostic work and helps you find the right repair solution.
Faulty Light Bulbs
The most frequent cause of f150 headlight electrical issues is a blown or malfunctioning light bulb. Headlight bulbs have a limited lifespan and will eventually burn out. It’s often the first thing to check. Other problems can speed up the bulb’s demise. Vibration from driving on rough roads, or even simply the repeated on-and-off cycling of the headlights, can affect the bulb’s lifespan. Identifying a bad bulb is usually easy. However, don’t just replace the bulb. Check the surrounding components to make sure the problem doesn’t exist elsewhere.
- Short Lifespan: Headlight bulbs are designed to last for a certain amount of operating hours. If your bulbs burn out very quickly, there might be other issues affecting them.
- Filament Breakage: The filament inside a bulb can break due to vibration or power surges. This immediately stops the bulb from working.
- Types of Bulbs: F150s use different bulb types (halogen, LED, etc.). Make sure you are using the correct type for your vehicle.
- Easy Replacement: Replacing a burned-out bulb is one of the simplest fixes. Always disconnect the negative battery cable before starting the work.
For example, if the bulb is frequently burning out on one side, there may be an electrical problem, such as a short circuit or overvoltage. This will need more advanced diagnosis. Make sure the
Wiring Problems
Wiring issues are also a big cause of f150 headlight electrical issues. Wires can corrode, break, or become damaged over time. Exposure to weather, heat, and vibration can affect the wiring harness. Problems in the wiring system can affect the power supply to your headlights. These problems are often challenging to locate, as they involve electrical circuits and potential shorts. Identifying wiring problems requires careful examination and testing. Always look for visible damage, corrosion, or loose connections. Let’s examine how to recognize and address these issues to keep your truck’s headlights working.
- Corrosion: Corrosion forms at connectors and terminals, blocking current flow. This can cause dim headlights or complete failure.
- Damaged Wires: Wires can be damaged by rubbing, heat, or impacts. This can lead to short circuits.
- Loose Connections: Loose wires at connectors can interrupt the electrical circuit. This can lead to intermittent headlight operation.
- Rodent Damage: Curious rodents like chewing on wiring, causing severe damage and electrical malfunctions.
One of the more common wiring problems is shorts, which cause bulbs to blow. Open circuits can prevent the headlights from working at all. Wiring issues often require careful inspection, using a multimeter to check for continuity. Many problems can be solved by replacing the affected wires or connectors. If you’re not comfortable with electrical work, consider seeking professional help.
Fuses and Relays
Fuses and relays are also very important in F150 headlight systems. Fuses are safety devices designed to protect the electrical circuits from overloads. If there’s too much current, the fuse will blow, preventing damage to the components. Relays are switches that control the flow of electricity to the headlights. These control circuits and headlight power from the battery. When the headlight switch is activated, the relay closes, allowing power to flow to the headlights. If either a fuse or a relay fails, it can cause headlight problems. Knowing how they work and where they’re placed is essential.
- Fuse Function: Fuses protect the electrical system from overcurrent situations that can damage components.
- Relay Function: Relays help manage the high current demands of headlights by controlling the power supply.
- Fuse Box Locations: Fuses are found in the fuse box, usually located under the hood or inside the cabin.
- Relay Locations: Relays for headlights are often found in the same fuse box as the fuses.
If a headlight isn’t working, the fuse should be checked first. If the fuse is blown,
Ground Connections
The ground connection is often overlooked. But it’s an important part of the f150 headlight electrical issues. A solid ground connection is essential for completing the electrical circuit. Without a good ground, the headlights may not function correctly. Corrosion or loose connections at the ground points can disrupt the circuit, causing dim or flickering headlights. Inspecting and cleaning ground connections is an often-overlooked but vital task. Let’s examine how to locate these crucial points and make sure they’re in good shape for reliable headlight function.
- Grounding Function: Grounding creates a return path for electrical current, completing the circuit and allowing the lights to work.
- Common Ground Points: Ground connections are typically located near the headlights, engine bay, and chassis.
- Corrosion Issues: Corrosion buildup at ground points can cause resistance, reducing current flow.
- Inspection and Cleaning: Periodically inspect the ground connections, clean any corrosion, and ensure they are tightly connected.
If you’re experiencing headlight problems, start by checking the ground connections. Look for signs of corrosion or looseness. Remove any corrosion with a wire brush or sandpaper. Make sure the connections are tight. A poor ground connection is a common cause of electrical issues and can be the reason behind headlight problems. Ground problems can cause the headlights to flicker, be dim, or not turn on at all. Sometimes, adding an extra ground wire can help improve performance.
Diagnostic Steps for Headlight Electrical Issues
Finding the source of f150 headlight electrical issues requires a systematic approach. Here’s a set of steps to use to identify the problem accurately. These steps focus on the electrical parts of the headlights. This involves checking fuses and relays, examining wiring, and testing the bulbs. The following steps will guide you through a logical process that will help you pinpoint the issue. This is crucial for making the correct repairs. Let’s look at how to approach diagnosing these problems for better outcomes.
Check the Fuses and Relays
Start with the fuses and relays. These are the easiest components to inspect and
- Locate the Fuse Box: Find the fuse box.
- Consult the Owner’s Manual: Identify the correct fuse for the headlights.
- Inspect the Fuses: Check each fuse for any signs of damage or a blown element.
- Check the Relays: Test the relays or replace them if you suspect a problem.
Replacing a fuse or relay is often a simple fix. If the new fuse blows immediately, there is an electrical problem. If the fuse is okay, move on to the next step. If you’re not sure which fuse to check, the owner’s manual is your best resource. If you have a multimeter, you can check the relay’s function. The key is to start with the simple checks first, then move on to more complicated tests. Remember to disconnect the battery before you start working on any electrical components.
Test the Light Bulbs
Testing the light bulbs is another step. To test the bulbs, you will need to remove them from the headlight assembly. Check the bulbs for any visible signs of damage, like a broken filament or a darkened glass. If the bulb appears normal, you’ll need to test it with a multimeter. Set the multimeter to the ohms setting. Then, place the multimeter probes on the two contacts of the bulb. If the multimeter shows a reading of zero or a very low resistance, the bulb is good. An open circuit (infinite resistance) means the bulb is bad. Replace any bad bulbs.
- Remove the Bulb: Take the bulb out of the headlight assembly.
- Visual Inspection: Check for any broken filaments or darkened glass.
- Use a Multimeter: Test the bulb for continuity using a multimeter.
When replacing a halogen bulb, don’t touch the glass part with your bare hands, as the oils from your skin can cause premature failure. Always make sure the replacement bulb is the correct type and wattage for your F150. Replacing a bulb is usually a quick fix, so it’s a good place to start your diagnostics. When putting the new bulb back in, ensure it is seated correctly and locked into place.
Inspect the Wiring and Connectors
Inspect the wiring and connectors next. Wiring problems are one of the most complex f150 headlight electrical issues. Wiring damage can lead to intermittent failures. Start by examining the wiring harness connected to the headlights. Look for any signs of damage. Check for cut or frayed wires, corrosion, or loose connections. Inspect the connectors for corrosion. Disconnect and reconnect the connectors to ensure a good connection. If you see damage, you’ll need to repair or replace the affected wiring. You can use a multimeter to check for continuity in the wires.
- Visual Inspection: Look for damaged wires, corrosion, and loose connections.
- Follow the Wiring Harness: Trace the wiring back from the headlights.
- Check the Connectors: Disconnect and reconnect to ensure a good connection.
- Use a Multimeter: Check for continuity and shorts in the wiring.
Wiring repairs can be challenging, but it’s important to do them properly. If you find a broken wire, you can repair it by using wire connectors or soldering the wires together. Make sure to use heat shrink tubing to insulate the connection. If you’re not comfortable with electrical work, consider seeking professional help. Addressing wiring issues quickly will prevent more serious electrical problems and help keep your headlights functioning correctly.
Check Ground Connections
Checking the ground connections is another important step in fixing f150 headlight electrical issues. Ground connections are essential for completing the electrical circuit. A poor ground connection can cause dim headlights, flickering lights, or complete failure. Locate the ground points. Ground points are often near the headlights or on the chassis. Inspect the ground connections for any corrosion or rust. Clean the ground connections with a wire brush or sandpaper to remove any corrosion. Make sure the ground connections are secure and tight. If they are loose, tighten them.
- Locate Ground Points: Find the ground connections near the headlights.
- Inspect for Corrosion: Check the ground points for corrosion or rust.
- Clean and Secure: Clean the connections and ensure they are tight.
- Additional Grounding: Consider adding an extra ground wire to help improve the system.
Sometimes, the ground connection may need to be moved to a cleaner spot. A good ground connection is crucial for the proper operation of the headlights. A simple check and cleaning of these connections can often solve many electrical problems. Ensure that the ground connections are free of any rust or corrosion for consistent and reliable operation. Adding an additional ground wire can help solve certain electrical issues.
Step-by-Step Bulb Replacement
Replacing a headlight bulb is a common task. Here’s how to do it in an F150. Remember, it’s a standard approach that can resolve many f150 headlight electrical issues. The process involves safety precautions, removing the old bulb, and installing the new one correctly. Following these steps can give you working headlights.
Gather Your Tools and Materials
Before you begin, gather the necessary tools and materials. You’ll need a new headlight bulb of the correct type and a few basic tools. The correct bulb type is important for the headlights to work well. This guarantees that your new bulb will work correctly. It’s best to have the right tools ready. This makes the job quicker and safer. Having everything at hand prevents interruptions.
- New Headlight Bulb: Make sure it’s the right type for your truck.
- Gloves: Wear gloves to keep the bulb clean.
- Screwdriver or Wrench: May be needed to remove the headlight assembly.
- Owner’s Manual: To check your bulb type and headlight assembly instructions.
Before you start, disconnect the negative battery cable. This keeps you safe from electric shock. Once you have all your tools and the new bulb, you’re ready to start. Take your time and double-check everything as you go. Replacing the bulb is a simple task that you can handle yourself. The correct bulb type is often printed on the old bulb. If not, consult your truck’s manual.
Accessing the Headlight Assembly
The next step is to access the headlight assembly. The steps depend on your F150. You may need to remove some parts, such as trim pieces or the grille. For most models, the headlight assembly is held in place by screws or clips. You may need to use a screwdriver or wrench to remove these. Once you remove the screws or clips, gently pull the headlight assembly forward. Be careful not to damage the wiring. This provides access to the bulb. Make sure to do this carefully.
- Identify the Fasteners: Locate the screws or clips that hold the headlight assembly.
- Remove the Fasteners: Use the right tool to remove the screws or clips.
- Gently Remove the Assembly: Pull the assembly forward without pulling on wires.
- Set the Assembly Aside: Place the assembly somewhere safe to access the bulb.
Sometimes, the headlight assembly is held in place by a few screws. Consult your owner’s manual for specific instructions for your F150 model. Taking your time here prevents damage to the truck and its wiring. The assembly should come out easily. If it does not, you might need to find hidden fasteners or clips. Once you’ve removed the assembly, you’ll be able to access the headlight bulb directly. Now you’re ready to swap out the old bulb for the new one.
Removing the Old Bulb and Installing the New One
With the headlight assembly open, you can now remove the old bulb and put in the new one. The bulb is held in place by a connector and possibly a retaining clip. Disconnect the electrical connector from the back of the bulb. Then, remove the retaining clip. The clip holds the bulb in place. Carefully pull the old bulb out of the headlight assembly. Make sure the new bulb is the same type. Insert the new bulb into the headlight assembly. Make sure it’s seated properly. Then, secure the retaining clip. Reconnect the electrical connector.
- Disconnect the Connector: Carefully disconnect the electrical connector from the old bulb.
- Remove the Retaining Clip: Release the clip to free the old bulb.
- Insert the New Bulb: Place the new bulb into the assembly.
- Secure the New Bulb: Fasten the retaining clip and reconnect the electrical connector.
After putting in the new bulb, carefully put the headlight assembly back into place. Ensure it’s aligned correctly. The correct way to install the bulb is important for its long life. Make sure it’s seated well. Then, fasten the retaining clip. Be careful not to touch the glass part of the bulb with your bare hands. The oils from your skin can cause premature failure. Always double-check your work to ensure everything is connected properly. Turn on your headlights and see if they work.
Reassembly and Testing
The final step is reassembly and testing. First, carefully put the headlight assembly back into place. Align it properly and reattach any screws or clips. Then, reconnect the negative battery cable. Turn on your headlights and test them. If they work, you’ve successfully replaced the bulb. If the headlights still don’t work, there might be another problem. In that case, you should check the fuses, wiring, or other components. If the new bulb blows right away, that is a sign of an electrical issue. Check the wiring or other components. It’s always great when a job is finished properly.
- Reinstall the Headlight Assembly: Put the headlight assembly back into place.
- Reattach Fasteners: Use the screws or clips to secure the assembly.
- Reconnect the Battery: Connect the negative battery cable.
- Test the Headlights: Turn on the headlights to check that they work.
If the headlights don’t work after replacing the bulb, start by rechecking all your connections. Make sure everything is secure and connected. Double-check the fuse. If you’ve tried all the troubleshooting steps and the headlights still don’t work, it’s a good idea to seek help from a professional. If you’re not comfortable working with electrical systems, this is a must. If everything seems fine, it may be a more serious electrical issue. A professional can quickly identify the problem and repair it. They’ll also ensure everything works safely and correctly.
Troubleshooting Other Electrical Problems
Beyond bulb replacement, you may encounter other f150 headlight electrical issues. Often, this requires deeper troubleshooting. This involves checking fuses and relays. A more in-depth look into the wiring will be necessary. Understanding how to handle these issues can save you time and money. Here are some of the most common issues you might face. These are typically more complex than a bulb replacement.
Checking the Wiring Harness
Checking the wiring harness is an important part of solving f150 headlight electrical issues. The wiring harness carries power to your headlights. Damage to the wiring can cause all sorts of problems. Start by visually inspecting the wiring harness. Look for any signs of wear, such as cuts, fraying, or burns. Follow the wiring from the headlight assembly back to the fuse box. Also, look for any damage. Check the connectors. Connectors can corrode or become loose. Disconnect each connector and look for corrosion. Clean them with electrical contact cleaner, and make sure they snap back together firmly. You can use a multimeter to check the wires for continuity.
- Visual Inspection: Check the wiring harness for any physical damage.
- Trace the Wires: Follow the wiring back to the fuse box.
- Inspect Connectors: Look for corrosion or loose connections.
- Use a Multimeter: Test the wires for continuity.
If you find any damaged wires, you can repair them by using wire connectors or soldering. Make sure to use heat shrink tubing to insulate the connection. If the wiring harness is severely damaged, you may need to
Checking the Headlight Switch
The headlight switch is a key component. The headlight switch controls the headlights. A faulty switch can cause your headlights to malfunction. This section will walk you through how to troubleshoot the switch. To start, check the switch. Examine it for signs of damage or wear. See if the switch feels loose or if it does not click. If the switch seems damaged, it may be the cause of the problem. Use a multimeter to test the switch. Set the multimeter to the continuity setting. Disconnect the wiring connector from the headlight switch. Then, put the probes of the multimeter on the terminals of the switch. Activate the switch. A good switch should show continuity when turned on and no continuity when off.
- Visual Inspection: Check the switch for any visible damage.
- Inspect the Connector: Make sure the connector is secure.
- Test with a Multimeter: Check the switch for continuity.
If the switch doesn’t function correctly, it’s a sure sign that the switch has problems. A faulty switch will cause all sorts of problems. Replacing the headlight switch can resolve several f150 headlight electrical issues. After you replace the switch, be sure to test the headlights. If the lights work after the switch is replaced, then that’s the problem fixed. Make sure you match the replacement switch to the model of your F150. If you are not comfortable doing electrical work, it is best to consult a professional.
Testing the Relays
Relays are another important part of the f150 headlight electrical issues. A relay controls the power to the headlights. These relays are commonly located in the fuse box. Use your owner’s manual to find the correct relay. You can test the relay with a multimeter. Remove the relay from the fuse box. Then, set the multimeter to the continuity setting. Put the multimeter’s probes on the terminals of the relay. You should hear a click when power is applied, indicating the relay is working. If the relay doesn’t click or the multimeter does not show continuity, the relay might be bad. Consider replacing the relay if the testing suggests a problem.
- Locate the Relay: Find the headlight relay in the fuse box.
- Remove the Relay: Take the relay out of the fuse box.
- Use a Multimeter: Check the relay with a multimeter.
To
Addressing Common Electrical Shorts
Electrical shorts are among the most difficult f150 headlight electrical issues. A short circuit happens when electricity takes an unintended path. This can cause various problems. Shorts can cause fuses to blow, headlights to flicker, or lights to stop working. These problems are hard to locate. Inspect all the wiring. Look for damaged insulation or exposed wires. Look for any wires that may be rubbing against metal parts. Use electrical tape or wire loom to protect the wires. Shorts can also occur in connectors. Clean and secure all connectors.
- Inspect Wiring: Check for damaged or exposed wires.
- Examine Connectors: Clean and secure all connectors.
- Use a Multimeter: Find a short circuit with a multimeter.
- Consult a Professional: Consider professional help.
Locating a short can be tough. Using a multimeter is often needed. Set the multimeter to the resistance setting. Disconnect the negative battery cable. Then, disconnect the suspect component. Place the multimeter probes on each of the wires. If the multimeter shows zero resistance, there is a short. A professional can help you find and fix the short quickly. You should have your truck looked over by someone who knows about electrical circuits. A good professional will locate and repair the short.
Frequently Asked Questions
Question: Why do my F150 headlights keep burning out?
Answer: Frequent bulb failure can result from overvoltage, loose connections, or a short circuit. Check your wiring and connections for damage.
Question: Where can I find the headlight fuse?
Answer: The headlight fuse is typically located in the fuse box under the hood or inside the cabin. Check your owner’s manual.
Question: What do I do if one headlight is dim?
Answer: A dim headlight might be caused by a bad ground connection, a corroded connector, or a failing bulb. Check these components.
Question: How do I test the headlight switch?
Answer: You can test the headlight switch by using a multimeter to check for continuity. This will show whether the switch is working correctly.
Question: Can I
Answer: Yes, you can usually
Final Thoughts
Dealing with f150 headlight electrical issues can be annoying, but you can overcome these issues with a bit of know-how. We’ve covered common problems and diagnostic steps, including bulb replacement, wiring checks, and more. Following this guide will help you to identify and fix many of these problems. You’ve now gained a good understanding of what can go wrong and what to do about it. Remember to always prioritize safety when working on your vehicle’s electrical system, and never hesitate to seek help if you’re unsure. By exploring these steps, you can keep your F150’s headlights working correctly, staying safe on the road. Now you have the tools to troubleshoot and restore your F150’s lights.