Fixing F150 Interior Trim Noise: A Simple Step-by-Step Guide
If you own an F150, you’ve probably noticed it: those annoying rattles, squeaks, and buzzes coming from inside. Addressing f150 interior trim noise sources can seem like a big job if you’re new to car repairs, but don’t worry! This guide makes it easy to find and fix these issues. We’ll break down the common culprits and show you exactly what to do. Prepare to say goodbye to those unwanted sounds and enjoy a quieter ride!
Key Takeaways
- Learn the common locations where interior trim noise originates in your F150.
- Identify the tools needed to effectively diagnose and resolve trim noises.
- Discover how to safely remove and reinstall interior trim panels.
- Find simple DIY solutions for silencing rattles and squeaks.
- Understand how temperature changes can affect noise levels.
- Gain valuable tips for preventing interior trim noise from returning.
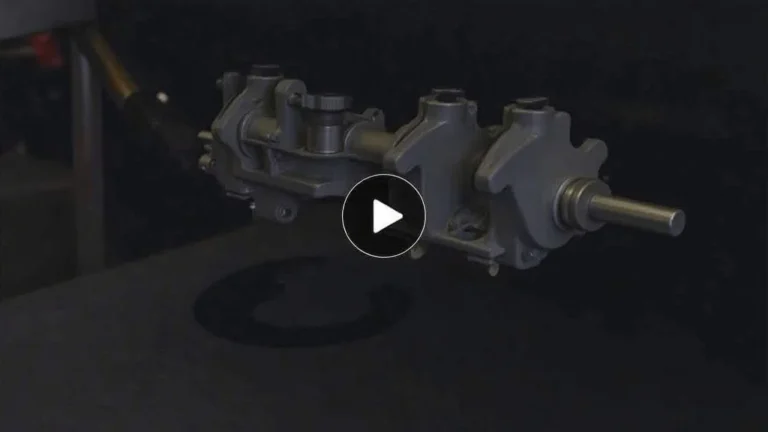
Common Culprits of F150 Interior Noise
The interior of an F150 is a complex assembly of plastic, metal, and fabric. These materials expand and contract with temperature changes and vibrations while driving. This movement can easily lead to noise. The challenge for many owners is pinpointing the exact location where the noise starts. It’s important to explore the most frequent origins to focus efforts and quickly eliminate the source.
Dashboard and Instrument Panel
The dashboard is a prime area for noise in the F150. It’s large and composed of many parts. Over time, these parts can loosen, creating gaps. You might hear rattles, especially when driving over rough roads. Also, the instrument panel, the area housing the speedometer and gauges, has various components that can vibrate.
-
Loose Clips and Fasteners: Many dashboard components are held in place by plastic clips and screws. These can loosen over time due to vibrations, causing panels to rub against each other. Replacing or reinforcing these clips is a common fix.
Dashboard clips are small, inexpensive parts that can be purchased at auto parts stores. A common fix is applying felt tape to areas where panels meet to eliminate contact and vibration.
-
Ventilation System Components: The air vents and their ductwork can rattle, especially if they are slightly misaligned. This is particularly noticeable when the HVAC system is in operation.
Inspect the vents for any loose connections. A good approach is to apply felt tape or foam tape to the edges of the vents to cushion contact with the surrounding dashboard components. This can greatly reduce noise.
-
Glove Box Issues: The glove box itself and its latch mechanism can generate noise. A loose glove box door or worn latch can create a squeak or rattle.
Check the glove box door alignment and the condition of the latch. Using a lubricant like silicone spray on the latch mechanism can often eliminate noise. Also, ensure that the contents of the glove box are not rattling.
-
Wiring Harness Contact: Wiring harnesses that run behind the dashboard can sometimes contact the dash structure and cause noise.
Tucking the wiring harnesses away from possible contact points can address this. Securing them with zip ties or adding foam tape to areas of contact is frequently an effective solution.
Door Panels
Door panels are another source of internal noise, especially on older F150 models. The constant slamming and opening of doors, along with the vibration from driving, can cause panels to shift or components to loosen. Door panels contain speakers, window controls, and various trim pieces that can contribute to interior noise.
-
Loose Door Panel Fasteners: Similar to the dashboard, door panels are held in place by screws and clips. These can loosen over time and with door use, leading to squeaks and rattles.
Removing the door panel and tightening or replacing these fasteners is a direct way to solve the problem. Adding a bit of thread locker to the screws can help to keep them secure.
-
Speaker Vibration: Speakers within the door panel can rattle, especially if the speaker or mounting hardware has loosened over time.
Check the speaker mounting screws and tighten them if necessary. Applying sound deadening material around the speaker can also help to absorb vibrations and improve sound quality.
-
Window Regulator and Motor Issues: Window regulators and their motors can develop play or wear out, resulting in noise when the window is up or down, or during its operation.
Lubricating the window tracks and motor can help. If the noise persists, it may be necessary to
-
Wiring and Door Handle Issues: Wiring harnesses and the door handle mechanisms can vibrate and produce noise. Loose wiring or a worn door handle assembly can be sources.
Secure any loose wiring with zip ties or tape. Lubricate the door handle mechanism to reduce friction and eliminate noise. If the handle has excessive play, it may need to be replaced.
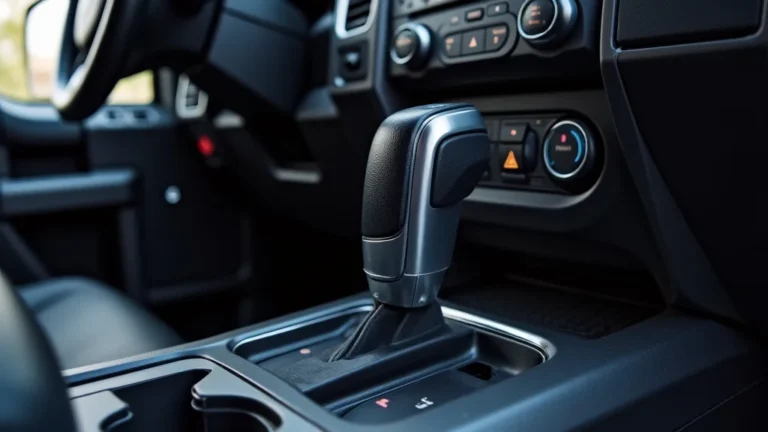
Center Console
The center console is also frequently a source of noise. With the center console located between the front seats, it houses various storage compartments, the gear selector, and often, cup holders and various electronics. The design and construction are frequently prone to rattles from loose parts or shifting objects.
-
Loose or Shifting Components: Objects stored in the center console, such as coins, keys, or loose items, can rattle. Also, the console itself can shift and cause noise.
Emptying the console and adding rubber mats or sound-dampening material is often a good first step. If the console itself is loose, check the mounting bolts and tighten them.
-
Gear Selector Mechanism: The gear selector mechanism, especially on models with column shifters, can produce noise as it is moved or while driving.
Lubricating the gear selector mechanism can solve this. Check for any loose parts or wear that might be creating friction.
-
Cup Holders and Storage Compartments: Cup holders and storage compartments, if not properly designed or worn out, can allow items to move and rattle.
Consider using rubber inserts in the cup holders and storage compartments to prevent items from rattling. Replace worn-out components if needed.
-
Loose Console Fasteners: The console itself is attached to the floor and other components with screws and bolts. These can loosen.
Tighten the fasteners that attach the console to the floor and other parts of the vehicle. Adding thread locker to these screws can help keep them from loosening again.
Tools and Materials for Noise Reduction
To pinpoint and fix f150 interior trim noise sources, you’ll need a range of tools and materials. Having the right equipment will make the job easier and more effective, ensuring that you can identify and eliminate the noise. This is the toolkit to have ready.
Essential Tools
-
Trim Removal Tools: Plastic trim removal tools are vital. Metal tools can scratch or damage your trim. They are designed to safely pry panels and trim pieces without damaging them.
A set of plastic trim removal tools includes various shapes and sizes to handle different types of trim. They’re typically inexpensive and widely available at auto parts stores or online.
-
Screwdrivers and Wrenches: A variety of screwdrivers (Phillips, flathead) and wrenches are needed to remove screws and bolts that secure trim panels and components.
Have a good set of both standard and metric tools. Consider getting a ratcheting screwdriver for easier and faster work.
-
Socket Set: A socket set is essential for removing nuts and bolts, particularly those holding larger components.
A range of socket sizes is needed, from small to medium. Ensure your set includes both standard and metric sizes to accommodate different components.
-
Flashlight: A flashlight or work light is crucial for inspecting areas that are hard to see, such as behind panels and under the dashboard.
A small, bright LED flashlight is easy to maneuver. A headlamp can be even better, as it leaves both hands free.
-
Utility Knife: A utility knife is useful for cutting felt tape, foam tape, or other materials to size.
Always use the utility knife with caution. A retractable blade is often safer, preventing accidental cuts.
Materials to Reduce Noise
-
Felt Tape: Felt tape is self-adhesive and is perfect for applying to areas where trim panels meet, to eliminate friction and prevent squeaking.
Purchase a roll of felt tape of appropriate thickness. It is easy to cut and apply. Use it on the edges of panels and where components touch to stop vibration and noise.
-
Foam Tape: Similar to felt tape, foam tape can be used as a buffer to prevent contact between components, and especially where gaps are larger.
Foam tape can be useful for filling small gaps or providing cushioning between parts. Foam tape comes in varying thicknesses.
-
Thread Locker: Thread locker, also known as Loctite, ensures screws and bolts stay secure, preventing them from loosening over time due to vibration.
Use blue thread locker for most applications. Red thread locker is for permanent applications. This material is inexpensive and available at most auto parts stores.
-
Silicone Spray: Silicone spray can be used to lubricate plastic components and eliminate squeaks and creaks, especially in door panels and the center console.
Silicone spray is ideal for lubricating plastic surfaces. Avoid using it on rubber, where it may cause damage. Use in moderation.
-
Sound Deadening Material: If you’re serious about reducing noise, consider using sound deadening material. This can be applied to door panels, the floor, and other areas.
Popular choices include Dynamat or similar products. While more expensive, sound deadening material dramatically reduces noise and is effective.
Step-by-Step Noise Diagnosis and Fixes
Diagnosing and fixing f150 interior trim noise sources is a process, but it’s manageable. Careful inspection and a methodical approach will help identify and eliminate those irritating sounds. Here’s a step-by-step guide to follow.
Step 1: Identify the Location
Pinpointing the source of the noise is the most important part of the process. This involves listening carefully and isolating the noise. It will help to reduce the time spent.
-
Drive and Listen: Drive your F150 on different road surfaces (smooth, rough) and at different speeds. This helps you identify when the noise is most noticeable.
Try driving with the radio off and the air conditioning/heater fan off to better isolate the noise. Note when the noise occurs.
-
Use a Helper: Have a friend or family member ride with you to help pinpoint the location of the noise.
Have them sit in different seats and listen. Their observations may help narrow down where the noise originates.
-
Tap and Press: While parked, tap and press various trim pieces and panels to see if you can reproduce the noise.
Start with the areas where you suspect the noise might be coming from. This can help you identify loose or vibrating components.
-
Record the Noise: If possible, record the noise with your phone. This can help you analyze the sound and share it with others.
Recording the noise can help you determine the type of noise, such as a squeak, rattle, or buzz. It may also provide clues about the source of the sound.
Step 2: Remove Trim Panels (Carefully!)
Once you’ve identified where the noise is coming from, the next step is to remove the relevant trim panels. This is where trim removal tools become invaluable. Proceed with patience and care.
-
Gather Tools: Have your trim removal tools, screwdrivers, and any other necessary tools ready. Protect your work area with a soft cloth.
Lay a soft cloth or towel down to protect the trim panels from scratches during removal and handling. This is critical for keeping everything in good condition.
-
Locate Fasteners: Identify the screws, clips, and other fasteners that hold the panel in place. Check your F150’s repair manual.
The repair manual for your F150 is the best source of information about how trim panels are attached. Note where all the fasteners are.
-
Remove Fasteners: Carefully remove the fasteners using the appropriate tools. Use a screwdriver or socket wrench for screws and bolts.
When removing screws, be careful not to strip the heads. Use the correct size screwdriver or bit. Keep fasteners organized as you remove them.
-
Pry Gently: Use your trim removal tools to carefully pry the panel away from the vehicle. Start at the edges and work your way around.
Insert the trim removal tool between the panel and the vehicle. Gently pry the panel until the clips release. Avoid using excessive force.
-
Disconnect Wiring: If the panel has electrical connections (such as for power windows or speakers), carefully disconnect them.
Note where each connector goes to ensure that you can easily reattach them. Use care when disconnecting the connectors to avoid damaging them.
Step 3: Noise Source Investigation and Fixes
With the trim panels removed, you can explore the areas where noise comes from. Focus on the possible noise sources and make fixes.
-
Inspect Fasteners and Clips: Check all fasteners and clips for looseness or damage. Tighten or replace as necessary.
Wiggle the trim panel and its components. If anything feels loose, inspect the fasteners holding it in place. Replace damaged clips.
-
Apply Felt or Foam Tape: Place felt or foam tape in areas where panels meet or rub against each other.
Apply the tape to the edges of trim panels and any areas where components touch. This will absorb vibrations and prevent noise.
-
Lubricate Moving Parts: Use silicone spray or a similar lubricant on moving parts, such as door latches and window mechanisms.
Apply the lubricant to hinges, latches, and any moving parts. Avoid using oil-based lubricants, as these can attract dirt.
-
Secure Wiring Harnesses: Ensure that all wiring harnesses are secured and not vibrating against the vehicle’s structure.
Use zip ties or tape to secure loose wiring. Ensure the wiring is not making contact with any metal components.
Step 4: Reassembly and Testing
After fixing the identified noise sources, reassemble the trim panels and test your work. Take your time to get it right. It’s an easy process with patience.
-
Reattach Wiring: Reconnect any electrical connectors you disconnected. Make sure the connections are secure.
Double-check that all electrical connectors are properly seated and secure. Improperly connected wires can cause problems.
-
Align and Reinstall Panel: Align the panel with its mounting points. Press firmly to reattach the clips.
Ensure the panel aligns properly with the mounting points. Press firmly on the panel until all the clips click into place.
-
Reinstall Fasteners: Reinstall all screws and bolts, tightening them securely but not over-tightening.
Use the appropriate tools to tighten the fasteners. Over-tightening can strip the threads or damage the panel. Add thread locker.
-
Test Drive: Take your F150 for a test drive to see if the noise is gone. Listen carefully for any new noises.
Drive on roads of various surfaces and speeds. If the noise persists, revisit the area where you made the repairs.
Here’s an example of practical solutions that can be applied to an F150:
-
Scenario 1: Dashboard Rattle. You’re driving and hear a persistent rattle coming from the dashboard. After some investigation, you find that the noise comes from the area around the instrument cluster. You remove the instrument cluster bezel, and discover that the plastic clips holding it in place have loosened. The solution is to replace the clips and add felt tape to the contact points between the bezel and the dashboard. This absorbs vibrations and keeps the bezel secure.
The result: After the fix, the dashboard rattle is gone, and the cabin is much quieter. You find the drive is more enjoyable.
-
Scenario 2: Door Panel Squeak. A squeak develops in your driver’s side door panel when driving over rough surfaces. You find that the noise happens when the door panel flexes. You remove the panel, inspect the connections and the speaker. You discover that the speaker itself is loose, causing the noise. You tighten the speaker mounting screws and apply felt tape between the speaker and the door panel.
The result: The squeak is eliminated, and you notice a much quieter interior. Driving is now a more comfortable experience.
The Effects of Temperature
Temperature changes can drastically affect interior trim noise. Materials expand and contract with temperature fluctuations, which can create or eliminate noise. Understanding this is key to addressing the noise.
-
Expansion and Contraction: Plastic, metal, and fabric expand when warm and contract when cold. This movement can cause parts to rub against each other and make noise.
When temperatures drop, materials contract, and gaps can appear. When it warms up, materials expand, and parts can press against each other.
-
Noises in Summer: In summer, heat can cause plastic to soften. This can cause components to sag or rub against each other, increasing the potential for noise.
The dashboard and door panels can be particularly susceptible to noise in summer. The sun’s heat can exacerbate the problem.
-
Noises in Winter: Cold temperatures cause materials to contract, which can increase gaps and create rattles.
In winter, you might notice new noises or that existing noises become more pronounced. Materials shrink and can lead to more vibration.
-
Solutions for Temperature-Related Noises: Consider the weather when diagnosing noise. For instance, felt tape can help address expansion in summer.
Pay attention to the temperature when investigating noises. Addressing these fluctuations can help you eliminate or reduce noises related to the weather.
Consider these examples:
-
Cold Weather Example: You notice a distinct rattle in your F150’s dashboard during winter. As the temperature drops below freezing, the plastic dashboard trim contracts, and small gaps appear between the components. These gaps allow the trim pieces to vibrate against each other when the vehicle is in motion.
The fix: By applying felt tape to the contact points between the dashboard components, you can fill the gaps. The felt tape provides a buffer that prevents the trim from rattling against each other. The result is a quieter cabin, even when the temperature is very low.
-
Hot Weather Example: You drive your F150 during a summer heatwave, and a squeaking noise starts coming from your driver’s side door panel. The heat makes the plastic door panel more pliable. The panel is rubbing against the window regulator mechanism, which causes the noise.
The fix: You remove the door panel and apply silicone spray to the areas of contact between the door panel and the window regulator mechanism. The spray lubricates the surfaces, reducing friction and the resultant squeaking. The result is that the door panel no longer squeaks, and you can enjoy the ride.
Preventing Future Noise Issues
After you have fixed the existing f150 interior trim noise sources, take steps to keep your F150’s interior quiet. Maintenance and prevention will help prevent future noises.
-
Regular Inspections: Regularly inspect your F150’s interior, especially during seasonal changes, to catch potential issues early.
Check the trim panels and components for any signs of loosening or wear. Early detection can prevent small problems from turning into bigger ones.
-
Tighten Fasteners: Periodically tighten all screws and bolts that hold trim components in place. This will prevent them from loosening over time.
Inspect and tighten fasteners during regular maintenance, such as oil changes or tire rotations. This is a simple step.
-
Use Protective Mats: Using floor mats and cargo mats can protect the interior from spills and dirt, and help minimize vibrations.
Mats can protect the flooring. They can also absorb some of the road noise. Choose high-quality mats.
-
Avoid Overloading Storage: Avoid overloading the glove box, center console, and door pockets with heavy items, as this can cause trim parts to warp or vibrate.
Excessive weight in storage compartments can put stress on the trim. This will lead to premature wear. Keep these storage areas organized and clean.
-
Professional Help: If you are uncomfortable doing DIY repairs, or if you encounter persistent noise problems, seek professional help.
Consult a qualified mechanic or auto body shop if you have difficulty diagnosing or fixing noise issues. They have the expertise to address complex problems.
Frequently Asked Questions
Question: What’s the best way to start finding noise sources?
Answer: Begin by driving your F150 on different road surfaces to identify the conditions when the noise occurs. Then, have a friend ride along to help pinpoint its location by listening and touching.
Question: What do I use to remove trim panels without damage?
Answer: Use plastic trim removal tools. These tools are designed to safely pry panels and trim pieces without scratching or damaging your interior.
Question: How can I stop a squeak in my door panel?
Answer: Remove the door panel, then inspect and lubricate any moving parts such as the window regulator or door handle mechanisms. Apply felt tape to areas where panels meet to eliminate friction.
Question: What’s the best way to keep fasteners tight?
Answer: Use thread locker on screws and bolts during reassembly. This prevents them from loosening over time due to vibrations, and it is inexpensive and effective.
Question: How often should I inspect my F150’s interior to prevent noises?
Answer: Inspect your F150’s interior regularly, especially during seasonal changes, to catch potential noise issues early. This can prevent small problems from turning into bigger ones.
Final Thoughts
Addressing f150 interior trim noise sources doesn’t have to be a frustrating experience. As you’ve seen, identifying and fixing these issues is achievable with the right approach and equipment. The main step is to take your time and follow the methods described. Begin by pinpointing the source of the noise by driving and listening. Remove trim panels cautiously using the correct tools, and then inspect for loose fasteners. Apply felt or foam tape to stop vibrations and lubricate moving parts. Reassemble everything carefully, and test your work. With a bit of patience, you can eliminate the irritating sounds that disrupt your driving experience. By following this guide, you can enjoy a quieter, more pleasant ride in your F150. Remember to inspect your trim periodically, and you will prevent those irritating noises from returning. You’ve now got the tools to do the job!