F150 Trailer Light Fuse Location: Finding and Fixing the Problem
Getting your trailer lights working can be a real headache, especially if you’re new to this. Many folks find the f150 trailer light fuse location a little tricky because it’s not always in the most obvious spot. Don’t worry, it’s totally fixable, and you don’t need to be a mechanic! This guide will break down everything you need to know, step-by-step, to find and
Finding the Right Fuse Box
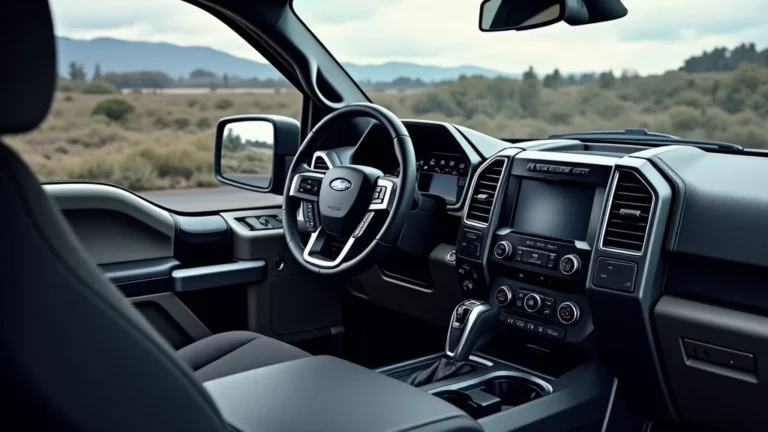
The first step is to locate the fuse boxes in your F150. These boxes are like hubs that protect your truck’s electrical systems. They contain several fuses that protect different components, including the trailer lights. Getting to know the fuse boxes is important when you’re troubleshooting any electrical issues. Understanding where they are is the initial step in fixing anything that isn’t working properly. You’ll usually find two fuse boxes, and knowing where they’re located is the initial step to getting things fixed.
Inside the Cabin
Inside your F150, you’ll find one of the fuse boxes inside the cabin, usually on the driver’s side. It’s often located behind a panel on the dashboard or near the steering column. Removing the panel is generally very easy; often, it just snaps off. You can use a plastic trim tool or even a small screwdriver to gently pry it open. Inside, you’ll discover a diagram of the fuses, which helps you identify which one controls your trailer lights. It is very important to get to know the fuse box diagram to understand the functionality of the truck’s various electrical systems.
- Identifying the Panel: Carefully look for the access panel on your truck’s dashboard or near the steering column. It will typically have a small indent or slot where you can insert a tool to pry it open.
- Removing the Panel: Gently use a plastic trim tool or small screwdriver to carefully pry the panel open. Be cautious not to break any clips or damage the dashboard.
- Locating the Diagram: Once the panel is removed, find the fuse diagram, which is usually printed on the inside of the panel or the cover itself. It identifies which fuses are for what systems, including the trailer lights.
- Checking the Diagram: Study the fuse diagram to find the fuse specifically for your trailer lights. This will help you identify the correct fuse to inspect.
Under the Hood
The second fuse box is located under the hood, usually on the driver’s side, near the battery. It is often a black plastic box. You’ll need to open the hood and look for this box. It is usually clearly marked. This one is typically for more of the engine’s or truck’s functions. This fuse box also houses several fuses and relays, and one of them is usually for the trailer lights. Like the interior fuse box, this one also has a diagram. Remember to use care when working near the battery to avoid any electrical shocks.
- Opening the Hood: Locate the hood release lever inside the cabin, usually near the driver’s side footwell. Pull the lever to release the hood latch.
- Finding the Fuse Box: Look for a black plastic box, often rectangular, near the battery on the driver’s side. It should be easily visible.
- Opening the Fuse Box: Open the fuse box by releasing any clips or latches holding the cover in place. The cover may slide or lift off.
- Checking the Diagram: Inside the fuse box cover or on the box itself, you’ll find a diagram of the fuses and their functions. Locate the one related to your trailer lights.
Pinpointing the Trailer Light Fuse
Now that you know where the fuse boxes are, you need to find the specific fuse that protects your trailer lights. This fuse is usually a low-amperage fuse, so it’s relatively small. It’s designed to blow if there is an overload in the circuit, protecting your truck and trailer wiring from damage. Knowing the right amperage is key, as using a fuse with too high of an amperage can lead to electrical fires, while using one that is too low can lead to frequent blowing. Locating the right fuse is straightforward when you have the right diagram.
Using the Fuse Diagram
The fuse diagram is your best friend when finding the trailer light fuse. As mentioned earlier, the diagram is usually located on the inside of the fuse box cover or the fuse box itself. It will show a layout of all the fuses and their corresponding functions. It will usually be a small picture with numbers. Look closely at this diagram to find the specific fuse labeled for “Trailer Tow,” “Trailer Lights,” or a similar description. Make sure you are reading the correct diagram for the fuse box you’re examining.
- Match the Fuse: When you’ve located the correct label in the diagram, you will see a corresponding number or letter. Match that designation to a fuse in the box itself.
- Reading the Diagram: Familiarize yourself with the diagram. It’ll use symbols and abbreviations. These symbols are there to help you.
- Check Your Truck’s Manual: If the diagram is unclear, consult your F150’s owner’s manual. The manual should provide a detailed explanation of the fuse box and its components.
- Different Models: Keep in mind that fuse locations may vary slightly depending on the year and trim level of your F150. Always verify the information with your specific truck model.
Identifying the Fuse Type and Amperage
Once you’ve identified the right fuse location using the diagram, you need to know the type and amperage of the fuse. The amperage is crucial as it indicates the amount of current the fuse is designed to handle. Using the wrong amperage can cause your fuse to blow more frequently or fail to protect your trailer lights. You will usually find the fuse labeled with the amperage rating. This is also stated in your owner’s manual. The fuse type varies. Be sure to
- Fuse Types: There are different types of fuses. Common types include blade fuses (mini, standard, and maxi) and cartridge fuses. Make sure you are aware of what type is used in your truck.
- Amperage Rating: The amperage is usually printed on the fuse itself. It’s a number followed by an “A” (e.g., 10A, 20A).
- Matching the Fuse: When replacing the fuse, ensure you get a new one with the same type and amperage. This is vital for the trailer lights and the safety of your truck.
- Spare Fuses: It is good to have some spare fuses in your truck. If you are having problems, this will save you a trip to the store.
Inspecting and Replacing the Fuse
Once you know where the fuse is, the next step is to inspect it to see if it’s blown. Then, if needed, you’ll
Inspecting the Fuse
To inspect the fuse, you first need to remove it from the fuse box. You can use a fuse puller tool. If you don’t have one, you can carefully use needle-nose pliers or small tweezers. Be careful not to damage the fuse box or other fuses when you’re removing the fuse. Once you have the fuse out, look at the metal filament inside. If it’s broken, the fuse is blown and needs to be replaced. Examine the fuse for any signs of damage like a dark or burnt appearance, which also indicates the fuse needs to be replaced.
- Using a Fuse Puller: A fuse puller is a small plastic tool that makes removing fuses easy and prevents damage. It clips onto the fuse and allows you to pull it straight out.
- Visual Inspection: Hold the fuse up to a light and look at the metal filament inside. It should be intact.
- Check for Burns: Look for any signs of burning or discoloration on the fuse. These can signal an overload.
- If It’s Not Blown: If the fuse looks intact, the problem isn’t the fuse. You may want to check other things.
Replacing the Fuse
If the fuse is blown, you need to
- Getting the Right Fuse: When buying a new fuse, be very sure it has the same amperage rating.
- Inserting the New Fuse: Line up the new fuse with the correct slot in the fuse box and push it in until it’s secure.
- Testing the Lights: Once the new fuse is in, test your trailer lights to confirm they work. Have someone assist you so that they can see if the lights turn on or not.
- What if the New Fuse Blows?: If the new fuse blows right away, this could mean an electrical short circuit or an overloaded trailer light system. You might need to have the trailer and truck wiring inspected by a professional.
Common Trailer Light Problems and Solutions
Sometimes, the problem isn’t just the fuse itself. Several issues can cause your trailer lights to fail. Here are some of the most common issues you might encounter. Understanding these issues will help you troubleshoot and fix the problems. Trailer lights can be a real pain if something is wrong. Understanding these problems will help you in your quest to get them working.
Wiring Issues and Shorts
One of the most frequent causes of trailer light problems is wiring issues. These issues can include loose connections, corroded wires, or short circuits. Short circuits happen when a live wire touches a grounded part of the vehicle, which can cause the fuse to blow. If you see signs of wear or damage on the wiring, replace them. Examine the trailer’s wiring, the connector, and the truck’s trailer wiring connection for signs of damage or corrosion. It may be necessary to take the truck and trailer to a professional if it seems too complicated.
- Loose Connections: Check for loose wiring connections at the trailer connector and the truck’s wiring harness. These loose connections can interrupt the flow of electricity.
- Corrosion: Corrosion on the trailer connector or wiring can cause poor electrical contact. Clean the connectors and wiring with a wire brush or electrical cleaner.
- Short Circuits: Look for any exposed wires or areas where wires may be touching the metal chassis. Cover the wiring with electrical tape.
- Damaged Wires: Check the wiring for any signs of damage, such as cuts, abrasions, or cracks. If you spot damage, replace the wires or use electrical tape to cover them.
Trailer Connector Problems
The trailer connector is where the truck and trailer electrical systems meet. Problems with this connector can easily cause your trailer lights to malfunction. These problems can range from corrosion and dirt to damage from wear and tear. It’s important to keep your connector clean and in good shape. Problems with your trailer connector can be the issue, and it is a good idea to check this connection.
- Corrosion: Over time, the trailer connector can get corrosion, leading to poor connections. Clean the connector with electrical contact cleaner or a wire brush to remove the corrosion.
- Damaged Pins: Check the pins inside the connector for bending or damage. Bending the pins may not allow them to make contact with the truck.
- Loose Connections: Ensure the wires connected to the connector pins are securely attached. Loose connections can interrupt the flow of power.
- Water Intrusion: Water can get into the trailer connector and cause shorts or corrosion. Consider using a weather-resistant connector or covering the connector when not in use.
Grounding Issues
Grounding is essential for the electrical system to work correctly. A poor ground connection can cause lights to not work properly, flicker, or behave erratically. The ground connection is the link that completes the circuit, allowing electricity to flow back to the power source. Issues with ground connections are very common, and it is crucial to check these connections. Grounding issues are a very common problem that should be looked at when troubleshooting your trailer lights.
- Loose Ground Wires: Check the ground wires on both your truck and trailer. Be sure the ground wires are firmly connected to the chassis.
- Corroded Ground Points: Corrosion at ground points can disrupt the electrical flow. Clean the ground connection.
- Poor Connections: Make sure the ground wires are securely connected to the chassis. Loose or corroded connections can cause the lights to malfunction.
- Testing the Ground: Use a multimeter to check the ground connections for proper continuity. This will confirm if the ground circuit is working correctly.
Tools and Equipment You Might Need
Fixing your trailer lights often doesn’t require a lot of fancy equipment, but having the right tools can make the job easier. Here is a list of the things you may need to find and fix the f150 trailer light fuse location issues. Having these things can make the whole process easier to handle. You should get a good handle on what you will need. Having the right tools can save you time and frustration and allow you to fix it faster.
Essential Tools
These are the basic tools you will want to have on hand when dealing with your trailer lights. They’re useful for many other basic truck maintenance tasks. They will make your job much easier. The basics are usually enough to get the job done.
- Fuse Puller: A fuse puller is a small, inexpensive plastic tool that makes it easy to remove fuses from the fuse box without damaging them.
- Multimeter: A multimeter is an essential tool for checking electrical circuits. It can measure voltage, current, and resistance to help you diagnose electrical problems.
- Screwdrivers: A set of screwdrivers (both flathead and Phillips head) is needed to remove panels. This is needed to get to the fuse boxes.
- Wire Strippers and Crimpers: These tools are needed for repairing any wiring problems.
Safety Gear
Safety should be your first concern when working with electricity. It is important to prevent injury. Be careful when working on any electrical project. Keep yourself and your truck safe.
- Work Gloves: A pair of gloves will protect your hands from cuts or abrasions.
- Safety Glasses: Protect your eyes from debris.
- Vehicle Jack and Jack Stands: If you are working on the trailer wiring and need to get under the trailer, a jack and jack stands are a must.
Optional Items
These items can make the job more convenient, but are not essential. Having these items will assist you in getting the job done, but they are not required. These can also be useful for other jobs you may do on the truck.
- Electrical Tape: This is used for insulating wires.
- Electrical Contact Cleaner: If you find corrosion on the connector, you can clean it up with electrical contact cleaner.
- Spare Fuses: Keep a set of spare fuses in your truck. This will save you time and get you back on the road.
- Flashlight: A flashlight can be very useful when working in dimly lit areas.
Step-by-Step Guide to Locate the F150 Trailer Light Fuse
Now, let’s put it all together. Here’s a simple guide on what you need to do to pinpoint the f150 trailer light fuse location and fix any problems. Following these steps can help you fix this issue. You can follow these steps to locate and inspect the fuse for your trailer lights. This will help you get those lights working again.
- Step 1: Locate the Fuse Boxes:
Start by finding the two fuse boxes in your F150. One is inside the cabin, usually on the driver’s side, behind the dashboard. The other is under the hood, near the battery. Make a note of their locations.
- Step 2: Access the Fuse Diagram:
Open each fuse box and find the fuse diagram. It’s often located on the inside of the fuse box cover or the box itself. The diagram will show the layout of the fuses and what they control. Read the diagram carefully. This will help you identify the correct fuse.
- Step 3: Identify the Trailer Light Fuse:
Use the fuse diagram to find the fuse specifically for the trailer lights. Look for labels such as “Trailer Tow,” “Trailer Lights,” or a similar description. Make a note of the fuse number and the amperage rating.
- Step 4: Inspect the Fuse:
Carefully remove the trailer light fuse from the fuse box using a fuse puller or needle-nose pliers. Inspect the fuse by looking at the metal filament inside. If the filament is broken, or if the fuse looks burned or discolored, it is blown and needs to be replaced.
- Step 5: Replace the Fuse:
If the fuse is blown, get a new fuse of the same type and amperage. Insert the new fuse into the correct slot in the fuse box, ensuring it is fully seated. Ensure it’s the correct one, as you want to avoid electrical issues.
- Step 6: Test the Trailer Lights:
After replacing the fuse, connect your trailer to your F150 and test the trailer lights. Turn on the truck’s headlights, brake lights, and turn signals to confirm they are working. Have someone assist you so that they can see if the lights turn on or not.
- Step 7: Check for Underlying Problems:
If the new fuse blows immediately, there might be a wiring issue or short circuit. Inspect the wiring and connections for any damage or corrosion. You may need to have the wiring checked by a professional if the problem persists.
Troubleshooting If the New Fuse Blows Immediately
If the new fuse blows as soon as you put it in, this signals a deeper electrical problem. Don’t panic! This is a sign of an issue, and it can be fixed. It’s important to identify what is going on. Here are some possible reasons and what to do.
Short Circuit in the Trailer Wiring
A short circuit in your trailer wiring is a common culprit. This happens when a hot wire touches a grounded part of the trailer, like the trailer frame. This can lead to a sudden surge of current, which causes the fuse to blow immediately. Short circuits in the trailer lighting can be a tricky problem to find. They need to be located and fixed to avoid future problems.
- Inspect the Wiring: Check all the trailer wiring for any exposed wires or areas where wires might be rubbing against the trailer frame. Repair any damaged or exposed wires with electrical tape.
- Check the Connectors: Make sure the trailer connector is clean and that the pins aren’t bent or corroded. Damaged connectors can cause shorts.
- Testing the Wiring: A multimeter can be used to test the wiring for continuity. If you find a connection where there shouldn’t be one, it indicates a short.
- Professional Help: If you are unsure, have a professional inspect the wiring to locate and fix the short circuit.
Overloaded Trailer Light System
An overloaded trailer light system can also cause the fuse to blow. This happens when the trailer light system draws more current than the fuse can handle. This might be from too many lights or from some lights that draw too much power. This condition puts stress on the system and may burn the fuse. To fix this, you may need to reduce the load or check the lights that are drawing too much power.
- Check the Lights: Make sure the trailer lights are the correct type and wattage. Using lights that draw too much power can overload the system.
- Reduce the Load: If you have added extra lights to your trailer, try disconnecting them to see if the fuse stops blowing. This helps you narrow down which lights are causing the issue.
- Wiring Inspection: Inspect the trailer’s wiring for any signs of incorrect wiring, such as wires connected in the wrong order or with the wrong polarity.
- Professional Evaluation: If you’re not sure about your wiring, consult a professional to ensure your trailer lights are wired correctly.
Problems With the Truck’s Wiring
It’s also possible that the problem is in the truck’s wiring rather than the trailer’s. The truck’s wiring supplies power to the trailer, so any issues here can cause the fuse to blow. You may want to check out the truck’s wiring and connections. Problems with the truck can cause significant problems with your trailer lighting. Make sure you check this out.
- Inspect the Truck’s Wiring Harness: Check the wiring harness at the rear of the truck for any damage or corrosion. Any issues can cause electrical problems.
- Check the Trailer Connector: Make sure the trailer connector on your truck is clean, corrosion-free, and securely attached. A faulty connector can cause shorts or other issues.
- Wiring Damage: Inspect the truck’s wiring for any damaged wiring or exposed wires. Repair any damage to avoid shorts.
- Professional Inspection: If you cannot find the problem, consult an auto electrician to inspect the truck’s wiring.
Dealing With Repeated Fuse Blowing
If your trailer light fuse keeps blowing, there is a persistent problem that needs to be resolved. It’s important to keep from repeatedly replacing the fuse and ignoring the underlying problem. It can be caused by electrical problems. The underlying issues must be resolved before the lights will work. Addressing the problem is necessary to keep your truck from developing more extensive electrical problems.
- Do Not Use a Higher Amperage Fuse: Using a higher-amperage fuse than the correct one is dangerous and can lead to electrical fires. Never
- Thorough Inspections: Perform a complete inspection of both the truck’s and the trailer’s wiring systems. Look for shorts, loose connections, corrosion, and damaged wires.
- Test for Shorts: Use a multimeter to test for short circuits. A short circuit will cause the fuse to blow and needs to be located and fixed.
- Seek Expert Help: If you are unable to locate the source of the problem, take your truck and trailer to a qualified mechanic or auto electrician.
Frequently Asked Questions
Question: Where is the fuse for my F150 trailer lights located?
Answer: The fuse location varies by year and model, but it is typically in one of the fuse boxes. One is in the cabin, usually near the dashboard or steering column. The other is under the hood, near the battery.
Question: What type of fuse do I need for my F150 trailer lights?
Answer: It depends on your model, so consult your owner’s manual or the fuse box diagram. You need to use the same type and amperage as the original fuse.
Question: What does it mean if my new fuse keeps blowing?
Answer: It means there is a short circuit, an overloaded circuit, or another electrical problem in either the truck’s or the trailer’s wiring.
Question: Can I use a fuse with a higher amperage rating?
Answer: No, never use a fuse with a higher amperage rating. Doing so can damage your truck’s wiring and potentially cause a fire.
Question: What if the trailer lights still don’t work after replacing the fuse?
Answer: Check for wiring problems, damaged connectors, or grounding issues. You may need to consult a professional.
Final Thoughts
So, there you have it – a clear guide to finding and fixing the f150 trailer light fuse location! You’ve learned how to find the right fuse boxes, identify the correct fuse, and troubleshoot common issues like wiring problems and shorts. Remember, the fuse diagram is your friend. Keep an eye on your wiring and connections, and don’t be afraid to seek some help if the problem feels bigger than you can handle. You can now approach this challenge with confidence! With these tips, you’re well-equipped to keep your trailer lights shining bright and enjoy safer trips. If you find yourself in a pinch, don’t hesitate to refer back to this guide for a quick refresher. Now, go get those lights working!