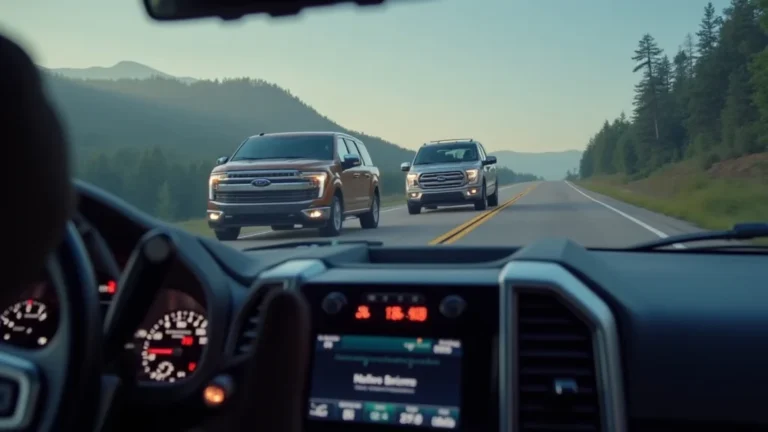
F150 Trailer Wiring: Decode Color Codes for Safe Towing
Wiring your trailer can seem tough, especially if you’re new to it. Many people find the f150 trailer wiring color codes confusing. Don’t worry, it’s simpler than you might think! This post will break down the color codes so you can safely and correctly wire your trailer. We’ll make things easy with step-by-step instructions. Get ready to explore the different wires and their functions.
Decoding Your F150 Trailer Wiring: A Beginner’s Guide
Before you begin, it’s good to have a basic idea of what each wire in your trailer wiring does. This will help you identify the correct wires and connections. Knowing the function of each wire will also help you troubleshoot any issues that may arise. This section explores the primary functions of each wire, helping you prepare before actually wiring your trailer. We’ll cover the standard seven-way connector, which is very common. Understanding the function of each wire is the first step.
The Seven-Way Connector Explained
The seven-way connector is the most common type used for trailers. It provides all the necessary connections for the trailer’s lights and brakes. The colors assigned to each wire are pretty standard, but it’s always smart to double-check with a wiring diagram for your specific truck and trailer. This helps avoid confusion and ensures everything works correctly. It also ensures compatibility between your F150 and your trailer. Let’s explore the basics of each wire.
- Left Turn Signal/Brake: Usually yellow, this wire is responsible for the left turn signal and left brake light. When you signal a left turn or step on the brakes, this wire sends power to the corresponding lights on your trailer. This is a critical safety feature, alerting other drivers. This wire is vital for road safety.
- Right Turn Signal/Brake: Typically green, this wire controls the right turn signal and right brake light. Similar to the yellow wire, it signals the trailer’s right turn and brake lights. This ensures your intentions are clearly visible to those around you. Ensuring that this wire functions is necessary for safe road use.
- Running Lights: Brown is the color for running lights. When you turn on your headlights, power is sent through this wire to the trailer’s running lights. This keeps your trailer visible at night or in low-light conditions. It is a fundamental feature for night towing.
- Ground: The white wire is the ground. It provides a return path for the electrical current, completing the circuit. A good ground connection is essential for all the lights and brakes to work correctly. A bad ground can cause lights to flicker or not work at all. Make sure it is securely attached.
- 12V Power: Often blue, this wire provides a 12-volt power supply. It can be used for various trailer accessories, like interior lights or charging a battery. This is useful for trailers with extra features. Remember to check the amperage rating to avoid overloading the circuit.
- Reverse Lights: Typically purple or light green, this wire activates the trailer’s reverse lights. When you put your truck in reverse, power goes through this wire, illuminating the backup lights. This improves visibility when backing up. This adds an extra safety layer.
- Electric Brake: The dark blue wire is used for electric brakes. When the brakes are applied in your truck, power is sent through this wire to activate the trailer’s brakes. This is essential for controlling heavier trailers and preventing sway. Make sure this wire is properly connected for effective braking.
Understanding the Basics: Wiring Tools and Safety
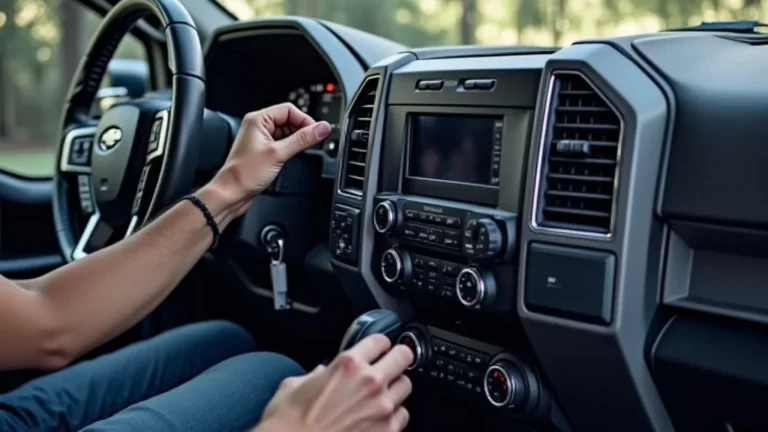
Before getting started, you’ll need the right tools and supplies. You should also take safety steps. Make sure to disconnect your truck’s battery before working with any electrical wiring. This will prevent any accidental shorts or electrical shocks. Using the correct tools and practicing these safety steps is key to a successful project. Let’s cover some essential tools and techniques.
Essential Tools for the Job
Having the right tools can make the process much easier. You’ll need wire strippers, crimpers, and a multimeter. Wire strippers help remove the insulation from the wires. A crimper is for attaching connectors to the wires, and a multimeter helps check for current and voltage. These tools help you work safely. These are the basic necessities you’ll need.
- Wire Strippers: These are used to remove the plastic insulation from the wires without damaging the metal inside. This tool is important. Choose wire strippers that are the right size for the wire gauge you are using. This helps in making clean and secure connections.
- Crimpers: These tools connect terminals and connectors to wires. They create a secure and reliable electrical connection. Crimping is better than soldering. Ensure you are using the correct crimping tool for the connectors and wire gauges you have.
- Multimeter: This is an essential tool for testing voltage, continuity, and resistance in the wiring. It helps you troubleshoot any issues and confirm your connections are correct. It’s important for troubleshooting any electrical issues you might face during the wiring process. It helps you stay safe and ensures everything works as expected.
- Wire Connectors: You will need a variety of wire connectors, like butt connectors, ring terminals, and quick-splice connectors. These connect different wires together. Use the right size and type of connector for your wires and application. This will make strong, reliable connections.
- Electrical Tape: Used to insulate and protect wire connections, electrical tape can be used to bundle and secure wires. It provides an extra layer of protection, keeping your wiring safe from the elements. Use high-quality electrical tape for the best results.
Safety First: Important Precautions
When dealing with electrical wiring, safety should always be your top priority. Make sure to wear safety glasses to protect your eyes. Work in a well-lit and well-ventilated area. If you’re unsure about anything, it’s best to seek help from a professional. Taking these steps is essential for a safe working environment. Never work on electrical wiring in wet conditions. Remember safety first.
- Disconnect the Battery: Before you start working on any electrical wiring, always disconnect the negative terminal of your truck’s battery. This will prevent any accidental shorts or electrical shocks. Make it the first thing you do before touching any wires.
- Wear Safety Glasses: Protect your eyes from debris and potential electrical hazards. Safety glasses will keep your eyes safe throughout the wiring project. Consider wearing gloves to keep your hands protected.
- Work in a Well-Lit Area: Make sure you have plenty of light. This helps you see the wires clearly and avoids making mistakes. Good lighting is important for detail work. It makes the job easier and safer.
- Avoid Working in Wet Conditions: Water and electricity don’t mix. Ensure the area you are working in is dry to reduce the risk of electrical shock. Avoid working outside in the rain or near any sources of water.
- Double-Check Your Work: After making connections, double-check all your wiring to ensure everything is connected correctly. This will prevent electrical issues and ensure the trailer lights and brakes work correctly. Check everything twice before you hook up the trailer.
F150 Trailer Wiring Color Code Guide: Wire by Wire
This is where we get into the details of the f150 trailer wiring color codes. We’ll look at the specific colors and their functions. Remember, the color codes are generally standard, but it’s still wise to double-check. Using a wiring diagram for your truck and trailer is a good step. This will help you know the function of each wire. Let’s explore the colors and their jobs.
Decoding the Wire Colors
The standard color codes simplify the wiring process. Knowing the meaning of each color makes it easy to connect the wires correctly. These codes are not just for convenience; they are also for safety. These colors help make sure that everything functions as it should. It is also easier to find problems.
- Yellow: The yellow wire typically handles the left turn signal and left brake light. When you signal a left turn or step on the brakes, the yellow wire sends power to the left side of your trailer. This signals your intentions to other drivers. This ensures other drivers know your next move.
- Green: The green wire usually controls the right turn signal and right brake light. When you signal a right turn or apply the brakes, the green wire sends power to the right side of the trailer. This keeps other drivers safe. This wire keeps the lights working correctly.
- Brown: The brown wire is for the running lights, also known as tail lights. It makes sure that your trailer is visible at night or in low light. This is a critical safety feature. Having lights visible at night helps other drivers see you.
- White: White is for the ground connection. This wire completes the electrical circuit. It is vital for all other wires to function correctly. A secure ground connection is important. It also prevents the lights from flickering or failing.
- Blue: The blue wire is usually for the electric brakes. When the brakes are applied in your truck, the blue wire activates the trailer’s brakes. This is for safe towing. It ensures that the trailer brakes work in sync with your truck’s brakes.
- Red or Black: Sometimes, a red or black wire is used for the 12V power supply. This can power accessories on your trailer, like interior lights. Make sure the wire is rated for the amperage. This prevents overloading the circuit.
- Purple or Light Green: These colors are often used for the reverse lights. When you put your truck in reverse, these wires power the trailer’s backup lights. This improves visibility when backing up. This adds an extra layer of safety.
Matching Trailer Wiring to Your F150
Matching the trailer wiring to your F150 means correctly connecting the wires. This includes knowing which wires from your truck connect to which wires on your trailer. This ensures that the lights and brakes function correctly. Always refer to your truck and trailer wiring diagrams. This way you’ll know what wires connect to where. If you follow the correct steps, everything should work seamlessly. Let’s explore how to make these connections.
- Identify the Wires: First, determine the function of each wire on both your truck and your trailer. Use the color codes. Double-check with a wiring diagram. This helps you avoid mixing up the wires. Knowing the function of each wire makes the process easier.
- Strip the Wires: Use wire strippers to remove a small amount of insulation from the ends of the wires. Be careful not to damage the wire strands. This step ensures that you can make good connections. It is important for creating a secure connection.
- Connect the Wires: Use the correct connectors, like butt connectors or wire nuts, to join the wires. Make sure the connections are secure. A loose connection can cause problems. It is vital to make sure the wires are attached firmly.
- Test the Connections: After making the connections, test the trailer lights and brakes. Use a multimeter or have a helper check the lights. Make sure everything works as expected. This will make sure everything functions.
- Protect the Connections: After testing, protect your connections with electrical tape or heat shrink tubing. This keeps the wires safe from the elements. This also prevents corrosion and ensures the connections last. This adds extra protection to your wiring.
Common Wiring Issues and How to Troubleshoot Them
Even with the best preparation, you might encounter issues. Troubleshooting is a part of any wiring project. Identifying the problem is the key to solving it. Knowing where to look for problems is necessary. Let’s look at some common issues and their solutions. Taking the time to locate and fix problems will pay off.
Common Problems
Problems can arise during any wiring project. These are some common issues that people run into when wiring a trailer. Knowing about these problems can help you be prepared. Being aware can help you identify and fix them quickly. It also helps you avoid mistakes.
- Lights Not Working: The most common issue is that the trailer lights don’t work. Check the bulbs first. Then check the fuses in both your truck and the trailer. Finally, inspect the wiring connections for any loose wires or corrosion. This will help you resolve the issue quickly.
- Brake Lights Not Working: If the brake lights aren’t working, check the brake light switch in your truck. Ensure the brake light wire on the trailer is correctly connected. Examine the trailer’s brake light bulbs for any damage. Check the connections.
- Flickering Lights: Flickering lights often mean a bad ground connection. Check and clean the ground wire on both your truck and your trailer. Ensure the ground wire is securely connected to clean metal. A secure ground connection prevents flickering.
- Trailer Brakes Not Working: If the electric brakes are not working, check the brake controller settings in your truck. Check the wire connections for the electric brakes. Make sure the brake magnets on the trailer are working correctly. Verify the electrical connections.
- Short Circuits: A short circuit can happen when bare wires touch. Look for any damaged wires. Inspect the wiring for exposed wires. Replace any damaged wires. Ensure all connections are well insulated to prevent shorts. This prevents electrical issues.
Step-by-Step Troubleshooting Guide
If you have an issue, follow a systematic approach. This will help you find the problem easily. It prevents wasting time. Following these steps helps you fix the issue. This systematic guide will help you solve problems.
- Check the Basics: Start with the simplest checks. Make sure the trailer is connected to the truck. Verify that your truck’s lights work correctly. Check the trailer’s fuses and bulbs. Sometimes, the issue is very simple.
- Inspect the Connections: Carefully examine all the wire connections, both in the trailer and at the truck’s connector. Look for loose wires, corrosion, or damage. Tighten any loose connections. Clean any corroded connections with a wire brush.
- Test with a Multimeter: Use a multimeter to test for voltage and continuity. Check the wires to confirm that they are getting power. This helps you identify which wires have problems. It helps pinpoint the fault.
- Check the Ground: Make sure the ground connection is secure and making good contact with clean metal. A bad ground can cause many electrical problems. Ensure your ground connection is solid. Ensure the ground wire is attached to a clean metal surface.
- Consult a Wiring Diagram: If you are having trouble, refer to a wiring diagram for both your truck and trailer. This diagram can show the specific wiring for your model. It can help you identify any wiring problems. Wiring diagrams are a good resource.
F150 Trailer Wiring: Special Considerations
Besides the basics, there are some extra details to consider. The type of trailer, the kind of use, and any special features impact the wiring requirements. Taking these factors into account can help you prevent issues. Knowing the wiring needs of your trailer is important. Understanding these special circumstances is key.
Wiring for Different Trailer Types
Different types of trailers will need different wiring. For example, a boat trailer might have special lighting requirements. Knowing these differences can help you make sure you meet the needs of each trailer. It is also important for safety. Each trailer type requires different standards.
- Boat Trailers: Boat trailers often have waterproof lights and wiring to resist corrosion. You should use marine-grade wiring and connectors. Also, ensure the ground connections are well-protected. Use waterproof connectors.
- Camping Trailers: Camping trailers might need additional wiring for interior lights, appliances, and batteries. You might need to add a 12V power wire. Check the wiring for these trailers.
- Utility Trailers: Utility trailers often have simple lighting and brake requirements. The wiring is usually straightforward. The wiring will depend on the features.
- Car Trailers: Car trailers need strong wiring for their size and weight. Make sure the brakes work correctly. It is also important to consider the weight.
Upgrading Your Trailer Wiring
Sometimes, you might need to upgrade the wiring on your trailer. This may be necessary if you add new features. Upgrading the wiring helps make sure everything works correctly. It also ensures safety. Upgrading the wiring will help with any new additions.
- Wire Gauge: Use the correct wire gauge for the current your trailer will use. Heavier loads need thicker wires. Ensure that the wires are the proper size. This also helps reduce the risk of overheating.
- Connectors: Use high-quality connectors. They can withstand the elements. They will also improve the wiring’s reliability. High-quality connectors are important. This adds to the durability.
- Brake Controller: Ensure that your truck’s brake controller is compatible with your trailer’s brakes. A properly working brake controller is critical for safe towing. Verify that the system works.
- Additional Circuits: If you add extra features, like a battery charger, you might need extra circuits. Plan these additions. Make sure that your wiring can handle the extra electrical load. Plan ahead for additional circuits.
Frequently Asked Questions
Question: What do I do if my trailer lights are not working?
Answer: Check the trailer’s bulbs and fuses first. Then, inspect the wiring connections for any loose wires or corrosion. Verify that your truck’s lights are working. You can also use a multimeter to check the wires.
Question: What is the purpose of the ground wire in trailer wiring?
Answer: The ground wire provides a return path for the electrical current, completing the circuit. A good ground connection is necessary for the lights and brakes to work correctly. A bad ground can cause lights to flicker or not work at all.
Question: How do I know if I have the right wire gauge?
Answer: Use the correct wire gauge for the current your trailer will use. Heavier loads require thicker wires. Refer to a wiring diagram or consult with a professional if you’re unsure.
Question: What is the difference between a 4-way and a 7-way trailer connector?
Answer: A 4-way connector provides basic functions like turn signals, brake lights, and running lights, using only four wires. A 7-way connector provides additional circuits such as reverse lights, 12V power, and electric brakes.
Question: Can I use electrical tape to protect my trailer wiring?
Answer: Yes, electrical tape is helpful for insulating and protecting wire connections. However, for more durable protection, consider using heat shrink tubing to seal and protect connections from moisture and abrasion.
Final Thoughts
Understanding f150 trailer wiring color codes makes it easy to wire your trailer. You can avoid headaches by knowing what each wire does and how to connect them. Before you begin, get the right tools and supplies. Also, remember to take your time and follow the steps. Always prioritize safety and double-check your work. You are well-equipped to wire your trailer safely. With a little effort, you can make sure your trailer’s lights and brakes function correctly. Now go ahead and get started. Get ready to hit the road with confidence, knowing your trailer is wired properly!