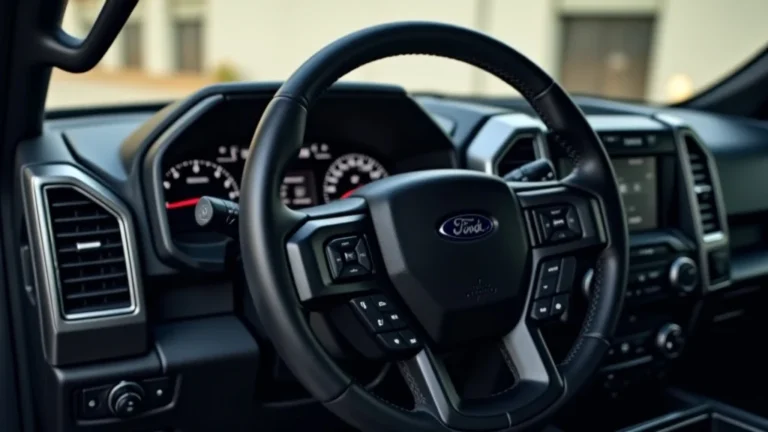
What Causes F150 Radio Problems That Make It Cut Out?
If you’re here, you’re likely facing a frustrating issue: your F150 radio keeps cutting out. For many, figuring out what causes f150 radio to cut out can feel tricky. Don’t worry, you are not alone! Many people have the same problem. This post will break down the common culprits and give you easy, step-by-step solutions to get your tunes back. Let’s explore the possible reasons why your radio acts up and how to fix it!
Key Takeaways
- Learn common reasons why your Ford F150 radio might cut out.
- Discover how to check for loose wires or bad connections.
- Understand the role of the radio’s fuse and how to replace it.
- Find out how to diagnose potential issues with the radio antenna.
- Explore possible problems with the radio’s internal components.
- Learn steps to troubleshoot and fix radio issues yourself.
Common Reasons For Radio Cutouts
When your F150 radio begins to cut out, it can be a source of annoyance. Fortunately, many problems are simple to resolve. The most common cause is usually related to electrical issues. This could be anything from a loose wire to a blown fuse. Other times, the antenna or the radio unit itself might be the culprit. Knowing the common issues can save you time and money. Let’s delve into the usual suspects to get you back to enjoying your music. You’ll soon see why what causes f150 radio to cut out is not always as complex as it seems!
Electrical Connections And Wiring Problems
One of the first places to look when your radio cuts out is the wiring. Your F150 has many wires that connect the radio to the power source, speakers, and antenna. Over time, these wires can become loose, corroded, or damaged. This can interrupt the signal, causing the radio to cut out intermittently. You may find this problem is most prevalent when driving on bumpy roads, as vibration can exacerbate any existing issues. Inspecting these connections is a simple first step towards resolving the issue.
- Loose Wires: Vibrations in the truck can cause wires to come loose from their connectors.
- Corroded Connections: Moisture can cause corrosion, disrupting the electrical flow.
- Damaged Wiring: Wires can be pinched or cut, interrupting the signal.
Loose wires are a very common reason why your radio might behave erratically. The constant movement and vibration of your truck can work to pull the wires apart. Checking for loose connections is one of the easiest first steps to diagnose the problem. Locate the radio unit and carefully inspect the wires that plug into it. Also, check the wires connected to your speakers. Often, a simple push or tighten will solve the issue, allowing you to enjoy your radio.
Corrosion can build up on wire connectors, especially if moisture gets in. This buildup of rust can create resistance and cause the signal to weaken or cut out entirely. You should inspect all of the wiring connectors for any signs of corrosion. The corrosion can be cleaned using a wire brush or a specialized electrical contact cleaner. Cleaning the connectors can restore the electrical connection and eliminate the cutting out.
Wire damage can happen over time or be caused by a specific event, like an accident or improper installation of equipment. Wires that are pinched, cut, or frayed can cause intermittent problems. Inspect the visible sections of wiring for any physical damage. If you find a damaged wire, it’s best to repair or replace it to avoid any short circuits or further problems. Always make sure the replacement or repair is done correctly to maintain the safety of the vehicle’s electrical system.
Radio Fuse Issues
A blown fuse is a very common cause of radio problems. The fuse is a safety device designed to protect your radio from electrical surges. When a surge occurs, the fuse blows, cutting off power to the radio and preventing damage. Locating and checking the fuse is a quick and easy troubleshooting step. Sometimes the fuse blows due to a larger electrical problem, while other times it’s simply a result of age or a power spike.
- Fuse Location: Find the radio fuse in your F150’s fuse box.
- Fuse Inspection: Visually inspect the fuse for a broken filament.
- Replacing the Fuse:
When you’ve identified a blown fuse, you must
The location of the fuse box can vary depending on your truck’s model and year. The fuse box is typically located inside the cab or under the hood. Consult your owner’s manual to find the exact location for your F150. Once you locate the fuse box, you can identify the radio fuse by looking for a label that says “Radio”, “Audio”, or something similar. Knowing the exact location and the type of fuse is the first step in troubleshooting the problem.
Once you’ve located the radio fuse, the next step is to visually inspect it. Carefully remove the fuse from the fuse box. Look closely at the filament, which is the thin wire inside the fuse. If the filament is broken, the fuse is blown and needs to be
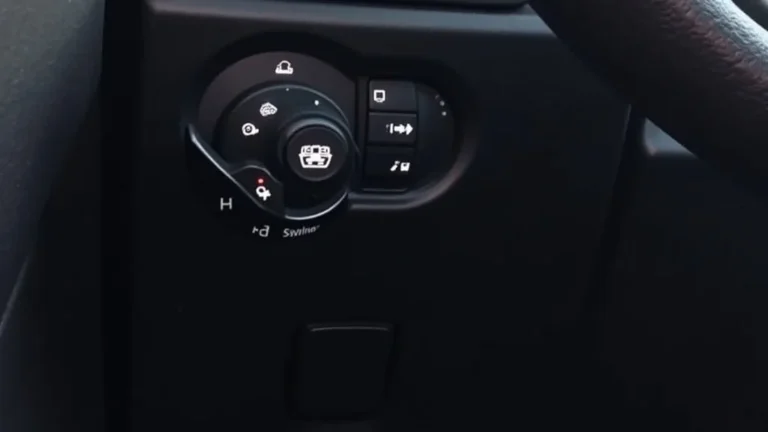
Antenna Troubles
The antenna is essential for receiving radio signals. Problems with the antenna can cause the radio to cut out or have poor reception. These problems can be anything from a broken antenna to a damaged antenna cable. Sometimes, a simple fix is all it takes to restore your radio’s performance. The antenna cable, in particular, is subject to damage and wear, especially if it runs through areas exposed to the elements or vehicle movement.
- Antenna Condition: Check for physical damage to the antenna itself.
- Antenna Cable: Inspect the cable for damage or loose connections.
- Antenna Grounding: Ensure the antenna is properly grounded.
Start by inspecting the antenna for any obvious signs of damage. This might include a bent or broken antenna mast or a loose base. If the antenna is physically damaged, the signal quality can be compromised, leading to issues with the radio. Look for any corrosion or rust around the base of the antenna. The antenna mast might be loose or missing. Any of these problems can significantly reduce the ability of your radio to pick up signals.
The antenna cable carries the signal from the antenna to the radio. Check the cable for any signs of damage, such as cuts, kinks, or breaks. Examine the connections at both ends of the cable – where it connects to the antenna and where it plugs into the back of the radio. These connections can become loose over time or corroded. Make sure the cable is securely connected at both ends. Any damage or disconnection in the antenna cable can cause reception problems and make the radio cut out.
Proper grounding is critical for the antenna to function correctly. A bad ground connection can interfere with signal reception and cause the radio to cut out or have static. Examine the grounding point of the antenna, usually located near the base. Make sure there is no rust or corrosion. If there is corrosion, clean the grounding point to ensure a solid connection. A good ground connection is essential for the antenna to work correctly.
Radio Unit Problems
Sometimes, the problem isn’t the wiring, fuse, or antenna, but the radio itself. The radio unit can experience internal failures, affecting its performance. This can include issues with the amplifier, tuner, or other components inside the radio. These problems may require specialized testing and potential repairs or replacement. Radio units are complex electronic devices. You should be prepared to explore more complex diagnostics to resolve the issue.
Internal Component Failure
The radio’s internal components can degrade over time, leading to performance issues. These components include capacitors, resistors, and integrated circuits. Component failure can cause intermittent problems like cutting out. They may be affected by temperature, humidity, and general wear and tear. Sometimes, these issues can be difficult to diagnose without specialized equipment, making it a challenging task for many.
- Amplifier Issues: Problems with the internal amplifier can cause sound cutouts.
- Tuner Failure: A faulty tuner can affect signal reception.
- Software Glitches: Software issues can sometimes cause the radio to malfunction.
The amplifier is critical for boosting the audio signal. It can be susceptible to overheating or component failure. The symptoms of an amplifier problem may include the radio cutting out, distortion, or very low volume levels. If the amplifier fails, it will need repair or replacement. This is usually more complex and requires technical expertise.
The tuner is responsible for receiving and processing radio signals. A faulty tuner may lead to poor signal reception, static, or the radio cutting out. A tuner failure often involves the breakdown of electronic components inside the tuner circuit. If the tuner is bad, you may need a specialized radio repair or a complete replacement of the radio unit.
Modern radios rely on software for their functionality. Software glitches or bugs can lead to intermittent problems, including cutting out. These problems might be resolved by resetting the radio or updating the software, if available. Software updates are typically done through a USB port. In some cases, a hard reset may be needed to clear any software-related errors.
Overheating and its Effects
Overheating can be a major problem for electronic components, including those inside the radio. When the radio gets too hot, its performance can suffer, leading to issues like cutting out. This is particularly common in hot weather or when the radio is used for long periods. Overheating can cause components to fail or work erratically, leading to frustrating radio problems. You may need to have your radio checked in this case.
- Heat Sources: External factors that can affect radio temperature.
- Cooling Mechanisms: Some radios use fans or heat sinks.
- Symptoms of Overheating: Intermittent cutouts or complete failure.
Radios are often located in areas where they can be exposed to heat, such as inside the dashboard. External heat sources like direct sunlight or heat from the engine can contribute to overheating. If your radio is located in direct sunlight, the internal temperature can rise significantly. The close proximity to the vehicle’s engine or other heat-generating components can also exacerbate the problem. Ensuring proper ventilation around the radio can help prevent overheating issues.
Some more advanced radio systems have internal cooling mechanisms, like fans or heat sinks, to manage their temperature. These components help dissipate heat and prevent overheating. Ensure that these cooling mechanisms are functioning correctly. If the fan is not working or if the heat sink is blocked, it can worsen the chances of your radio cutting out. Check for any obstructions that might be blocking the airflow, which reduces cooling efficiency.
The main symptom of overheating is usually intermittent cutouts or complete failure of the radio, especially when the radio has been running for a long time. The radio may work fine when cold and start to cut out after some use. The radio may even work again after it has cooled down. If you suspect overheating, try letting the radio cool down and see if the problem disappears. If the symptoms are present, it is worth exploring the radio’s temperature controls and potential heat sources.
Troubleshooting Your Radio Problems
Troubleshooting involves a methodical approach to pinpointing the root cause of your radio issues. Start with the easiest checks and work your way to the more involved ones. This means starting with the basics, such as checking the fuse and wire connections, then moving on to more complex diagnostics. By following these steps, you will increase your chances of finding and resolving the problem quickly and efficiently.
Step-by-Step Diagnostics
Follow a structured approach to troubleshoot the radio issues. Start by checking the easiest things first, such as the fuse and connections. You’ll move toward more detailed checks if the initial steps don’t solve the problem. This will help you identify the source of the radio’s cutting out and get you back to enjoying your music. This systematic process can save you both time and money. Here are some of the steps.
- Check the Fuse: The first thing to do is inspect the radio fuse.
- Inspect Wiring: Look for any loose or damaged wires.
- Test the Antenna: Check the antenna connection and condition.
- Test Speakers: Check the speakers for any issues.
Locate the fuse box in your F150, consult your owner’s manual to find the exact location. Identify the fuse that powers the radio and visually check it for a blown filament. Remove the fuse and look at the tiny wire. If it’s broken,
Examine the wiring connected to the radio. Check for any loose connections or physical damage like cuts or abrasions. If you find loose wires, try reconnecting them firmly. If you spot any damaged wires, you may need to repair or replace them. Make sure the wires are securely connected to the radio.
The antenna is critical for signal reception. Check the connection where the antenna cable plugs into the radio and also at the antenna itself. Inspect the antenna for any physical damage, such as a bent mast or corrosion. Sometimes, re-seating the antenna cable can improve signal quality. A damaged antenna cable or a faulty antenna can cause your radio to cut out.
Sometimes, the issue may not be with the radio itself, but with the speakers. Check the speaker connections for loose wires or damage. Test the speakers by playing audio through them. If the speakers are faulty, they may cause the radio to cut out or distort the sound. If you suspect a speaker problem, test the sound on each speaker to isolate the issue.
Tools You Might Need
Having the right tools can make the troubleshooting process much easier. Some of these tools are basic, while others are more specialized. The following equipment and tools are a must when you start troubleshooting and diagnosing the source of your radio issues.
- Screwdrivers: For removing panels to access the radio.
- Multimeter: Used to test for voltage and continuity in circuits.
- Wire Strippers/Crimpers: Needed for repairing or replacing wires.
- Fuse Puller: Simplifies removing and replacing fuses.
A set of screwdrivers, including Phillips head and flathead, is essential. They allow you to remove the trim panels and access the radio unit itself. Many modern vehicles use plastic trim clips, so you may need plastic trim removal tools to prevent damage to the interior.
A multimeter is a handy tool for testing electrical circuits. It measures voltage, resistance, and continuity. You can use it to check if power is reaching the radio, or to identify shorts in the wiring. A multimeter can pinpoint electrical problems and can save time.
If you find damaged wiring, wire strippers and crimpers will be necessary to repair it. These tools allow you to remove the insulation from wires and attach connectors. Always ensure your crimps are secure to avoid future problems.
A fuse puller is a small tool that simplifies the removal of fuses from the fuse box. These are typically plastic and prevent you from damaging the fuse or surrounding components. Fuse pullers are inexpensive and are often included in a basic toolkit.
When to Seek Professional Help
While many radio problems can be fixed at home, some require expert assistance. If you have tried the basic troubleshooting steps and are still experiencing problems, or if you are not comfortable working with electrical systems, it is best to seek professional help. The problems may include more complex issues, requiring specialized tools and knowledge.
- Complex Electrical Problems: When troubleshooting becomes too complex.
- Software or Internal Component Failures: When advanced diagnostics are needed.
- Safety Concerns: If you are uncomfortable working with electronics.
If you’ve checked the fuse, wiring, and antenna without finding a solution, you may be dealing with a complex electrical issue. This can involve internal problems within the radio unit, such as issues with the amplifier or tuner. Professional assistance will involve using diagnostic equipment to pinpoint the exact problem.
Modern radios use complex electronics and software. If the radio has software glitches or internal component failures, you will need specialized diagnostic equipment to find the solution. These diagnostics require specialized tools and skills to test the radio’s systems.
Working with vehicle electronics can be risky, especially if you are not experienced. If you are uncomfortable or lack experience, seek help from a professional. Electrical work can be dangerous if performed incorrectly. A professional will be familiar with the proper safety procedures.
Frequently Asked Questions
Question: Why does my F150 radio cut out only sometimes?
Answer: Intermittent cutouts are often caused by loose wiring, damaged connections, or an antenna problem that only occurs under certain conditions, such as driving over bumps.
Question: Can a bad speaker cause the radio to cut out?
Answer: Yes, a faulty speaker can sometimes cause the radio to cut out, especially if the speaker is shorted or drawing excessive power.
Question: What’s the easiest thing to check when my radio cuts out?
Answer: The easiest thing to check is the radio fuse; it’s a quick, simple first step. Consult your manual to find the correct location and look for a blown fuse.
Question: How can I tell if the antenna is the problem?
Answer: If you have poor reception or the radio cuts out in certain areas, the antenna might be the issue. Check the antenna cable and the antenna itself for damage.
Question: What should I do if the fuse keeps blowing?
Answer: If the fuse keeps blowing, it indicates a short circuit or another serious electrical problem. You will need to inspect the wiring to find the source of the problem or seek professional help.
Final Thoughts
Discovering what causes f150 radio to cut out involves a step-by-step process of elimination. You explored the most common causes, from loose wiring and blown fuses to antenna issues and radio component failures. You also explored practical troubleshooting steps and the necessary tools. This journey has shown that many radio problems have simple solutions, like tightening a connection or replacing a fuse. If you’ve tried these solutions and the radio still cuts out, it might be time to get some help. Armed with this knowledge, you can troubleshoot with confidence. Now go forth, get your tools, and bring your tunes back to life!