What Causes F150 Coolant Loss? A Simple Guide to Common Issues
If you’re wondering what causes f150 to lose coolant, you’re not alone! It’s a pretty common question for truck owners. Figuring out why your coolant is disappearing can seem tricky, but don’t worry. This guide will help you understand the most frequent reasons. We’ll break down the process in easy steps, so you can pinpoint the problem and get it fixed. Let’s explore what you need to know to get your F150 running smoothly again. We’ll start by looking at some basic areas.
Possible Culprits Behind Coolant Leaks
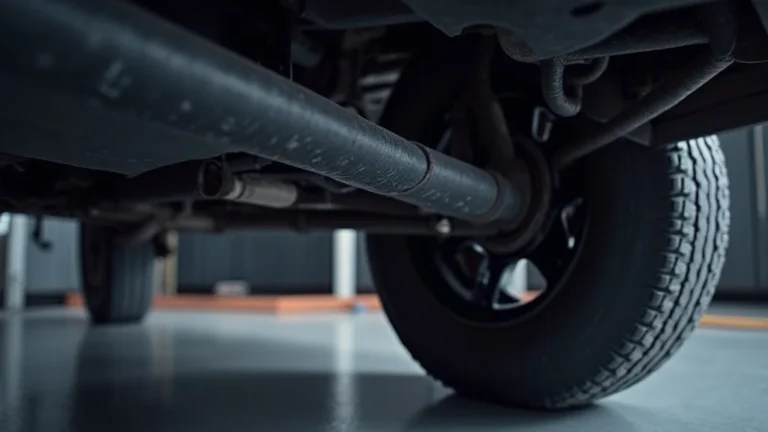
One of the first things many F150 owners face is a sudden drop in coolant level. This is often the first sign of a problem, and the solution typically starts with locating the leak. Pinpointing the source requires knowing where to look and what to look for. Common areas to inspect include the radiator, hoses, water pump, and engine block. Coolant leaks can range from small drips to significant sprays, and finding the origin is the initial key to fixing it. Visual inspection is crucial, but pressure testing the cooling system can sometimes reveal problems that aren’t immediately visible. Once you know where the leak is, you can start making the repairs. The approach, whether it’s replacing a hose or fixing a larger issue, depends on what you find. The goal is always to restore the cooling system’s functionality and prevent further issues.
Examining the Radiator and Associated Components
The radiator is a central part of your F150’s cooling system. It’s designed to dissipate heat and keep the engine at a safe operating temperature. A leak in the radiator is a frequent cause of coolant loss. Radiator leaks can arise from several issues. These issues include corrosion, physical damage from road debris, or degradation of the radiator core. Radiators are often made of aluminum or a combination of aluminum and plastic, both of which are susceptible to wear over time. Regularly check the radiator for signs of leaks, such as drips, stains, or a noticeable drop in coolant level. The radiator cap also plays a key role in maintaining pressure within the cooling system. An old or faulty cap might not seal properly, leading to coolant loss through evaporation or overflow. Inspecting the radiator and its components regularly is a part of proper maintenance.
- Radiator Core Condition: The radiator core is made up of thin tubes and fins that facilitate heat transfer. Over time, these tubes and fins can corrode or become blocked, potentially leading to leaks. Check for visible signs of damage, such as bent fins or signs of coolant residue.
- Hose Inspection: Radiator hoses connect the radiator to the engine and other parts of the cooling system. They can dry out, crack, or become loose over time. Look for cracks, bulges, or leaks at the hose connections. Squeezing the hoses when the engine is cold can help identify potential weak spots.
- Radiator Cap Functionality: The radiator cap maintains pressure within the cooling system, which raises the boiling point of the coolant. A faulty cap can cause coolant to leak or boil over. Inspect the cap’s seal and ensure it holds pressure properly. Consider replacing it every few years as a preventative measure.
- Coolant Level Monitoring: Check the coolant level in the overflow reservoir regularly. A consistent drop in the coolant level, without any visible leaks, may indicate a radiator issue. This could include a small leak that’s difficult to spot.
Water Pump Woes
The water pump is the heart of the cooling system, circulating coolant throughout the engine. A failing water pump is a common reason for coolant loss in an F150. Water pumps are subject to constant use and can eventually wear out. Common issues include seal failure, bearing wear, and corrosion. When the water pump fails, coolant can leak from the weep hole, which is a small opening designed to indicate a pump issue. The weep hole allows coolant to escape when the pump’s internal seals begin to fail. This is typically the first sign of trouble. Another sign is a whining or grinding noise from the front of the engine, which could indicate failing bearings within the pump. Ignoring these symptoms can lead to more serious engine damage. Replacing the water pump can resolve the coolant loss and prevent more problems.
- Seal Integrity: The water pump has seals that keep the coolant contained. These seals can wear out over time. If you find coolant leaking from around the pump, the seals are likely damaged.
- Bearing Wear: The water pump contains bearings that allow the impeller to spin. Over time, these bearings can wear, causing noise and potential failure. You might hear a grinding or squealing noise coming from the pump.
- Weep Hole Leakage: The weep hole is a small opening in the water pump designed to allow coolant to escape when the seals fail. Coolant dripping from the weep hole is a clear indication of a failing water pump.
- Impeller Condition: The impeller is a fan-like structure inside the pump that circulates the coolant. The impeller can corrode or degrade, reducing the pump’s efficiency. This could lead to overheating and, ultimately, coolant loss.
Exploring Engine Block Issues
The engine block, the main structure of the engine, can also be the site of coolant leaks. These leaks can be more difficult to identify than those in the radiator or water pump. Common issues include cracks in the block or cylinder head. The engine block can be damaged by overheating. The cylinder head gasket failure is a common problem. The cylinder head gasket seals the space between the engine block and the cylinder head. These issues often require more intensive repair work. Overheating or physical damage can cause cracks. Coolant can then leak into the engine or outside. A cracked engine block typically requires replacing the block or, in some cases, welding or patching the damage. Repairing a cylinder head gasket usually involves removing the cylinder head, replacing the gasket, and inspecting the head for warpage or damage. These repairs are best handled by a professional mechanic to ensure the engine runs correctly.
- Cylinder Head Gasket Failure: The cylinder head gasket seals the cylinder head to the engine block. When this gasket fails, coolant can leak into the combustion chambers or outside the engine. This can cause white smoke from the exhaust, engine misfires, and a drop in coolant level.
- Engine Block Cracks: Overheating or physical damage can cause cracks in the engine block. Coolant can then seep out of these cracks. Finding these leaks often requires a pressure test or dye test to pinpoint their location.
- Freeze Plug Problems: Freeze plugs, also known as core plugs, are designed to protect the engine block from cracking during freezing conditions. These plugs can corrode or rust. They can eventually leak coolant. Replacing freeze plugs can be a complex job, often requiring specialized tools and skills.
- Intake Manifold Gasket: The intake manifold gasket seals the intake manifold to the engine block. Coolant passages often run through the intake manifold. A failing gasket can cause coolant to leak into the engine or outside, leading to coolant loss.
Pinpointing the Leak: Diagnostic Steps
Identifying where your F150 is losing coolant is crucial to getting it fixed. The process involves different checks and tests to locate the leak. Some methods you can try at home, but others might need a trip to a mechanic. The goal is to systematically rule out potential causes. These include a visual inspection, pressure testing, and using dye to locate small leaks. You should always be cautious when working with hot engines and coolant. If you’re not comfortable working on your truck, it’s best to seek assistance from a qualified mechanic. Getting the correct diagnosis will save you both time and money. It also keeps your truck running smoothly.
Visual Examination: The First Step
The first step in finding a coolant leak is to perform a visual examination of your F150’s cooling system. This involves a careful inspection of all components to look for obvious signs of leakage. Start by looking for puddles of coolant under the truck. Check the engine compartment, paying attention to the radiator, hoses, water pump, and engine block. Look for coolant stains, drips, or wet spots. Pay attention to areas where components connect, such as hose clamps and fittings. Inspect the overflow reservoir for any signs of leakage. Also, check the coolant level in the reservoir and the radiator itself. If the level is low, inspect around the radiator cap for any signs of leakage. A visual inspection can often reveal the source of a leak, especially if it’s large or obvious. However, small leaks may be difficult to spot without additional tests. This step provides the starting point for diagnosis.
- Park on a Clean Surface: Park your F150 on a clean, dry surface, like a garage floor or driveway. This will make it easier to spot any coolant leaks.
- Check Coolant Levels: Check the coolant level in the radiator and the overflow reservoir. Make sure the engine is cold before removing the radiator cap.
- Radiator Inspection: Inspect the radiator for leaks. Look for wet spots or drips. Pay attention to the top, bottom, and sides of the radiator.
- Hose Inspection: Carefully examine all coolant hoses for cracks, bulges, or leaks. Squeeze the hoses to check for softness or swelling.
- Water Pump Examination: Check the water pump for signs of leakage around the weep hole. Also, look for coolant stains on the pump housing.
- Engine Block Inspection: Examine the engine block for cracks or leaks. Pay attention to areas around the cylinder head gasket and freeze plugs.
Pressure Testing: Uncovering Hidden Leaks
Pressure testing is an important tool for revealing coolant leaks that might not be visible during a visual inspection. This process involves using a special tool to pressurize the cooling system. This is done without starting the engine. A pressure tester simulates the normal operating pressure of the cooling system. It allows you to see if there are any leaks. The tester typically has a pump and a pressure gauge. It connects to the radiator or overflow reservoir opening. After attaching the tester, you pump it up to the recommended pressure, usually indicated on the pressure tester or in your F150’s repair manual. Then, you visually inspect the cooling system components for any signs of leaks. The pressure test can help identify leaks in areas like the radiator core, hoses, or cylinder head gasket. It’s often more effective at finding small leaks than a visual inspection alone. Professional mechanics often use pressure testing to quickly diagnose coolant loss issues. It’s a key step in ensuring the vehicle’s cooling system is performing well.
- Attach the Tester: Connect the pressure tester to the radiator or overflow reservoir, following the tool’s instructions. Make sure the connection is secure.
- Pressurize the System: Pump the tester to the recommended pressure, typically 15-20 PSI (pounds per square inch). Watch the gauge to monitor the pressure.
- Visual Inspection: Carefully inspect the cooling system components for leaks. Look for coolant dripping or spraying from the radiator, hoses, water pump, and engine block.
- Listen for Leaks: Listen for any hissing sounds, which could indicate a leak. Pay attention to areas where components connect.
- Pressure Drop: If the pressure drops, it means there is a leak somewhere in the system. The speed at which the pressure drops can help indicate the size of the leak.
Dye Detection: Spotting the Subtle Leaks
When visual inspections and pressure tests fail to reveal the cause of coolant loss, using dye detection is a great option. Dye detection uses a special fluorescent dye added to the coolant. This dye makes leaks visible under a UV light. The process involves adding the dye to the coolant system. Running the engine allows the dye to circulate. After running the engine, you would use a UV light to search for the dye. Leaks will show up as bright, fluorescent spots where the dye escapes. This method is effective at finding very small leaks, such as those in a cylinder head gasket or a slow leak from a hose. It can even locate issues that are difficult to see with the naked eye. The dye can be left in the cooling system for a few days to help with the detection process. Once the leak is found, you can get the parts needed to resolve the issue.
- Add the Dye: Follow the instructions on the dye bottle to add the correct amount to your coolant. Run the engine for a short time to circulate the dye.
- UV Light Inspection: After running the engine, use a UV light to inspect the entire cooling system. This includes the radiator, hoses, water pump, and engine block.
- Look for Fluorescent Traces: Look for bright, fluorescent spots that indicate coolant leaks. The dye will be most visible in the area of the leak.
- Wipe Away Residue: Wipe away any coolant residue to confirm the source of the leak. The dye will make it easy to see where the coolant is coming from.
- Clean Up: After identifying the leak and making the necessary repairs, make sure to flush out the dye from your system.
Common Coolant Loss Causes in F150s
F150 trucks can lose coolant for various reasons. These reasons include component failures and wear and tear. A few key problems that often cause coolant loss are the radiator, hoses, and water pump. Identifying these specific problems will help you address the issues. A common issue is the radiator. It can develop leaks due to age or damage. Another problem is the hoses that can crack or become loose. The water pump, a critical part of the cooling system, can fail. Knowing these common problems helps owners understand what to look for when they face coolant loss. Each issue needs a specific solution. Regular maintenance and careful inspection can help prevent these problems.
Radiator Leaks: A Frequent Culprit
Radiator leaks are a frequent cause of coolant loss in F150 trucks. The radiator’s role is critical in keeping the engine cool. Radiators can develop leaks over time due to wear and tear. Over time, the radiator can corrode, which leads to pinhole leaks in the core. Physical damage, like from road debris, can also cause leaks. Plastic end tanks, common on many radiators, can crack and leak as the plastic ages. The design and materials of the radiator can affect its lifespan. A cracked radiator will quickly cause a noticeable drop in coolant level. Finding the leak can involve a visual inspection for drips or stains, as well as a pressure test to find smaller leaks. Regular maintenance can help extend the life of your radiator. Replacing the radiator is often needed when leaks occur.
- Corrosion: Corrosion can eat away at the radiator’s metal components, leading to leaks. This is especially true in areas where the truck is exposed to road salt.
- Physical Damage: Road debris, such as rocks or small objects, can hit and damage the radiator. This can cause punctures and leaks.
- Plastic Tank Cracks: The plastic end tanks on some radiators can crack over time, especially due to temperature changes and age.
- Hose Connections: The radiator connects to hoses that can leak if their clamps are loose or if the hoses themselves are damaged.
Hose Failures and Their Consequences
Coolant hoses are essential parts of the cooling system. They transport coolant between the engine, radiator, and other components. Hose failures are another common cause of coolant loss. Over time, hoses can degrade due to heat exposure. They can dry out, crack, or become brittle. Coolant leaks can occur at the hose connections. They also can happen along the hose itself. The rubber hoses expand and contract with the temperature. This can lead to cracks or leaks. Loose or damaged hose clamps are also a frequent culprit. When a hose fails, the coolant can spray or drip. The impact can cause a sudden loss of coolant. A leaking hose can quickly lead to overheating and engine damage if not addressed. Checking the hoses regularly is important. Replacing them when they show signs of wear can help prevent problems.
- Drying and Cracking: Heat exposure can cause coolant hoses to dry out and crack, leading to leaks. Regular inspections are key to finding this.
- Loose Clamps: Hose clamps can become loose over time, especially with vibration and temperature changes. This can lead to leaks at the hose connections.
- Bulging or Softening: Hoses can bulge or soften if they are exposed to excessive heat or if they are made of poor-quality materials. This can lead to leaks.
- Material Degradation: Coolant hoses are made of rubber or silicone. These materials degrade over time. The degradation can cause leaks.
Water Pump Issues: A Vital Component
Water pump problems are a key reason for coolant loss in F150s. The water pump circulates coolant through the engine. The water pump’s mechanical seals can wear out. The wear can cause leaks around the pump. This wear and tear is common because the pump operates continuously when the engine is running. Bearing failures can cause a whining or grinding noise. This can also lead to coolant leaks. Another indicator of water pump failure is the weep hole. The weep hole allows coolant to escape when the seals begin to fail. Coolant dripping from the weep hole is a clear sign that the water pump needs to be replaced. Ignoring water pump issues can lead to overheating and engine damage. Getting a water pump replaced when needed keeps the cooling system working well. This extends the life of your engine.
- Seal Failure: The water pump has seals that keep the coolant inside. These seals can wear out over time.
- Bearing Wear: The water pump contains bearings that allow the impeller to spin. Over time, these bearings can wear, causing noise and leakage.
- Weep Hole Leakage: The weep hole is designed to allow coolant to escape when the seals fail. Coolant dripping from the weep hole is a clear sign of a failing water pump.
- Impeller Damage: The impeller is a fan-like structure inside the pump that circulates the coolant. The impeller can corrode or degrade, reducing the pump’s efficiency and leading to leaks.
Step-by-Step Fixes for Coolant Loss
Finding the source of the coolant leak is just the beginning. The next step involves fixing it. This process can range from simple DIY tasks, like tightening a hose clamp, to more complex repairs that might need professional help. Knowing what steps to take depends on the type of leak. For example, replacing a damaged hose is usually straightforward. However, repairing a cracked engine block needs specialist skills. Safety is always important when you are working on your vehicle. Taking the necessary precautions, like wearing safety glasses and gloves, is important. Also, be sure to use the right tools for the job. Following the correct steps for each repair will ensure that your truck’s cooling system functions correctly. This will prevent more damage. If you’re not sure about any part of the process, it’s always best to ask for help.
Replacing a Leaking Hose: Easy DIY
Replacing a leaking coolant hose is a common DIY repair that is straightforward. The first step is to identify the damaged hose. Examine all hoses in the cooling system. Look for cracks, bulges, or leaks. Once you find the problem hose, you can start the replacement. You’ll need the right size replacement hose. You’ll also need the right tools. Remove the hose clamps from both ends of the old hose. This is often done using pliers or a screwdriver. Next, remove the old hose from the fittings. Install the new hose. Make sure the hose is firmly attached to the fittings. Place the hose clamps back in place, and tighten them securely. Refill the coolant to the correct level. Start the engine and check for leaks. Check for leaks around the new hose. Replacing the hose correctly is a quick fix to coolant loss issues.
- Locate the Leaking Hose: Identify the specific hose that is leaking coolant. Check for cracks, bulges, or wet spots.
- Gather Tools and Parts: Get the replacement hose. You will also need hose clamps and tools like pliers or a screwdriver.
- Remove the Old Hose: Loosen the hose clamps on both ends of the old hose and carefully remove the hose from the fittings.
- Install the New Hose: Attach the new hose to the fittings and secure it with the hose clamps. Make sure the hose is properly seated.
- Check for Leaks: Start the engine and inspect the hose connections for any signs of leaks. Top off the coolant as needed.
Radiator Repair or Replacement: What to Do
Dealing with a leaking radiator involves a choice: repair or
- Assess the Damage: Determine the severity of the leak and the overall condition of the radiator. Small leaks may be repairable, while large leaks usually require replacement.
- Consider Repair Options: For minor leaks, explore repair options like radiator sealant. Seek a professional opinion for more serious damage.
- Remove the Old Radiator: Drain the coolant. Disconnect the hoses. Remove the fan shroud and unbolt the radiator from its mounts.
- Install the New Radiator: Put the new radiator in place. Reconnect the hoses. Install the fan shroud. Make sure everything is secure.
- Refill and Test: Refill the cooling system with the correct coolant. Start the engine and check for leaks around the new radiator.
Water Pump Replacement: Handling the Heart of the System
Replacing a water pump is a more complex job. It is often best left to those with mechanical experience. First, you’ll need to drain the cooling system and remove the old water pump. The water pump is usually located at the front of the engine. It is driven by the engine’s drive belt. You will need to remove the belt and any components that block access to the pump. This could involve removing the fan, fan shroud, or other accessories. Unbolt the old water pump from the engine block. Clean the mounting surface. Then, install the new water pump. Make sure to use a new gasket and tighten the bolts to the recommended torque. Reinstall the other components. This includes the drive belt and fan. Fill the cooling system with the correct coolant. Check for leaks. This will ensure that the replacement is working correctly.
- Drain the Coolant: Drain the cooling system from the radiator or the drain plug in the engine block to avoid a messy job.
- Remove Accessories: Detach the drive belt. Remove any parts that block access to the water pump, like the fan or other parts.
- Detach the Old Pump: Unbolt the old water pump from the engine block. Clean the surface before the new pump is installed.
- Put in the New Pump: Use a new gasket. Tighten the bolts to the right specs. Make sure the pump is seated properly.
- Test and Refill: Put everything back together. Fill with the proper coolant. Start the engine. Check for leaks to ensure the pump is working well.
Frequently Asked Questions
Question: Why is my F150 losing coolant, and I don’t see any leaks?
Answer: Coolant can evaporate, especially if there’s a small leak at a hose connection or the radiator cap. Check the engine oil for a milky appearance, which can indicate a head gasket failure. Also, look for white smoke from the exhaust, as it may suggest coolant burning in the cylinders.
Question: What’s the best way to find a coolant leak in my truck?
Answer: Start with a visual inspection, checking all hoses, the radiator, and the water pump for signs of leaks, such as drips, stains, or a low coolant level. A pressure test can also help uncover hidden leaks by pressurizing the cooling system.
Question: How often should I check my F150’s coolant level?
Answer: You should check your coolant level at least every month or every time you fill up your gas tank. This will help you catch any leaks early and prevent engine damage.
Question: How do I know if my water pump is bad?
Answer: Common signs of a failing water pump include coolant leaks around the pump, a whining or grinding noise, or a noticeable drop in coolant level. The weep hole might have coolant dripping from it.
Question: Can I drive my F150 if it’s losing coolant?
Answer: Driving a vehicle with coolant loss is risky and may cause engine overheating. Try to fix the leak or have your truck fixed as soon as possible. Overheating can lead to serious engine damage.
Final Thoughts
Knowing what causes f150 to lose coolant helps you keep your truck in good working order. Common culprits include radiator leaks, hose failures, and water pump problems. To keep your F150 running smoothly, it’s key to look for signs like low coolant levels, visible leaks, and unusual noises. Checking your truck’s coolant system regularly is a great habit. Knowing the most frequent causes gives you the upper hand to spot issues and get them fixed early. This could be as easy as tightening a loose clamp or as complex as replacing a radiator. Don’t be afraid to perform basic checks or get your truck checked by a trusted mechanic. Proactive care helps avoid major issues. This is an investment in your truck’s long life and reliability. By staying informed and taking the right steps, you can keep your F150 in top shape for the long haul.