Why F150 Dash Rattles on Bumps and How to Fix It
If you’re wondering why f150 dash rattles on bumps, you’re not alone! It’s a common issue, especially for those new to truck ownership. These rattles can be annoying, but figuring out the cause doesn’t have to be hard. We’ll explore the common reasons behind the noise and give you a simple, step-by-step approach to pinpointing and fixing the problem. We will break down everything from the dashboard components to how the suspension plays a role. Let’s get started on silencing those annoying rattles and enjoying a quieter ride.
Key Takeaways
- The dashboard components often vibrate due to road conditions.
- Loose fasteners and clips are common culprits behind the rattling.
- Temperature changes and aging can degrade materials, increasing noise.
- Identifying the source of the noise requires some detective work.
- Simple tools and basic skills are usually sufficient for repairs.
- Properly addressing the problem will improve the driving experience.
Common Causes of F150 Dashboard Rattles
The F150, like any vehicle, is subject to wear and tear over time. Road vibrations, temperature fluctuations, and the age of the materials all contribute to potential rattles. These sounds can come from many places, and finding the origin is the first step toward fixing the issue. The dash is a complex assembly of different parts. Understanding what causes these rattles helps you target the problem areas.
Loose Fasteners and Clips
One of the most frequent reasons for an F150 dash rattle is loose fasteners and clips. Over time, the constant vibration from driving can cause screws, bolts, and plastic clips to loosen. These fasteners hold the various dashboard components together. When these connections become loose, the parts start to move and vibrate against each other, leading to the annoying rattling sound. The dashboard is constructed from many pieces. They are connected using screws, bolts, and plastic clips. These clips are designed to snap into place and hold the components firmly.
- Why they loosen: Road vibrations, bumps, and changes in temperature cause parts to shift slightly. This constant movement can gradually loosen screws and dislodge clips. Over time, plastic clips can also become brittle and break.
- How to identify: Listen closely to where the rattle is coming from. Use a flashlight to inspect the dashboard areas where the sound seems most prominent. Look for any loose screws or missing clips. Push gently on various parts of the dash to see if the sound changes or stops.
- Fixing the issue: Tighten any loose screws.
- Tools Needed: A screwdriver set (Phillips and flathead), a plastic trim removal tool, and potentially some thread locker.
Aging and Material Degradation
The materials used in your F150’s dashboard will age and degrade. Plastics, rubber, and other materials become brittle. The sun’s heat can cause these materials to dry out, shrink, or crack, creating gaps where parts move. This degradation is normal over time, but it can contribute to a noisy cabin. As materials age, they may lose their elasticity and no longer absorb vibrations as efficiently. Even small movements can cause the dash components to contact each other. This contact leads to rattles and squeaks.
- Impact of Temperature: Extreme heat and cold can cause materials to expand and contract. This process can stress the plastic components and speed up their degradation. Direct sun exposure can further damage the materials, making them brittle.
- The role of Rubber and Foam: Rubber seals and foam padding provide cushioning. They are between dashboard parts to absorb vibrations. These parts can compress, flatten, and lose their effectiveness. This will increase the likelihood of rattles.
- Repair strategies: Replace worn or damaged rubber seals. Consider using adhesive-backed foam or felt tape to fill gaps and reduce contact. Apply a protectant to the plastic surfaces to help prevent drying and cracking.
- Materials for the repair: Foam tape, felt tape, plastic protectant, and replacement rubber seals.
Vibration From the Suspension and Frame
The suspension of your F150 absorbs the impact of bumps and uneven roads. However, some vibrations make their way through the frame and into the cabin. These vibrations can cause the dashboard components to rattle. Any issues with the suspension, such as worn shocks or bushings, can worsen the problem. Even the slightest misalignment or imbalance can contribute to noise. If the vehicle’s frame isn’t rigid, the movement can transfer into the interior.
- Suspension components: Worn shocks, struts, and bushings can’t absorb vibrations. They then get transferred into the vehicle’s body. These vibrations can cause the dash to rattle.
- Frame issues: A loose or damaged frame can transmit road noise directly to the cabin. This issue can exacerbate dash rattles. Check for any signs of corrosion or damage to the frame.
- Solutions: Inspect and replace worn suspension components. Make sure to tighten any frame bolts. Examine the vehicle’s frame for any damage. Consult a mechanic if you suspect frame issues.
- Diagnosing the vibration: Inspect the suspension components. Look for signs of wear. Check the frame for rust or damage. Consult with a mechanic.
Step-by-Step Guide to Diagnosing F150 Dashboard Rattles
Finding the source of the rattle requires a systematic approach. Don’t be discouraged; patience and attention to detail are key. This section gives you the steps you need to identify the exact cause. Start with the basics and gradually narrow down the possibilities until you find the source of the annoying noise.
Preparation and Initial Assessment
Before you begin, gather the necessary tools. This stage involves an initial assessment. The goal is to set the stage for a successful diagnosis. It helps save time and prevents frustration. Taking some steps upfront will make the whole process easier. Start by collecting what you need, from tools to basic safety gear.
- Gather the right tools: You will need a basic set of tools. This may include screwdrivers, a plastic trim removal tool, a flashlight, and some masking tape. A mechanic’s stethoscope is helpful for pinpointing the sound.
- Safe Work Area: Park the truck on a level surface. Ensure it is in a well-lit area. Remove any loose items from the dashboard, glove compartment, and center console. This will help prevent unnecessary noise during the inspection.
- Start the Sound Test: Take your F150 for a short test drive. Pay close attention to when and where the rattle occurs. Note whether it happens on rough roads, during specific speeds, or when making turns. This information will help narrow down the possible causes.
- Recording the Sounds: Use your phone’s voice recorder. Record the rattle in action. This recording can help you pinpoint the sound’s characteristics. Listen carefully for details. Is it a high-pitched squeak or a low-frequency rattle?
Visual Inspection and Basic Checks
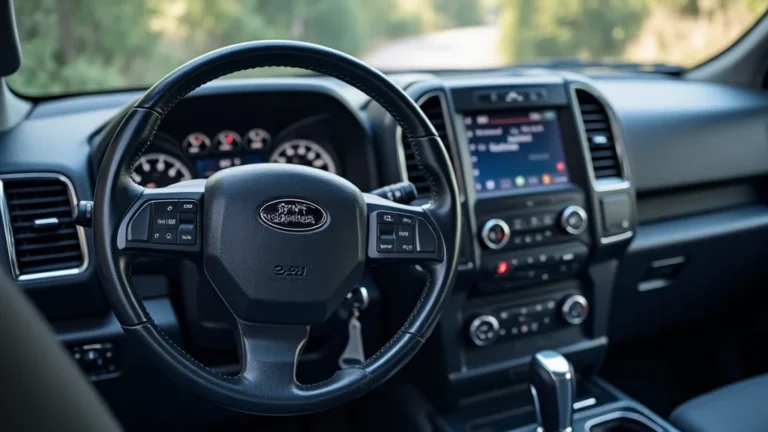
A visual inspection of your F150’s dashboard is the next step. It’s like detective work. You are looking for clues. This part can reveal a lot about the source of your rattle. You’ll examine everything from loose screws to disconnected wires. Be thorough. Look in all accessible areas of the dash.
- Exterior Inspection: Start with the exterior of the dash. Check all visible areas for any loose components. Inspect the dashboard trim and vents for any obvious gaps. Also, look for any damage or misalignment.
- Accessing Hard-to-Reach Areas: Use a flashlight to examine areas. These include behind the glove compartment and under the steering column. Use a plastic trim removal tool to gently pry panels to access hidden areas.
- The Check of Fasteners: Gently shake or wiggle different components to see if you can reproduce the rattle. Start with the most common problem areas. Look for any loose screws, bolts, or clips. Tighten those you can. Replace any damaged clips.
- Checking Wiring: Inspect the wires. Make sure they are secured with clips. Confirm that they are not rubbing against any metal components. Properly secured wires will prevent noise.
The Road Test and Further Diagnostics
A road test is key to finding the source. It lets you replicate the conditions that cause the rattle. Make sure you can reproduce the noise. That will give you clues. This stage combines your observations with targeted actions. The process includes listening carefully, and making specific adjustments.
- Select a Test Route: Drive the F150 on roads that replicate the conditions. These could be rough surfaces, speed bumps, or roads where the rattle is most noticeable.
- The Listening Focus: Pay close attention to where the sound seems to be coming from. Try different speeds and driving maneuvers. Notice any patterns, such as the type of bump that triggers the rattle.
- Testing with Pressure: While driving, gently press on different parts of the dashboard. See if you can stop or change the sound. If you find a spot where the rattle stops, that area is your prime suspect.
- Additional Checks: Check other areas. These include under the seats and in the doors. Sometimes, noises seem to be coming from the dash but originate elsewhere.
How to Fix F150 Dashboard Rattles
Now that you’ve identified the source of the rattle, it’s time to fix it. This stage focuses on removing the noise. We will cover a range of fixes. They go from simple tightening to replacing parts. Remember to be cautious, work methodically, and be patient.
Tightening Loose Components
Loose components are the most common source of dashboard rattles. The fix is often as simple as tightening a screw or re-securing a clip. These actions are a good starting point. They require no special tools or advanced skills. Start with these easy fixes.
- Locate the Loose Parts: Use the road test and visual inspection from earlier. They will identify the exact location of the loose components. Mark the areas where you found the problem. That will help you focus your efforts.
- The Use of Screws: Get a screwdriver that fits the screws. Tighten each screw, but be careful not to overtighten them. Overtightening can damage the plastic and make the problem worse.
- Clips and Fasteners: If you find loose clips, try to reattach them. If they are broken, replace them. Use a plastic trim removal tool to gently separate the dashboard panels. This will give you easier access to these components.
- Reassembly: Once you’ve tightened everything, take the truck for another test drive. Confirm the noise is gone before putting everything back together.
Adding Padding and Insulation
If tightening screws doesn’t solve the issue, adding padding can often eliminate the rattle. Padding helps to fill gaps and absorb vibrations. This method is especially helpful if the rattle comes from two parts touching. You will choose the right materials and apply them strategically.
- Selecting Materials: Choose materials designed to reduce noise and absorb vibrations. Foam tape, felt tape, and weather stripping are excellent choices. Make sure the materials can withstand temperature changes.
- Preparing the Surface: Clean the contact surfaces where you’ll be applying the padding. The goal is to make sure the adhesive sticks properly. Use isopropyl alcohol to clean the area.
- Applying the Padding: Cut the padding to the right size and shape. You’ll need it to fill the gaps and prevent contact. Stick the padding on the contact points. Then, reassemble the dashboard components.
- Testing: Drive the F150 on a bumpy road and check if the rattle is gone. If the rattle persists, you may need to add padding. This may require further investigation.
Replacing Damaged Components
Sometimes, the damage goes beyond simple tightening or padding. Some dashboard components might be worn out. Replacing those will solve the rattle. It is often the best solution for parts that have broken or degraded. You will need to remove the old parts and replace them.
- Identifying the Faulty Components: Identify the specific parts causing the rattle. The visual inspection will show you the damage. That could include broken clips, cracked panels, or worn rubber seals.
- Ordering Replacement Parts: Get the right replacement parts. You can find them at auto parts stores or online. Make sure the parts are specific to your F150 model and year.
- Removing the Old Components: Remove the old, damaged components. Use a plastic trim removal tool to separate the panels. Keep track of all the screws and clips. Label them to make reassembly easier.
- Installing the New Components: Put the new components in place. Then, reassemble the dashboard. Then, tighten all screws and clips. Finally, test the truck on a rough road.
Frequently Asked Questions
Question: What tools do I need to fix my F150 dash rattle?
Answer: You’ll typically need a basic set of tools, including screwdrivers (Phillips and flathead), a plastic trim removal tool, a flashlight, and potentially some thread locker or adhesive-backed foam or felt tape for padding.
Question: How do I find out where the rattling is coming from?
Answer: Start by taking a test drive on a bumpy road. Listen carefully and note when the rattle happens. Use a flashlight to inspect the dashboard components for loose screws or broken clips. Try pressing on different parts of the dash while driving to see if the noise changes.
Question: What if tightening screws doesn’t stop the rattle?
Answer: If tightening screws doesn’t work, consider adding padding or insulation. Use materials like foam tape or felt tape to fill gaps between components and reduce contact. If the problem persists, you may need to replace damaged components like broken clips or worn panels.
Question: Can temperature changes cause dashboard rattles?
Answer: Yes, temperature changes can definitely cause dashboard rattles. Extreme heat and cold can cause the materials in your dashboard to expand and contract. This can lead to loosening or cracking of the plastic components, which then contribute to the rattling sound.
Question: Is it difficult to work on my F150’s dashboard?
Answer: It depends on your comfort level with vehicle repairs. Diagnosing and fixing dashboard rattles can be done with basic tools and some patience. Start with simple fixes like tightening screws and replacing clips. If you’re unsure about any step, consulting a professional mechanic is always an option.
Final Thoughts
Resolving the issue of why f150 dash rattles on bumps doesn’t have to be a complicated task. By following the steps in this guide, you can identify the source of the noise. Then, you can determine how to fix it effectively. The process involves some basic detective work. You also need the right tools and a little patience. Whether it is tightening loose screws or adding insulation, you can restore peace and quiet to your driving experience. By taking the time to address these rattles, you’re not only improving your ride but also protecting your vehicle. Take action now and say goodbye to those annoying noises.