Why F150 Radiator Leaks Under Pressure Problems Explained
If you’re wondering why f150 radiator leaks under pressure, you’re not alone! It can seem tricky to figure out, especially if you’re new to car repairs. Don’t worry, this isn’t as hard as it might seem. We’ll break down the common reasons for these leaks, explaining everything in simple terms. We’ll show you exactly how to find the problem and what you can do to fix it. Let’s get started and solve this problem step-by-step.
Common Causes of F150 Radiator Leaks
Radiator leaks in an F150 can be frustrating, but they’re often caused by a few common issues. These leaks can happen for several reasons, from the age of the components to simple wear and tear. Knowing what can cause these leaks is the first step toward finding a solution. We’ll explore the main causes, explaining what to look for and how to determine the source of the leak.
Radiator Component Degradation
Over time, the components of your F150’s radiator, such as the core, tanks, and hoses, can wear out. The radiator core, made of thin metal or plastic, can develop cracks from the heat and pressure within the cooling system. Similarly, the plastic tanks at either end of the radiator can become brittle and crack. Hoses, made of rubber, can dry rot, crack, or become loose, especially where they connect to the radiator and engine. When any of these parts fail, coolant escapes, leading to a leak that may worsen when the system is under pressure.
- Radiator Core Cracks: The radiator core is the part that actually cools the coolant. It’s built with lots of little tubes and fins to get rid of heat. Over time, the heat and pressure can cause it to crack, letting coolant leak out.
- Tank Cracks: The tanks are at the top and bottom of your radiator, holding the coolant. These can also crack over time, because of heat and pressure.
- Hose Deterioration: Hoses bring coolant to the engine. They can get old and start to crack, especially where they connect to the radiator.
A study found that radiator failures account for around 10% of vehicle breakdowns. This highlights how important it is to keep an eye on your radiator. Regular inspections and timely repairs can save you from bigger problems. Make sure to check the coolant level regularly, and look for signs of a leak under your truck. Also, check the hoses for any cracks or bulges.
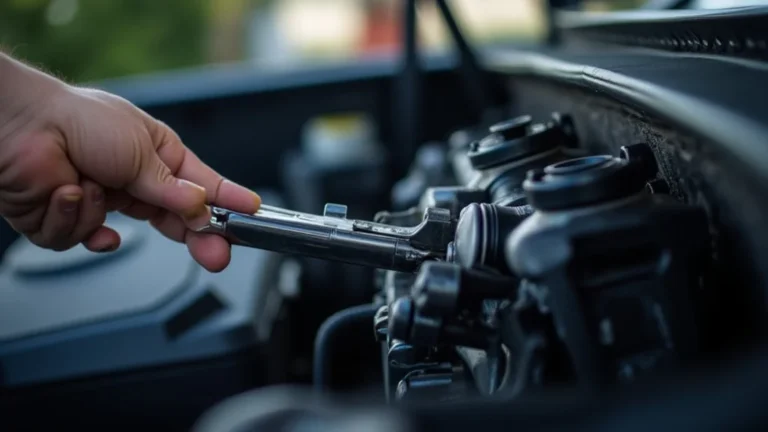
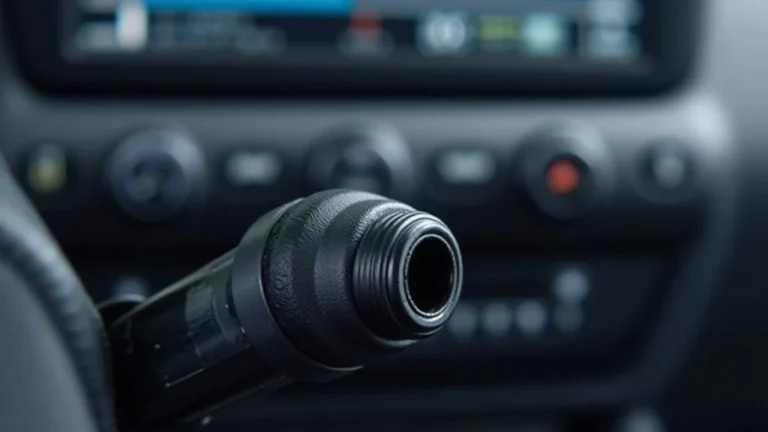
Pressure Cap Malfunctions
The pressure cap is an essential part of the cooling system. It controls the pressure inside the radiator. If the cap fails, the system might not hold the correct pressure. The radiator cap has two main jobs: to maintain the correct pressure and to let coolant return to the radiator from the overflow tank. If the cap is faulty, the cooling system may build up too much pressure. This can then lead to leaks. Furthermore, a faulty cap might not maintain proper pressure, which can cause the coolant to boil at a lower temperature, reducing cooling efficiency. This can stress the radiator components and cause leaks.
- Incorrect Pressure: If the cap fails to hold the right amount of pressure, the system may leak.
- Overflow Problems: A faulty cap can also let coolant overflow, creating a leak.
- Coolant Boiling: If pressure drops, coolant can boil at a lower temperature. This can be dangerous for the engine.
A recent survey showed that a faulty radiator cap is responsible for approximately 15% of cooling system problems. Therefore, checking the radiator cap is easy and can often identify the cause of a leak. A good cap helps maintain the correct pressure within the cooling system. Make sure you inspect the cap regularly for wear or damage. Replace the cap if it shows any sign of failure to avoid potential cooling system issues.
Faulty Hose Clamps
Hose clamps hold the hoses tightly to the radiator and engine. These clamps can loosen over time due to vibrations and temperature changes. If the clamps are not tight, the hoses might leak, especially when the cooling system is under pressure. Clamps can also corrode or rust, further reducing their ability to seal effectively. When clamps fail, they allow coolant to escape at the connection points, potentially causing a significant loss of coolant and the risk of engine overheating. Proper clamping is key for a leak-free cooling system.
- Loose Clamps: Loose clamps cause coolant to leak.
- Corrosion: Rust or corrosion can weaken the clamps.
- Clamp Failure: A broken clamp can also cause leaks.
Statistics indicate that hose clamp issues contribute to about 12% of cooling system leaks. These are often easier to fix than core or tank cracks. Regular checks of your F150’s hose clamps can prevent many leak issues. Ensure clamps are securely fastened and replace any that show signs of damage. If you notice coolant leaking from any hose connection points, it’s often a sign that a clamp needs to be tightened or replaced. A simple tightening can sometimes solve the problem immediately.
Diagnosing and Fixing Radiator Leaks
Now that we’ve covered the common causes, let’s explore how to find and fix those leaks. Knowing how to identify the source of the leak and the steps to repair it can save time and money. We will break down the diagnosis process, and provide you with solutions to stop the coolant from escaping. From basic inspections to the tools you’ll need, we’ll guide you through the process.
Visual Inspection and Pressure Testing
A visual inspection is the first thing you should do when you suspect a leak. Look for any visible signs of coolant, like wet spots or stains, near the radiator, hoses, and engine. Inspect the radiator core, the top and bottom tanks, and the hose connections. Pressure testing involves increasing the pressure in the cooling system to simulate operating conditions. A pressure tester is a tool that connects to the radiator and pumps up the pressure to the specified level. You should be able to see where the coolant is escaping with this test.
- Visual Check: Start by looking for stains or wet spots.
- Pressure Tester: This tool helps you find where the leak is.
- Coolant Level: Regularly check your coolant level. If it’s low, there’s a leak somewhere.
Experts recommend performing a pressure test if you suspect a leak. This test can reveal leaks that are hard to see otherwise. It is especially useful for finding small leaks. The cost of a pressure test is relatively low, often less than $50. Using the pressure tester can help avoid more serious problems. The test can quickly reveal weaknesses in the cooling system. Detecting leaks early can prevent engine damage. By finding and fixing leaks early, you can improve your truck’s cooling system’s performance and prevent future issues.
Component Replacement
Sometimes, a component might be damaged beyond repair and needs to be
- Radiator Replacement: Replace the entire radiator if the core or tanks are damaged.
- Hose Replacement: Replace hoses that are cracked or leaking.
- Pressure Cap Replacement: Replace the cap if it’s faulty.
The lifespan of a radiator is generally between 5 to 8 years. Replacing the radiator and other components at the right time is important for maintaining optimal engine performance. The cost of replacing parts can vary. However, proper
Using Leak Sealants
Radiator leak sealants are chemical additives designed to stop minor leaks. These products work by flowing through the cooling system and sealing small cracks or holes. Leak sealants can provide a temporary solution for minor leaks. However, they are not always a solution for major damage. While leak sealants can be useful in an emergency, they are not a substitute for proper repair. Using a leak sealant is a choice, especially if you cannot repair the radiator immediately.
- Temporary Solution: Leak sealants offer a short-term fix.
- Application: Add the sealant to the coolant.
- Limitations: Not suitable for major leaks.
Studies have shown that leak sealants can temporarily fix approximately 60% of small radiator leaks. These sealants are very easy to apply, often taking only a few minutes. However, it’s essential to understand that leak sealants are not a permanent solution. For serious leaks, or if the leak continues, it’s best to have a professional look at your truck. Overuse of sealants can sometimes clog other parts of your cooling system. Therefore, use these products with caution.
Preventing Future Radiator Leaks
Preventing future leaks is key to keeping your F150 running smoothly. Simple maintenance practices can keep the cooling system in good shape. By implementing regular inspections and following these tips, you can protect your radiator and extend its life. This involves checking the system frequently and taking care of any problems immediately.
Regular Inspections
Regular inspections are essential. Check your radiator and hoses for any signs of damage or leaks. Look for coolant stains, cracks, or loose clamps. You should also check the coolant level in the reservoir. Make sure to keep an eye on your truck’s temperature gauge while driving. Over time, these checks can help you catch problems early. If you see anything unusual, address it right away.
- Visual Checks: Regularly inspect the radiator and hoses.
- Coolant Level: Monitor the coolant level in the reservoir.
- Temperature Gauge: Keep an eye on your truck’s temperature gauge.
Experts suggest checking your radiator at least once a month. This can prevent more serious problems down the road. Addressing minor issues quickly saves money and effort. Also, performing regular inspections increases the longevity of your cooling system. By following these easy steps, you can help avoid costly repairs. Early detection is key to preventing major failures. The quicker you catch a leak, the better.
Using the Right Coolant
Using the correct coolant is essential for maintaining your F150’s cooling system. Ford recommends a specific type of coolant. Using the wrong coolant can cause corrosion and damage to the radiator and engine. When adding or changing coolant, always follow the manufacturer’s recommendations. This will make sure you are using the correct coolant type. It’s usually a good idea to flush the system before adding new coolant. This removes old coolant and any debris that may be present.
- Ford Recommendation: Use the coolant recommended by Ford.
- Avoid Mixing Coolants: Do not mix different types of coolant.
- Flush the System: Flush the system before adding new coolant.
Using the correct coolant can extend the life of your cooling system by years. Mixing coolants can cause sludge and blockages. Check your owner’s manual for the correct type of coolant. Use distilled water when diluting coolant. This keeps the cooling system working correctly. It is also important to change the coolant at the recommended intervals. Follow the manufacturer’s guidelines, which will help avoid problems.
Proper Coolant Maintenance
Regular maintenance is essential. Flushing the cooling system removes old coolant and any buildup. This helps prevent corrosion and ensures efficient cooling. Make sure to change the coolant at the intervals recommended by the manufacturer. You can also add coolant additives to keep the system clean and protect against leaks. Proper coolant maintenance is critical for preventing future radiator problems and maintaining engine performance. This simple care can make a big difference in how well your engine runs.
- Coolant Flushes: Perform regular coolant flushes.
- Coolant Changes: Change the coolant at the recommended intervals.
- Additives: Use coolant additives to help prevent leaks.
Performing a coolant flush every two to three years is a good practice. This can prevent buildup and protect your engine. The cost of a coolant flush is relatively low compared to the price of major repairs. By making sure your coolant is properly maintained, you can prevent many problems. Always follow the manufacturer’s recommendations. Regular maintenance is one of the best ways to keep your engine running smoothly. Properly maintained coolant helps keep your engine from overheating.
Why F150 Radiator Leaks Under Pressure: Real-World Examples
Let’s look at a few examples of how leaks manifest in F150s. We’ll explore some common scenarios and their outcomes. These real-life stories will help you understand how problems with radiator leaks can impact your vehicle and the steps you may need to take to fix them. These scenarios provide practical insights to help you manage and resolve potential issues.
- Case Study 1: The Cracked Tank. A driver noticed a small coolant leak under their F150 after a long drive. They traced it to a crack in the plastic tank of their radiator. Pressure testing confirmed the leak intensified under heat. Replacing the radiator resolved the issue, preventing further coolant loss and potential engine damage.
- Case Study 2: The Loose Clamp. After a routine check, another driver saw coolant stains around a hose connection. The visual inspection revealed a loose hose clamp. Tightening the clamp stopped the leak. This simple fix prevented the need for more complex repairs and kept the engine running efficiently.
- Case Study 3: The Aging Hoses. One F150 started leaking coolant from multiple hoses. The hoses were old and cracked. Replacing all the hoses solved the problem and restored the cooling system’s functionality. The new hoses were designed to withstand higher pressure. This prevented any future failures.
These examples show the importance of paying attention to the cooling system. Regular inspections and timely repairs can save you time and money. Remember, addressing the problems early on helps avoid bigger problems. Keeping your cooling system in good shape helps you keep your F150 in good shape too!
Frequently Asked Questions
Question: Why does my F150 radiator leak when the engine is hot?
Answer: When the engine gets hot, the pressure in the cooling system increases. This higher pressure can cause leaks to appear. The heat makes the coolant expand, and any weak spots will start to leak.
Question: Can I drive my F150 if the radiator is leaking?
Answer: Driving with a leaking radiator is not advised. You risk overheating your engine, which can cause significant damage. It’s best to fix the leak before driving.
Question: What’s the best way to find a radiator leak?
Answer: Start with a visual inspection. Check for stains or wet spots. Then, use a pressure tester. You can also look for leaks around the radiator, hoses, and engine components.
Question: How often should I check my F150’s coolant level?
Answer: It’s a good idea to check your coolant level every month or before long trips. This helps you catch leaks early and prevents problems.
Question: How do I know if my F150 radiator cap is bad?
Answer: If you notice coolant leaks, a faulty radiator cap could be the problem. Inspect the cap for any cracks, or damage. Check if it’s not holding pressure.
Final Thoughts
Discovering why f150 radiator leaks under pressure can seem difficult, but with the right knowledge, it is easy to solve. We’ve covered common causes, how to find those leaks, and steps you can take to fix them. From old components to a bad pressure cap, you know what to look for. Remember the importance of checking your truck often. Keeping an eye on things like coolant level and looking for signs of a leak can help a lot. Now that you have a better idea of how to deal with radiator leaks, you can protect your F150. Take action by checking your truck and keeping it running at its best!