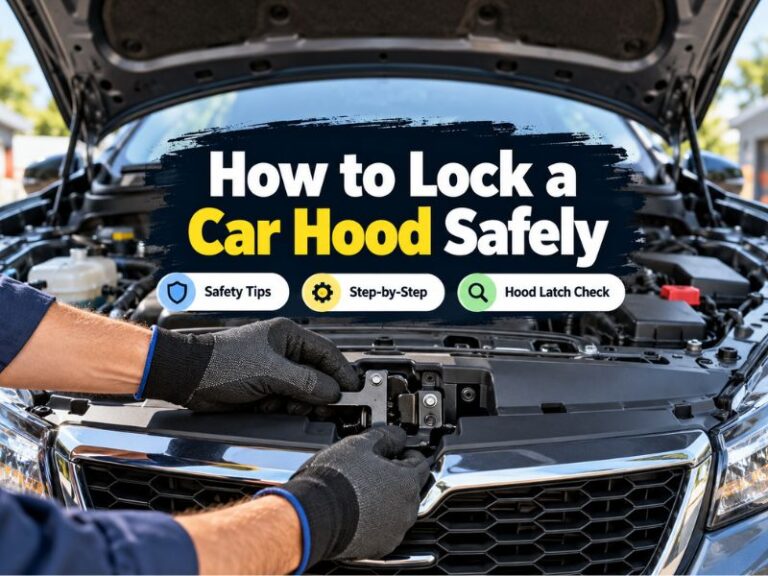
How to Lock a Non Locking Hood: Proper Hood Lock Installation
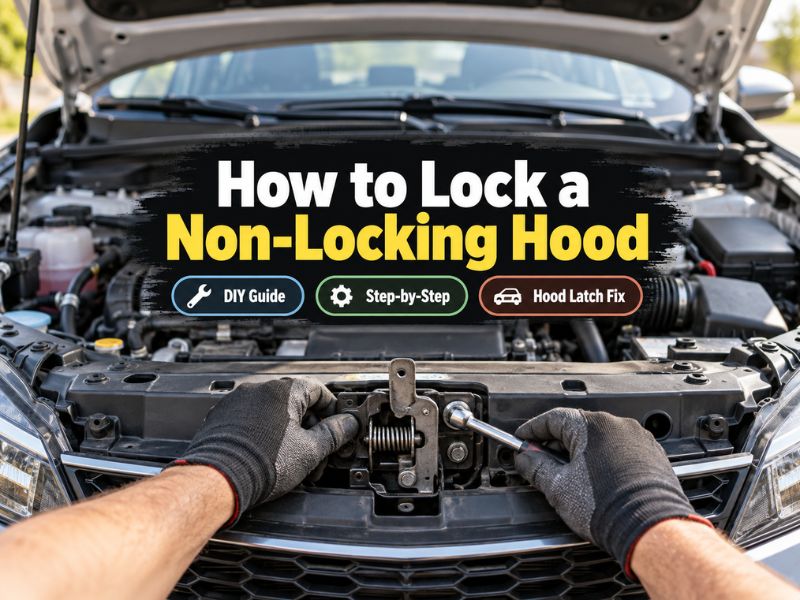
A hood that closes but does not lock can leave the engine compartment exposed to tampering, weather, or accidental opening. Some vehicles have only a basic catch, while others have a damaged, missing, or modified factory latch. Whatever the reason, the important distinction is that a decorative hood pin is not automatically a security lock.
It may hold the hood down, but it might not stop someone from opening it.
The safest practical solution is usually a vehicle-compatible aftermarket hood lock or locking secondary latch installed alongside the original hood catch. A temporary cable or padlock can secure a parked vehicle in limited situations, but it is not a substitute for a properly mounted automotive latch. If the hood structure, latch area, or release cable is damaged, repair that problem before adding hardware.
This guide explains how to lock a non locking hood without interfering with the normal hood-release system. You will learn how to choose a compatible kit, position the lock, protect wiring and moving parts, test the mechanism with the hood open, and confirm that the hood stays secure while still releasing normally. The procedure assumes a conventional vehicle hood and basic hand-tool confidence; model-specific instructions always take priority.
At a glance
- Use a purpose-built locking hood latch when real security matters; ordinary hood pins are not enough.
- Keep the original safety catch and factory release functioning after the installation.
- Test the lock repeatedly with the hood open before closing it for the first time.
How to lock a non locking hood with a proper secondary lock
The method below adds a mechanical lock without relying on the hood skin alone. The lock should be mounted to strong metal near the existing latch path, while the original primary latch and safety catch remain available as backup systems.
Tools you will need
- A vehicle-compatible locking hood latch or hood-lock kit, including its instructions and keys
- Basic hand tools such as sockets, wrenches, screwdrivers, and pliers
- Optional: drill, metal drill bits, center punch, file, and rust-protective paint if the kit requires new holes
- Optional: trim-removal tool, masking tape, marker, and a flashlight for access and alignment
Step 1 Confirm why the hood does not lock
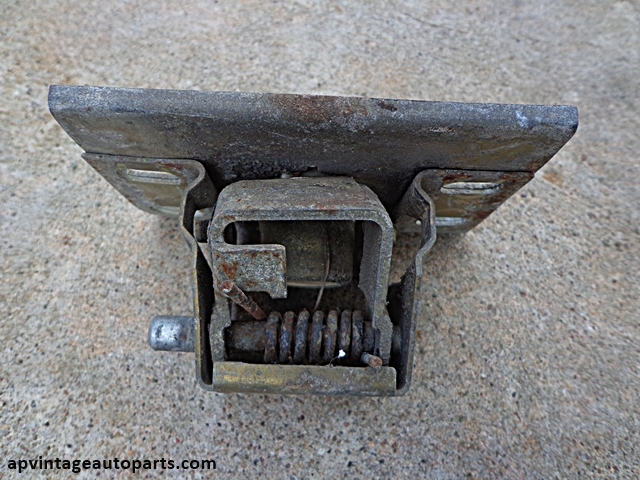
Open the hood and inspect the factory latch, striker, release cable, and safety catch before buying or installing anything. A hood that fails to secure because of a bent striker, loose latch, stretched cable, missing spring, or poor alignment may only need a repair rather than an added lock.
With the hood open, operate the interior release and observe the latch. It should move smoothly and return to its resting position. Look for cracked mounting metal, loose bolts, corrosion that affects the latch, or a cable that remains under tension after the lever is released.
Also check whether the hood has a second catch. The safety catch is designed to prevent a partially released hood from flying fully open, but it is not normally intended to serve as a theft-resistant lock. If the original latch is damaged or the hood does not sit evenly, stop here and repair or inspect it before continuing.
Step 2 Choose a compatible locking hood mechanism
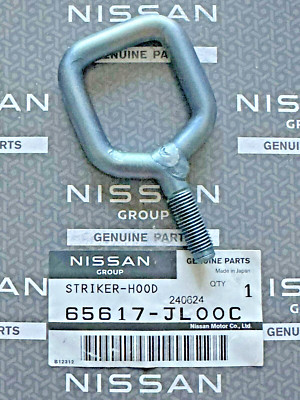
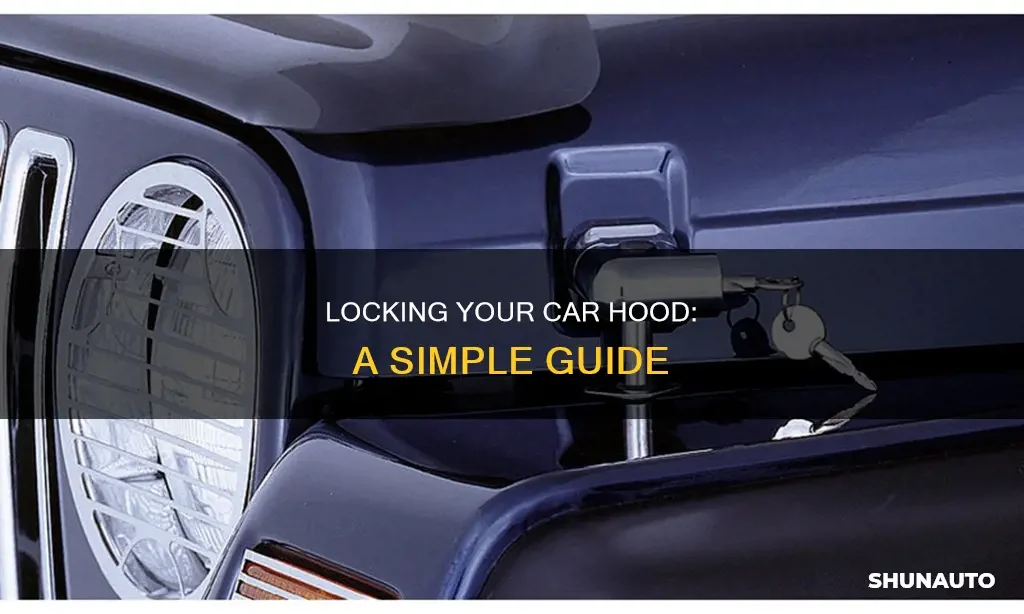
Select a lock made for the vehicle or for the exact hood-latch arrangement. A compatible kit should include a locking body, a striker or locking pin, mounting hardware, keys or an approved release method, and instructions showing where the parts belong.
Prefer a design that works as a secondary hood latch while preserving the factory latch. The lock should not require removing the original safety catch, blocking the release cable, or depending on a thin fiberglass or aluminum hood panel as its only support.
Universal kits can work, but they require careful measurement and often require drilling. Compare the available mounting space with the kit’s dimensions, including clearance for the key, cable, latch arm, radiator support, headlights, wiring harnesses, and hood movement. If you cannot identify a strong mounting point or a safe release path, have an automotive technician select and install the mechanism.
Important
Do not install a lock that could leave the hood inaccessible after it is closed. Keep a working interior release, and confirm that the hood can still be opened if the added lock fails.
Step 3 Prepare the vehicle and mark the mounting locations
Park on level ground, switch off the engine, remove the key, and allow hot components to cool. Open the hood fully and support it with the factory prop rod or approved support; never rely on a weak gas strut while working near the latch.
Read the kit instructions before removing trim or drilling. Place masking tape around the proposed locations to protect painted surfaces, then hold the latch and striker in position. The two pieces must meet squarely when the hood is closed, with enough adjustment to account for normal hood alignment.
Move the hood slowly through its full range if possible. Watch for contact with the lock body, fasteners, brackets, radiator, fan, air-conditioning lines, washer tubing, and electrical wiring. Mark only locations where the lock can be bolted to solid structure and where the fasteners will not interfere with any moving or hot component.
Step 4 Mount the locking body to solid structure
Install the lock body according to the manufacturer’s orientation. The strongest location is generally a reinforced portion of the radiator support or another substantial metal bracket near the existing latch, but the correct point depends on the vehicle and kit.
If the kit uses existing holes, clean the contact surfaces and install the supplied fasteners. If drilling is required, center-punch the marks, check behind the panel again, and drill gradually with the hood open. Remove sharp burrs with a file, then apply suitable corrosion protection to exposed bare metal before final assembly.
Use the supplied washers, spacers, and locking nuts rather than substituting random hardware. Tighten the fasteners firmly according to the kit instructions without crushing a thin support or distorting the lock body. The lock should not twist when you apply moderate hand pressure.
Do not mount the lock only through the outer hood skin unless the manufacturer specifically designed the kit for that structure. The hood skin can flex, crack, or tear around a loaded fastener. A lock must resist movement while the vehicle is moving, not just keep the hood closed while parked.
A useful way to approach how to lock a non locking hood is to check your progress after each stage.
Step 5 Fit and secure the striker or locking pin
Attach the striker, loop, or locking pin to the hood-side bracket or the designated reinforced area. Leave the adjustment hardware slightly loose if the design allows it; initial alignment is easier when the parts can move a small amount.
Lower the hood carefully without slamming it. Check whether the striker enters the lock centrally and whether the hood sits at its normal height. If the hood must be forced downward, lifted sideways, or shifted to engage the lock, realign the parts rather than relying on force.
Once the position is correct, tighten the bracket hardware and confirm that the lock body still operates freely. The key should turn without binding, and the locking pin should enter and leave the mechanism without scraping. A small amount of manufacturer-approved lubricant may be appropriate, but do not pack the mechanism with grease that can collect grit.
Step 6 Route any release cable safely
Some hood locks use a separate release cable, while others use a key directly at the grille or lock body. If your kit includes a cable, route it away from the exhaust, radiator fan, belts, pulleys, steering components, and sharp edges.
Secure the cable with suitable clips and leave enough slack for engine movement, hood movement, and normal service access. It should not be stretched tight when the hood is closed, and it should not form a low loop where it can snag or be pulled from outside the vehicle.
Place the interior end where the driver can reach it but an outside person cannot easily activate it through the grille. Do not hide it so well that you cannot use it during an emergency or routine maintenance. If the cable passes through a bulkhead, protect it with a proper grommet.
Step 7 Test the lock with the hood still open
Before closing the hood, operate the added lock repeatedly with the hood open. Insert and remove the key or use the release control, then watch the latch arm, pin, and spring return. The mechanism should move through its full travel without sticking.
Test the factory interior release separately. It should still pull the original latch and allow the normal hood-opening sequence. If the new hardware blocks the factory lever, holds the cable under tension, or prevents the safety catch from moving, correct the installation before proceeding.
Make a deliberate failure check: with the added lock in its locked position, confirm that the release method you intend to use can unlock it. Then place the mechanism in its unlocked position and confirm that the lock cannot accidentally re-engage as the hood moves. Follow the kit’s instructions if it uses a different sequence.
Check your result
With the hood open, the locking mechanism should visibly reach its locked position, release fully with the key or control, and leave the factory latch and safety catch unobstructed.
Step 8 Close the hood and verify complete engagement
Remove tools, rags, and loose hardware from the engine compartment. Close the hood gently from the position recommended by the vehicle manufacturer, then inspect the gaps around the hood and grille.
Use the key or control to lock the added mechanism. Do not assume it locked because the hood looks closed. Pull upward gently at the front edge without using excessive force.
The hood should remain seated, and the lock should not visibly shift, flex, or release.
Unlock the hood and confirm that it opens using the intended release method. Then test the factory release and safety catch according to the vehicle’s normal procedure. If either release feels unusually stiff, stop using the vehicle until the alignment is corrected.
Step 9 Perform a final movement and road-readiness check
Inspect the completed installation from several angles. Verify that no fastener, bracket, cable, or lock component touches the hood when it is closed. Check that the key cylinder or release point is protected from direct contact with the grille and that the hood can still be opened for emergency service.
Understanding how to lock a non locking hood also means recognizing the limits of the method.
After the first short drive, park safely and inspect the hardware again. Vibration can reveal a loose nut, a shifting bracket, or a contact mark that was not visible while stationary. Recheck the lock before relying on it for regular vehicle security.
Record where the key is stored and keep any spare key separate from the vehicle. If the mechanism becomes difficult to operate, address it promptly rather than forcing the key or slamming the hood.
What makes a non-locking hood secure
A secure hood installation has more than a visible pin or a closed panel. It has a load-bearing mounting point, a positive locking mechanism, a protected release path, and a functioning factory safety system. These parts work together to keep the hood shut without making routine servicing unsafe.

Hood pins versus locking hood latches
Traditional hood pins use a pin and retaining clip to hold the hood down. They can be useful for motorsport or as an additional restraint, but the exposed clip is often removable without a key. Unless the pin assembly is specifically designed and rated as a lock, it should not be treated as theft protection.
A locking hood latch normally captures a striker and requires a key or controlled release to open. It is a better choice when the goal is to restrict access to the engine compartment. Even then, the lock is only as strong as its brackets and mounting structure.
Why the original safety catch should remain
The safety catch is a backup feature that helps prevent a hood from opening fully if the primary latch is not engaged. Removing it to simplify an aftermarket installation creates an unnecessary hazard. A secondary lock should supplement, not replace, the factory retention system.
The hood also needs correct alignment. A lock that carries the hood at an odd angle can create stress, wind noise, paint damage, or false engagement. Gaps should remain reasonably even, and the hood should not need to be forced into position.
How to check the finished installation
Verification should test both security and normal operation. A lock that resists a gentle pull but prevents the driver from opening the hood is not a successful installation. Perform the checks below with the vehicle parked and the engine off.
- Confirm that the added lock reaches its locked position and cannot be released without the key or intended control.
- Confirm that the hood stays down during a gentle upward hand check at several points along the front edge.
- Confirm that the factory latch, safety catch, and interior hood release still operate normally.
- Look for rubbing, fresh scratches, bent brackets, loose hardware, or cable contact with hot or moving parts.
- Check that the hood opens far enough for normal fluid checks and emergency access.
- After the first drive, inspect the fasteners and alignment again.
If any test produces uncertainty, do not treat the hood as secure. Leave it parked with the hood safely closed only if the original latch works, and arrange an inspection or correction before normal driving.
Common problems after installation
Most problems come from poor alignment, an unsuitable mounting point, or a release cable that has been routed incorrectly. The symptoms below can help identify the likely issue, but a damaged latch or uncertain hood retention deserves professional attention.
| Symptom | Likely cause and response |
|---|---|
| The key will not turn | The striker may be side-loaded or misaligned. Open the hood, inspect the entry path, and realign the parts instead of forcing the key. |
| The hood sits high or uneven | The striker may be too tight, too low, or installed at an angle. Check the original hood bump stops and adjust the new hardware gradually. |
| The lock closes but releases easily | The mechanism may not be reaching its full locked position, or the bracket may flex. Stop driving until the lock and mounting structure are corrected. |
| The factory release feels stiff | The new bracket or cable may be pressing against the original latch or release cable. Restore free movement before using the vehicle. |
| The cable is hard to pull | Look for tight bends, heat damage, crushed housing, or insufficient slack. Reroute it with a protected, gradual path. |
| The lock loosens after driving | Check the supplied fasteners, washers, and locking hardware. A flexible or weak mounting panel may require a stronger bracket or different installation point. |
When to stop and seek qualified help
Stop the project if drilling may contact an airbag component, fuel system, refrigerant line, high-voltage wiring, or another system you cannot identify. Also seek help if the hood is bent, the latch support is cracked, the release cable is broken, or the hood cannot be held safely open.
Do not test an uncertain hood at highway speed. A hood that opens while driving can block visibility and cause a serious crash. A qualified technician can identify reinforced mounting points and verify that the lock does not compromise the vehicle’s original safety systems.
Frequently asked questions
Can I use ordinary hood pins to lock a non-locking hood?
Usually not for meaningful security. Ordinary pins hold the hood down but may be removable without a key. Use a purpose-built locking hood latch, or treat hood pins as an additional restraint rather than the only lock.
Can I remove the factory hood latch when adding a hood lock?
Do not remove it unless the vehicle manufacturer or kit instructions specifically require a validated replacement system. Keeping the original latch and safety catch provides important backup retention and preserves the normal release arrangement.
Is a cable lock through the grille a permanent solution?
A cable can be a temporary deterrent when the vehicle is parked, but it is vulnerable to cutting, can interfere with airflow or moving parts, and may not hold the hood safely during driving. It is not equivalent to a properly mounted locking latch.
Why does my new hood lock bind when I turn the key?
Binding usually indicates that the striker is pushing sideways or that the lock body is not square with the entry path. Check alignment with the hood open, inspect for contact marks, and adjust the bracket rather than forcing the key.
How often should I inspect an aftermarket hood lock?
Inspect it after installation, after the first drive, and whenever the hood has been serviced or struck. Include the fasteners, bracket, lock cylinder, release cable, and surrounding wiring in the inspection.
Finish with a secure, testable hood lock
The reliable answer to how to lock a non locking hood is to install a compatible locking hood latch on strong structure while preserving the factory latch and safety catch. Careful alignment matters as much as the lock itself: the mechanism must engage positively, release predictably, and remain clear of hot, sharp, and moving parts.
Before depending on the installation, test it with the hood open, verify both release systems, inspect the closed hood for full engagement, and recheck the hardware after the first drive. If the hood structure or latch behavior is uncertain, stop and have the installation inspected rather than accepting a questionable lock.