How to Lubricate a Hood Release Cable: Step-by-Step Guide
A stiff hood release handle does not always mean the cable is failing. Dirt, moisture, corrosion, or dried lubricant inside the cable housing can increase resistance and make the hood difficult to open. Knowing how to lubricate a hood release cable can sometimes restore smooth movement and reduce stress on the release handle and hood latch.
The job is usually simple: open the hood, inspect the cable and latch, lubricate the accessible cable ends and latch mechanism, then operate the release several times to distribute the lubricant. However, some modern hood cables use sealed or low-friction liners that should not be flooded with lubricant.
The key is using the correct product and applying it only where needed. Lubrication can help a dry or slightly stiff cable, but it cannot repair a frayed, kinked, rusted, or broken hood release cable.
How to Lubricate a Hood Release Cable
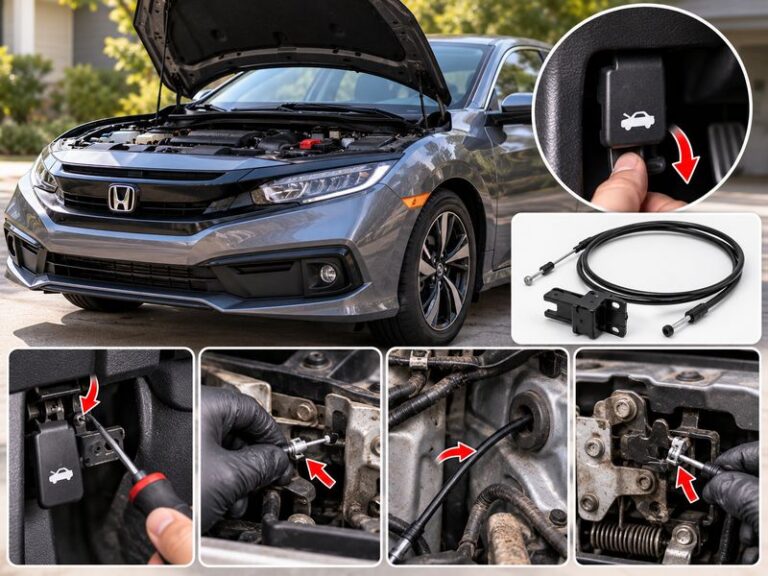
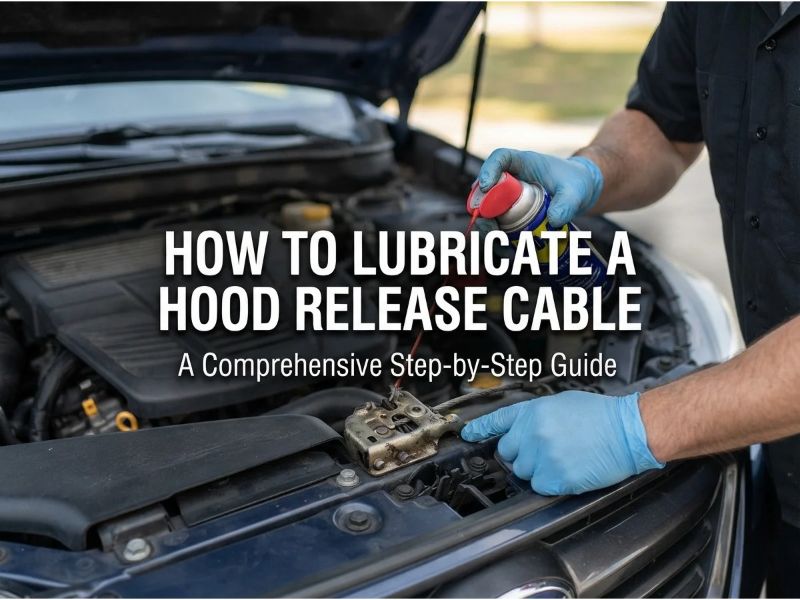
To lubricate a hood release cable, open the hood and locate where the cable connects to the hood latch. Clean away dirt, apply a small amount of cable-safe lubricant to the exposed inner cable and pivot points, then work the hood release handle several times. If the cable housing can safely accept lubricant, allow a small amount to travel into the housing.
For most vehicles, the basic process is:
- Open the hood.
- Locate the hood release cable at the latch.
- Inspect the cable for damage.
- Clean dirt from the cable end and latch.
- Apply an appropriate lubricant.
- Operate the release handle several times.
- Lubricate the hood latch separately.
- Test the system before closing the hood.
Do not continue lubricating a cable that is visibly damaged. Replacement is the better repair in that situation.
Read More: how to fix a stretched hood release cable
What Lubricant Should You Use on a Hood Release Cable?
The best lubricant depends on the cable design.
Good choices may include:
- PTFE-based cable lubricant
- Light synthetic lubricant
- Silicone-based lubricant that is compatible with plastics and rubber
- Manufacturer-recommended control cable lubricant
For the hood latch itself, a small amount of white lithium grease or another suitable automotive latch grease often works well on exposed metal pivot points.
The cable and latch do not necessarily require the same lubricant.
Best Choice for the Cable
A light, penetrating cable lubricant is generally better inside a cable housing than thick grease.
A light lubricant can travel between the inner cable and housing without creating excessive drag.
Best Choice for the Hood Latch
The latch contains exposed pivots, springs, and sliding metal surfaces.
These areas usually benefit from a lubricant that remains in place longer, such as white lithium grease or a manufacturer-approved latch lubricant.
Can You Use WD-40 on a Hood Release Cable?
Standard WD-40 can help loosen moisture, dirt, or light corrosion, but it is generally better viewed as a water-displacing penetrant and cleaner rather than the ideal long-term cable lubricant.
If a cable is sticky, a small amount may help free it temporarily. Afterward, a proper cable lubricant can provide longer-lasting lubrication if the cable design permits it.
Do not flood the cable housing with WD-40.
Some cables contain plastic or low-friction liners, so always consider the cable design and vehicle manufacturer’s recommendations.
Can You Use White Lithium Grease on the Cable?
White lithium grease is excellent for many hood latch components, but it is usually too thick to force deep inside a narrow hood release cable housing.
Use it mainly on:
- Hood latch pivots
- Release lever contact points
- Springs where appropriate
- Hood striker contact surfaces
For the cable itself, a lighter lubricant is usually more suitable.
Step 1: Open the Hood First
Whenever possible, perform the job with the hood already open.
This is important because you do not want to accidentally disconnect or misadjust the hood release system and then close the hood.
Once the hood is open, locate the main hood latch. It is commonly mounted near the front center of the radiator support, although some vehicles use different layouts.
Find the cable entering the latch assembly.
Step 2: Inspect the Cable Before Lubricating It
Lubrication is useful only if the cable is still mechanically sound.
Examine the accessible cable for:
- Frayed strands
- Rust
- Kinks
- Cracked outer housing
- Melted insulation
- Broken retaining clips
- Loose cable housing
- Excessive slack
If individual steel strands are breaking, replace the cable.
A lubricant may temporarily make a damaged cable move more easily, but it cannot restore its strength.
Step 3: Check the Hood Release Handle
Look under the dashboard at the interior hood release handle.
Pull the handle slowly.
It should move smoothly and return normally.
Watch for:
- Cracked plastic handle
- Loose mounting screws
- Cable housing moving with the handle
- Excessive handle travel
- Grinding or scraping feel
A stiff handle can be caused by the cable, but it can also result from the handle mechanism itself.
If the handle pivot is accessible and clearly dry, a small amount of appropriate lubricant may help.
Avoid spraying lubricant all over interior trim or carpeting.
Step 4: Clean the Cable and Latch Area
Before adding new lubricant, remove loose dirt around the cable connection and hood latch.
Use a clean rag or soft brush.
Road grime mixed with grease can create a thick abrasive paste, so adding more lubricant over heavy dirt is not ideal.
Focus on cleaning:
- Cable end
- Cable bracket
- Release lever
- Latch pivots
- Hood striker contact area
You do not need to completely strip the latch unless it is extremely dirty.
Step 5: Apply Lubricant to the Exposed Cable
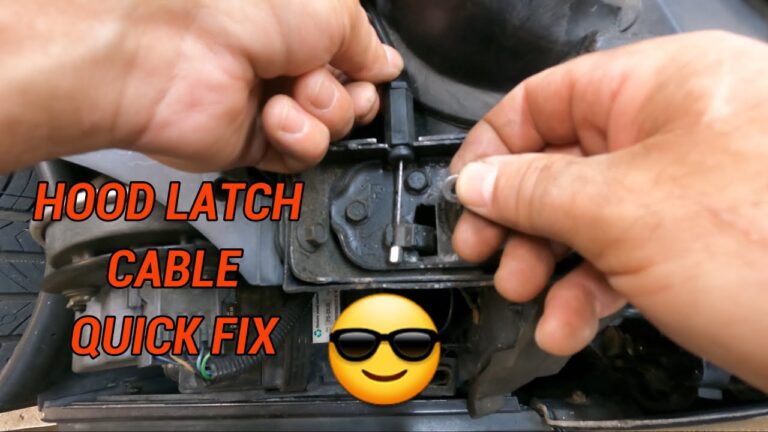
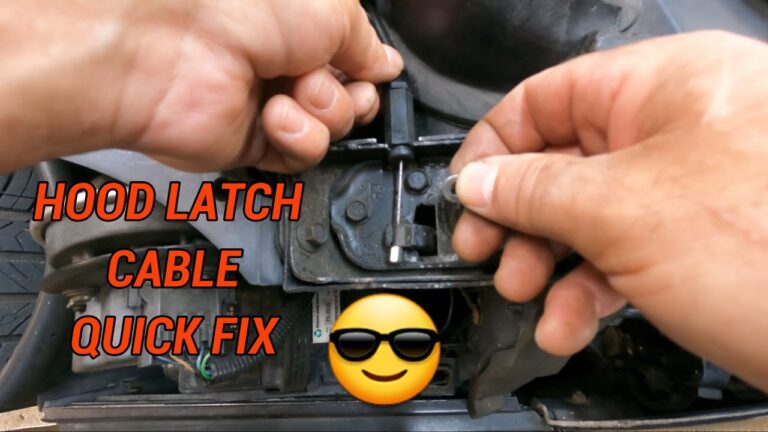
Locate the exposed portion of the inner hood release cable near the latch.
Apply a small amount of cable-safe lubricant where the inner cable enters the housing.
The goal is to let some lubricant work into the housing rather than soaking the entire area.
If possible, position the cable so gravity can help the lubricant travel inside.
Avoid excessive spray.
More lubricant is not necessarily better.
Step 6: Work the Hood Release Handle
After applying lubricant, have another person pull and release the interior hood release handle several times while you observe the cable.
This movement helps distribute lubricant along the inner cable.
You may notice the mechanism becoming smoother after several cycles.
Continue until the cable movement feels consistent.
Do not pull the handle violently.
If the cable still requires excessive force, investigate the latch and cable condition rather than simply adding more lubricant.
Step 7: Lubricate the Hood Latch
A stiff hood latch is often mistaken for a bad hood release cable.
Apply a small amount of suitable latch lubricant to the moving metal parts.
Common lubrication points include:
- Main latch pivot
- Release lever pivot
- Secondary safety latch pivot
- Spring contact points
- Rotating catch
Operate the latch several times so the lubricant spreads across the moving surfaces.
Wipe away excess lubricant.
Too much grease attracts dust and road debris.
Step 8: Lubricate the Hood Striker if Needed
The hood striker is the metal loop or pin that enters the latch when the hood closes.
A very small amount of grease on the striker’s contact surface may reduce friction and wear.
Do not cover the entire striker with a thick layer.
Only the surfaces that actually contact the latch need lubrication.
Step 9: Test the Latch With the Hood Open
Before closing the hood, test the mechanism.
On many vehicles, you can use a screwdriver to carefully move the latch into its closed position while the hood remains open.
Then pull the interior release handle.
The latch should immediately return to the released position.
Be careful not to place your fingers inside the latch mechanism.
After testing, make sure the latch has returned fully to the open position before lowering the hood.
Step 10: Close and Recheck the Hood
Once you are confident everything works correctly, close the hood normally.
Pull the interior release handle.
The hood should pop up enough for the secondary safety latch to be released by hand.
Check that:
- Release handle feels smooth
- Hood releases on the first pull
- Handle returns properly
- Hood closes securely
- Latch fully engages
If the cable still feels stiff, further diagnosis is needed.
Should You Lubricate the Entire Cable Housing?
Not always.
Older cable designs may benefit from lubricant being worked into the housing.
However, many modern control cables use plastic, nylon, or PTFE-type liners designed to reduce friction without heavy lubrication.
Adding the wrong lubricant can sometimes:
- Attract dirt
- Damage certain liner materials
- Cause the cable to become gummy
- Increase resistance over time
If the cable appears sealed or the manufacturer describes it as maintenance-free, lubricate the exposed connection points and latch rather than forcing lubricant deep inside the housing.
How to Lubricate a Hood Cable From the Interior End
Some vehicles provide access to the cable near the interior release handle.
If accessible:
- Remove only the trim necessary to reach the cable.
- Inspect the cable attachment.
- Confirm the housing is securely mounted.
- Apply a very small amount of suitable lubricant to the exposed cable if appropriate.
- Operate the handle several times.
- Wipe away excess lubricant.
- Reinstall the trim.
Do not disconnect the cable unnecessarily.
A cable that is difficult to reinstall can leave the hood release inoperative.
What If Lubricant Will Not Go Into the Cable?
Do not force it.
A sealed cable may not be designed for internal lubrication.
The housing may also be blocked by:
- Corrosion
- Broken cable strands
- Crushed housing
- Severe kink
- Hardened contamination
If a cable remains stiff even after the latch and exposed ends are lubricated, replacement may be more effective than trying to flood the housing.
Signs the Hood Release Cable Needs Replacement Instead
Lubrication is maintenance, not a repair for structural damage.
Replace the cable if you notice:
- Visible fraying
- Broken wire strands
- Heavy rust
- Kinked inner cable
- Crushed outer housing
- Cable sticking repeatedly
- Cable does not return smoothly
- Excessive stretch or slack
- Handle requires unusually hard pulling
- Cable binds even after lubrication
A hood cable can eventually snap if damaged strands continue to weaken.
Replacing it before it breaks is usually much easier because the hood is still accessible.
What If the Hood Release Is Still Hard to Pull After Lubrication?
If lubrication does not help, the problem may be somewhere else in the system.
Hood Latch May Be Misaligned
The hood striker can place too much pressure on the latch.
A common clue is that the hood releases more easily when someone pushes down on it while another person pulls the interior handle.
Cable Housing May Be Damaged
A crushed or kinked housing creates friction that lubricant may not overcome.
The cable assembly usually needs replacement.
Release Handle May Be Failing
A cracked handle or bent mounting bracket can reduce leverage and make the release feel difficult.
Inspect the interior mechanism.
Cable May Be Corroded Internally
Severe internal corrosion can lock the inner cable against the housing.
Replacement is generally more reliable than repeated lubrication.
How Often Should You Lubricate a Hood Release Cable?
There is no universal maintenance interval.
Many vehicles never require routine internal cable lubrication.
Instead, inspect and lubricate the system when you notice:
- Increased handle resistance
- Squeaking
- Slow latch movement
- Corrosion around the latch
- Hood becoming more difficult to release
Periodically lubricating the hood latch mechanism is usually more useful than regularly flooding the cable housing.
Vehicle-specific maintenance information should take priority if the manufacturer gives a recommended procedure.
Common Mistakes to Avoid
Using Too Much Lubricant
Excessive lubricant can collect dirt and make the latch messy.
Apply only enough to coat the moving surfaces.
Using Heavy Grease Inside the Cable Housing
Thick grease may increase resistance, especially in cold temperatures.
Use a light cable lubricant when internal lubrication is appropriate.
Lubricating a Damaged Cable Instead of Replacing It
Frayed strands are a mechanical failure.
Lubricant will not make the cable safe or reliable again.
Closing the Hood Before Testing
Always verify the release mechanism while the hood is open.
Closing the hood immediately after disturbing the cable could leave it stuck shut.
Ignoring a Sticky Latch
The latch often causes more resistance than the cable itself.
Clean and lubricate both parts of the system.
Can Lubrication Fix a Stretched Hood Release Cable?
Lubrication cannot shorten a physically stretched cable.
However, a stiff latch or dry cable may make the release handle feel as though the cable has stretched because you need more travel and force to open the hood.
If the system still has excessive slack after lubrication, inspect:
- Cable housing mounts
- Retaining clips
- Interior handle
- Latch connection
- Factory adjustment points
A genuinely stretched cable may require adjustment or replacement.
Is a Stiff Hood Release Cable Dangerous?
A stiff hood release cable normally does not cause the hood to open while driving because the cable’s job is to release the latch.
However, excessive resistance can eventually cause the cable or interior handle to break.
That can leave you unable to open the hood when you need access to the battery, engine oil, coolant, or other components.
If the hood itself does not latch securely, that is a different and more serious problem. Do not drive with a hood that cannot be securely latched.
FAQs About How to Lubricate a Hood Release Cable
What Is the Best Lubricant for a Hood Release Cable?
A light PTFE, silicone, synthetic, or manufacturer-approved cable lubricant is generally suitable when the cable is designed to be lubricated.
Avoid packing thick grease deep inside the cable housing.
Should I Grease the Hood Latch Too?
Yes. A dry hood latch can create significant resistance.
Use a small amount of suitable automotive grease on the exposed metal pivots and contact points, then operate the latch several times.
Can I Spray Silicone Lubricant Into the Hood Release Cable?
Silicone lubricant may be appropriate for some cables, especially when it is safe for plastics and rubber.
However, some cables are sealed or lined and should not be flooded internally. Check vehicle-specific guidance if available.
Will Lubricating the Cable Make the Hood Easier to Open?
Yes, if friction inside the cable or latch is causing the problem.
If the cable is stretched, frayed, kinked, or the latch is misaligned, lubrication alone may not fix it.
How Do I Know Whether the Cable or Latch Is Sticking?
Open the hood and disconnecting nothing, watch the cable and latch while someone pulls the release handle.
If the cable moves smoothly but the latch resists, the latch is likely the problem.
If cable movement is rough or jerky, the cable or housing may be binding.
Can I Use Motor Oil on a Hood Release Cable?
Motor oil is not the ideal choice.
It can attract dirt and may not be suitable for every cable liner.
A product specifically intended for control cables or light mechanical lubrication is a better option.
Should I Lubricate a New Hood Release Cable?
Usually not unless the cable manufacturer or vehicle service information recommends it.
Many replacement cables come pre-lubricated or use low-friction liners that require no additional lubricant.
What Should I Do if the Hood Release Cable Is Frayed?
Replace it.
Frayed strands indicate the cable is physically failing. Lubricating it may make movement smoother temporarily, but the cable can still break without warning.
Conclusion
Learning how to lubricate a hood release cable is mainly about reducing friction without overloading the system with grease. Clean the cable connection and hood latch, apply a small amount of appropriate lubricant, work the release mechanism several times, and test everything with the hood open before closing it.
Pay particular attention to the hood latch, because a dirty or dry latch is often responsible for a stiff release handle. If the cable is frayed, kinked, badly corroded, or remains difficult to operate after lubrication, replacement is usually the better solution.