How to Fix a Stretched Hood Release Cable: DIY Repair Guide
A hood release handle that suddenly feels loose or requires several hard pulls often points to excess slack somewhere in the release system. Learning how to fix a stretched hood release cable usually starts with checking the cable housing, mounting clips, release handle, and hood latch before replacing any parts.
In many cases, the cable itself has not physically stretched very much. Instead, the outer cable housing may have moved, a retaining bracket may have loosened, or the hood latch may need adjustment or lubrication. Restoring the cable to its correct position can sometimes bring the hood release back to normal.
If the inner cable is badly worn, frayed, kinked, or permanently lengthened, however, replacement is usually the safest repair. This guide explains how to diagnose the problem, remove cable slack, adjust the hood latch, and determine when a new hood release cable is necessary.
How to Fix a Stretched Hood Release Cable

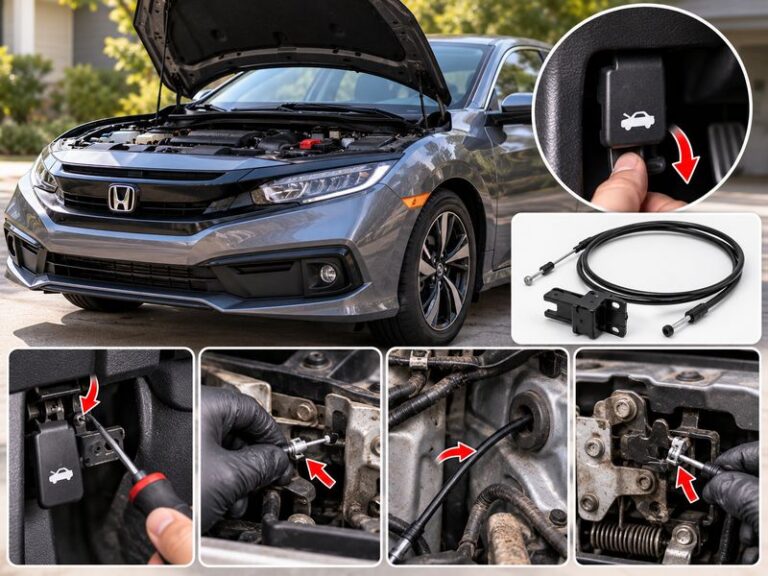
To fix a stretched hood release cable, first inspect the cable at the interior release handle and hood latch. Make sure the outer housing is securely seated in its brackets. If the vehicle provides a cable or latch adjustment, remove the excess slack until the latch releases with a normal pull. Lubricate and test the latch afterward.
If there is no adjustment available and the cable remains loose, replace the hood release cable rather than trying to shorten a damaged cable permanently.
The basic repair process is:
- Open the hood if possible.
- Inspect the interior hood release handle.
- Check the cable housing and retaining clips.
- Inspect the cable connection at the hood latch.
- Remove available slack using the factory adjustment.
- Clean and lubricate the hood latch.
- Test the release mechanism several times.
- Replace the cable if adjustment cannot restore proper operation.
The exact design varies by vehicle, so the adjustment point may be at the latch, along the cable housing, or not present at all.
What Does a Stretched Hood Release Cable Feel Like?
A stretched or excessively loose hood release cable normally causes the release handle to move farther than it used to before anything happens.
Common symptoms include:
- Hood release handle feels unusually loose.
- Handle travels almost all the way before the latch moves.
- You have to pull the handle several times.
- Hood releases only when the handle is pulled very hard.
- Someone has to press down or lift the hood while you pull the handle.
- Hood occasionally refuses to open.
- Release handle does not return normally.
- Cable can be seen moving excessively at the latch.
These symptoms do not automatically mean the steel cable itself has stretched.
A problem with the cable housing, latch adjustment, brackets, or release handle can create nearly identical symptoms.
Why Does a Hood Release Cable Become Loose?
A hood release cable works much like a bicycle brake cable. A steel inner cable moves inside a protective outer housing.
When you pull the hood release handle, the inner cable pulls a lever on the hood latch. That lever releases the primary latch so the hood can rise slightly.
Anything that increases free movement between the handle and latch can make the cable seem stretched.
Cable Housing Has Shifted
One of the most common causes is movement of the outer housing.
The cable housing must remain firmly seated in its mounting points. If one end slips out of a bracket, pulling the handle moves the entire housing instead of transferring all the force to the latch.
This creates noticeable slack.
Retaining Clip or Bracket Is Loose
Plastic retainers and metal brackets keep the cable in the correct position.
A broken clip can allow the housing to move several fractions of an inch, which can be enough to prevent reliable hood release operation.
Hood Latch Is Dirty or Corroded
The cable may actually be working properly while the latch itself is difficult to move.
Road dirt, moisture, corrosion, and old grease can increase resistance in the hood latch mechanism. The driver then pulls harder on the cable, eventually putting extra stress on the cable and handle.
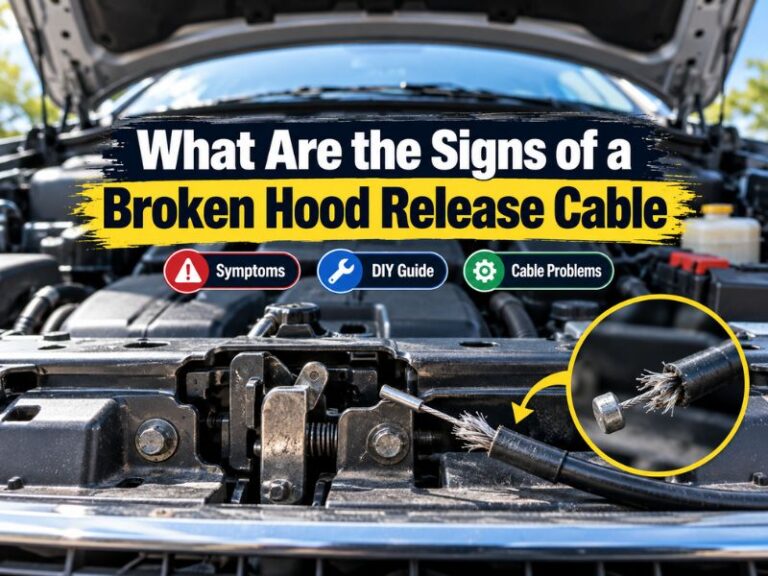
Cable Has Actually Stretched
Steel cables can develop additional length after years of repeated tension, especially if the latch requires excessive force.
The cable may also contain individual strands that have started breaking internally.
A damaged cable should be replaced.
Release Handle Is Damaged
The interior release handle or its mounting bracket can crack or bend.
If the handle moves before it begins pulling the cable, the problem may look exactly like cable stretch.
Hood Latch Is Misaligned
If the hood striker and latch are not aligned correctly, extra pressure may be placed on the latch.
You may notice that the hood releases more easily when someone pushes down on it while another person pulls the release handle.
That usually indicates latch tension or alignment, not simply cable stretch.
Tools You May Need
A basic hood release cable adjustment normally requires only simple hand tools.
Depending on the vehicle, you may need:
- Screwdriver
- Small socket and ratchet set
- Combination wrenches
- Pliers
- Flashlight
- Trim removal tool
- Penetrating lubricant
- White lithium grease or another lubricant approved for latch mechanisms
- Replacement cable clips if any are broken
A service manual or vehicle-specific repair information can also help because cable routing and adjustment methods vary considerably between vehicles.
Step 1: Open the Hood Before Making Adjustments
If the hood still opens, open it before doing anything else.
This gives you direct access to the latch and prevents you from accidentally adjusting the cable too tightly and locking yourself out of the engine compartment.
Once the hood is open, locate the latch near the front center or side of the radiator support, depending on vehicle design.
Have someone slowly pull the interior release handle while you watch the latch mechanism.
You should see the cable pull the release lever immediately after a small amount of handle movement.
If the handle moves significantly before the latch lever moves, there is too much slack somewhere in the system.
Step 2: Inspect the Interior Hood Release Handle
Look underneath the dashboard where the hood release handle is mounted.
Check for:
- Cracked plastic
- Loose mounting screws
- Bent brackets
- Cable end coming out of the handle
- Excessive movement around the cable housing
The outer housing should remain stationary while the inner cable moves.
If both the cable and housing move together when you pull the handle, the housing probably needs to be reseated or secured.
Tighten loose mounting hardware if necessary.
Replace a badly cracked hood release handle rather than relying on an improvised repair.
Step 3: Follow the Cable and Check Its Mounting Points
Trace as much of the hood cable as you can safely access.
The cable usually travels from the driver’s side lower dashboard through the firewall and into the engine compartment.
Look for damaged or missing retaining clips.
The cable should not:
- Hang loosely near moving components.
- Touch the exhaust system.
- Rub against sharp metal edges.
- Have severe bends or kinks.
- Move inside its mounting brackets.
Push any displaced cable housing ends fully back into their retaining brackets.
Replacing a missing clip may eliminate the slack without any other adjustment.
Step 4: Check the Cable Connection at the Hood Latch
Find where the hood release cable connects to the latch.
Most systems use a small metal cable end attached to a release lever, with the outer housing locked into a nearby bracket.
Check that both parts are correctly seated.
Have someone pull the release handle while you watch the mechanism.
The latch lever should begin moving almost immediately.
If the inner cable moves but the latch lever does not move enough, cable adjustment may be required.
Step 5: Adjust the Hood Release Cable If Possible
Some vehicles have an adjustable hood release system, while others use a fixed-length cable.
Look near the hood latch for:
- Threaded cable adjuster
- Adjustable cable bracket
- Slotted mounting holes
- Locking nut
- Movable cable housing mount
If your vehicle has an adjustment, loosen the appropriate fastener and move the cable housing slightly so excess slack is removed.
Do not make the cable completely tight.
A small amount of free play is necessary so the latch can fully return to its resting position.
After adjustment, tighten the mounting hardware securely.
Pull the interior handle several times while the hood remains open.
The latch should release easily without binding.
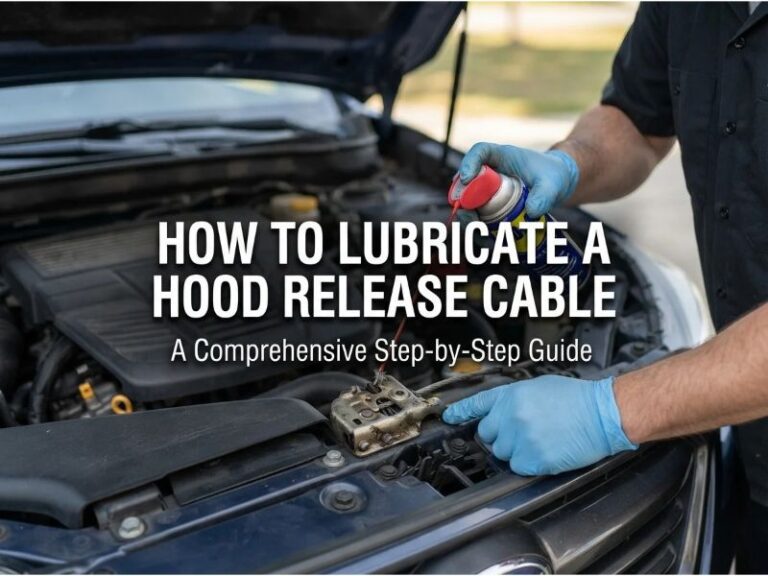
Step 6: Clean and Lubricate the Hood Latch
A sticky latch can make even a properly adjusted cable feel weak.
Remove dirt and old buildup from the visible moving portions of the latch.
Apply a small amount of suitable lubricant to:
- Pivot points
- Springs
- Release lever
- Rotating latch components
Operate the mechanism several times to distribute the lubricant.
Do not saturate the entire latch with heavy grease because excessive grease can attract dirt.
If corrosion is severe or the latch does not move freely after cleaning, replacing the latch may be necessary.
Step 7: Check Hood Latch Alignment
A hood that puts excessive pressure on the latch can make the release cable difficult to operate.
Look at the hood striker and latch position.
Warning signs of misalignment include:
- Hood requires force to close.
- Hood sits higher on one side.
- Hood release works only when someone pushes down on the hood.
- Striker shows unusual wear on one side.
- Hood has recently been removed or adjusted.
Many vehicles allow some adjustment of the hood striker or latch mounting position.
Make very small adjustments.
Incorrect latch positioning can prevent the hood from closing securely, so do not make large changes unless you understand the adjustment procedure for your vehicle.
Can You Shorten a Stretched Hood Release Cable?
Physically shortening the cable is generally not the preferred repair.
A hood release cable normally has permanently attached ends designed to fit the interior handle and latch. Cutting and reconnecting the steel cable can weaken the system and create an unreliable release mechanism.
Instead, first correct:
- Loose cable housing
- Missing retaining clips
- Factory cable adjustment
- Hood latch alignment
- Sticky latch movement
If those repairs do not remove the slack, replace the cable.
A new cable is usually a more dependable solution than modifying an old one.
Can You Use a Spacer to Remove Hood Cable Slack?
On certain cable-operated systems, a technician may be able to reposition a cable housing or use the factory adjustment mechanism to take up slack.
Adding homemade washers, clamps, cable stops, or other spacers is less reliable.
A temporary modification may appear to improve handle travel but can create several problems:
- Cable may become too tight.
- Hood latch may not fully reset.
- Cable end may slip.
- Hood may become difficult to open again.
- Improvised parts may interfere with latch movement.
For a road-going vehicle, using the manufacturer’s adjustment method or installing a replacement cable is the safer approach.
How Much Slack Should a Hood Release Cable Have?
There should normally be only a small amount of free movement before the hood latch starts responding.
There is no universal measurement because hood release systems differ by vehicle.
The cable should not be under constant tension when the release handle is at rest. Constant tension may prevent the latch from fully returning.
At the same time, excessive handle travel before latch movement indicates too much slack.
The goal is minimal free play with complete latch return.
When Should You Replace the Hood Release Cable?
Replace the cable when adjustment cannot restore proper operation or when physical damage is visible.
Replacement is especially appropriate if you find:
- Frayed cable strands
- Rust on the inner cable
- Crushed cable housing
- Severe kinks
- Melted outer sheath
- Broken cable ends
- Cable that repeatedly jumps out of position
- Continued excessive slack after all brackets are secured
- Cable that binds when pulled
A worn hood release cable can eventually break completely.
Replacing it while the hood still opens is much easier than dealing with a broken cable after the hood becomes stuck closed.
How to Replace a Stretched Hood Release Cable
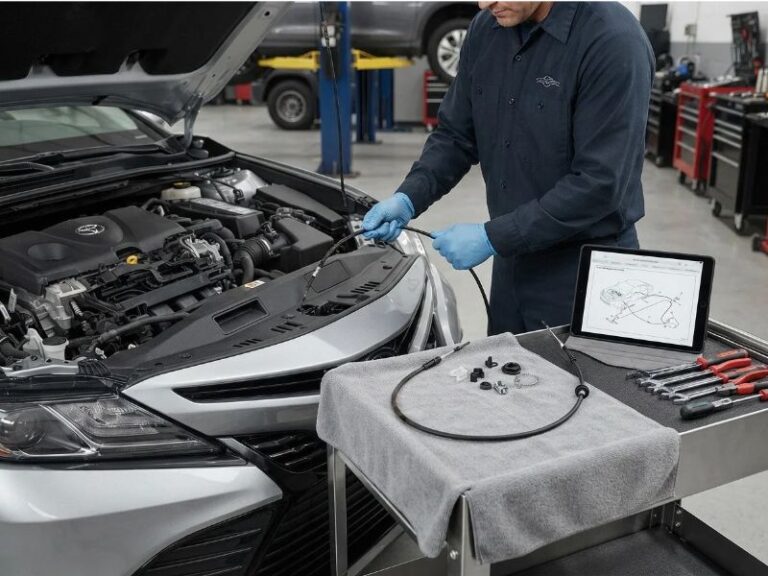
Cable replacement varies by vehicle, but the general process is similar.
Disconnect the Cable From the Hood Latch
With the hood open, disconnect the cable end from the release lever.
Release the outer housing from its bracket.
Take a photo of the routing before removing anything if necessary.
Disconnect the Interior Release Handle
Remove the lower dashboard trim needed to access the hood release handle.
Detach the cable from the handle mechanism.
Be careful with plastic clips because older trim pieces can become brittle.
Remove the Old Cable
Release the cable from its retaining clips along the firewall and engine compartment.
Some vehicles use rubber grommets where the cable passes through the firewall.
Pull the old cable out carefully.
Route the New Cable
Follow the original cable path exactly.
Keep the cable away from:
- Exhaust components
- Belts
- Cooling fans
- Steering components
- Sharp metal edges
Secure every retaining clip.
Reconnect the Handle and Latch
Attach the new cable to the interior handle and hood latch.
Make sure both ends of the outer cable housing are completely seated.
If adjustment is available, set the cable with a small amount of free play.
Test Before Closing the Hood
This step is especially important.
Use a screwdriver or suitable tool to carefully move the latch into its closed position while the hood remains open, if the latch design allows this safely.
Pull the interior release handle.
The latch should release immediately.
Return the latch to the open position before closing the hood.
Test the mechanism several times.
Only close the hood after you are confident the release cable and latch are operating correctly.
What If the Hood Is Already Stuck Closed?
A stretched cable may eventually reach the point where pulling the interior handle no longer moves the latch far enough.
Try having one person gently press down on the hood directly above the latch while another person pulls the release handle.
Reducing pressure on the latch may allow it to release.
If that does not work, avoid repeatedly yanking the handle. Excessive force can break the handle or cable.
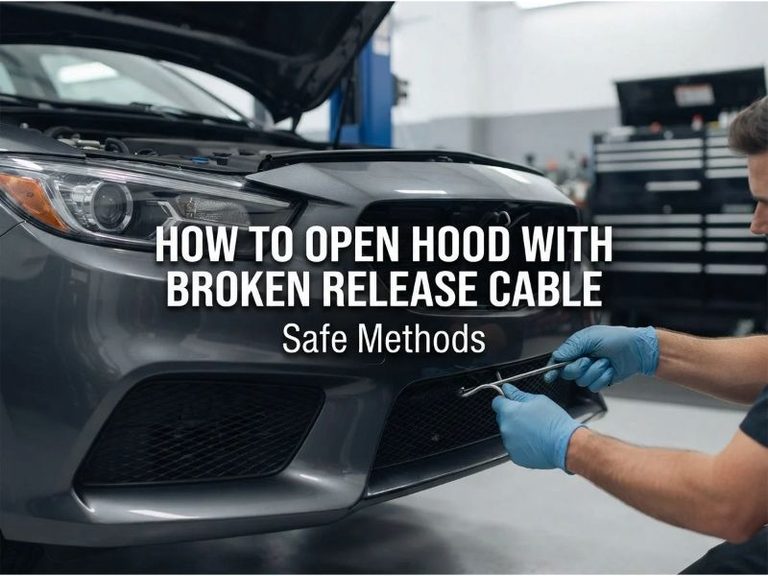
Access to the latch may sometimes be possible through:
- Front grille
- Lower splash shield
- Engine compartment opening
- Wheel-well area
The correct method depends heavily on the vehicle.
Avoid damaging the grille, radiator, A/C condenser, wiring, or safety components while attempting access.
If the latch cannot be reached safely, a mechanic or automotive locksmith may be the better option.
Common Mistakes When Fixing a Hood Release Cable
Adjusting the Cable Too Tight
Removing every bit of free play can prevent the hood latch from returning completely.
Leave enough slack for the release lever to rest normally.
Ignoring the Hood Latch
Replacing or tightening the cable will not solve the problem if the actual cause is a corroded or binding latch.
Make sure the latch moves freely.
Closing the Hood Before Testing
Never make a major cable adjustment and immediately slam the hood shut.
Test the release mechanism several times with the hood open first.
Using Improvised Cable Repairs
Wire clamps and makeshift cable ends may fail unexpectedly.
Because the hood release system needs to work reliably, a damaged cable should generally be replaced with the correct part.
Ignoring Broken Cable Clips
A new cable can still feel loose if its housing is not correctly secured.
Inspect every accessible mounting point.
Can You Drive With a Stretched Hood Release Cable?
A slightly loose hood release cable does not normally affect how securely the hood stays closed because the cable releases the latch rather than holding the hood shut.
However, ignoring the problem can eventually leave you unable to open the hood.
That becomes especially inconvenient if you need access to:
- Battery
- Engine oil
- Coolant reservoir
- Fuse box
- Brake fluid reservoir
- Windshield washer reservoir
There is also an important distinction between a release cable problem and a hood latch problem.
If the hood itself does not latch securely, opens unexpectedly, or can be lifted while supposedly closed, do not drive the vehicle until the latch problem is corrected.
How to Prevent Hood Release Cable Problems
Routine attention to the latch can reduce stress on the cable.
Periodically:
- Check that the hood opens smoothly.
- Lubricate latch pivot points when needed.
- Keep the latch free of heavy dirt buildup.
- Replace broken cable retaining clips.
- Investigate a suddenly loose release handle.
- Correct hood or latch misalignment.
- Avoid repeatedly pulling the release handle with excessive force.
A release handle should normally require a firm but reasonable pull.
A sudden change in the amount of effort or travel usually deserves inspection.
FAQs About How to Fix a Stretched Hood Release Cable
Can a Hood Release Cable Actually Stretch?
Yes, a hood release cable can develop additional slack over time, but apparent cable stretch is often caused by the outer housing moving, a broken retaining clip, latch wear, or handle movement.
Inspect the entire system before assuming the cable itself needs replacement.
Can I Tighten a Hood Release Cable?
You can tighten or adjust a hood release cable only if the vehicle provides an adjustment point.
Some vehicles have an adjustable bracket or cable mount near the hood latch. Other vehicles use a fixed-length cable that must be replaced if it becomes excessively loose.
Why Does My Hood Release Handle Feel Loose?
A loose hood release handle may be caused by excessive cable slack, a displaced cable housing, broken retaining clip, damaged release handle, or disconnected cable.
Check the handle and housing first because these problems are often easy to see.
Why Does My Hood Open Only When Someone Pushes Down on It?
If pushing down on the hood makes it easier to release, the latch may be under excessive pressure.
Possible causes include latch misalignment, hood striker adjustment, worn hood bump stops, or a sticky latch.
The cable may not be the main problem.
Can Lubricating the Hood Latch Fix a Loose Cable?
Lubrication cannot physically shorten a loose cable, but it can reduce the force needed to operate a sticky latch.
If excessive latch resistance caused the cable to feel stretched, cleaning and lubricating the mechanism may noticeably improve operation.
Is a Hood Release Cable Difficult to Replace?
Difficulty varies considerably by vehicle.
The latch end is often easy to reach with the hood open, while routing the cable through the firewall and removing dashboard trim may require more time.
Vehicles with tightly packed engine compartments can make the job more difficult.
What Happens If the Hood Release Cable Breaks?
If the cable breaks, pulling the interior handle will no longer release the primary hood latch.
The latch must then be operated manually from another access point, which may require removing a grille, splash shield, or other components depending on the vehicle.
Should I Replace the Cable or Hood Latch?
Replace the cable if it is frayed, kinked, broken, corroded, or remains excessively loose after proper adjustment.
Replace or repair the hood latch if it binds, does not spring back correctly, is badly corroded, or fails to hold the hood securely.
Sometimes both components need attention.
Conclusion
Knowing how to fix a stretched hood release cable starts with finding the source of the extra slack rather than immediately replacing the cable. Check the release handle, cable housing, retaining clips, hood latch, and any factory adjustment points first.
Reseating a loose housing, replacing a broken clip, adjusting the cable, or lubricating a sticky latch may restore normal operation. If the cable is frayed, damaged, or still has excessive slack after proper adjustment, replacing the hood release cable is usually the most reliable repair.
Always test the latch repeatedly with the hood open before closing it. A correctly repaired system should release smoothly, return fully, and securely latch the hood every time.